

Need synced captions instead?If you’re trying to display your script as timed subtitles or captions, use a captions layer instead of a text layer. Captions are automatically generated from your script and update as you make edits. Learn how to add captions.
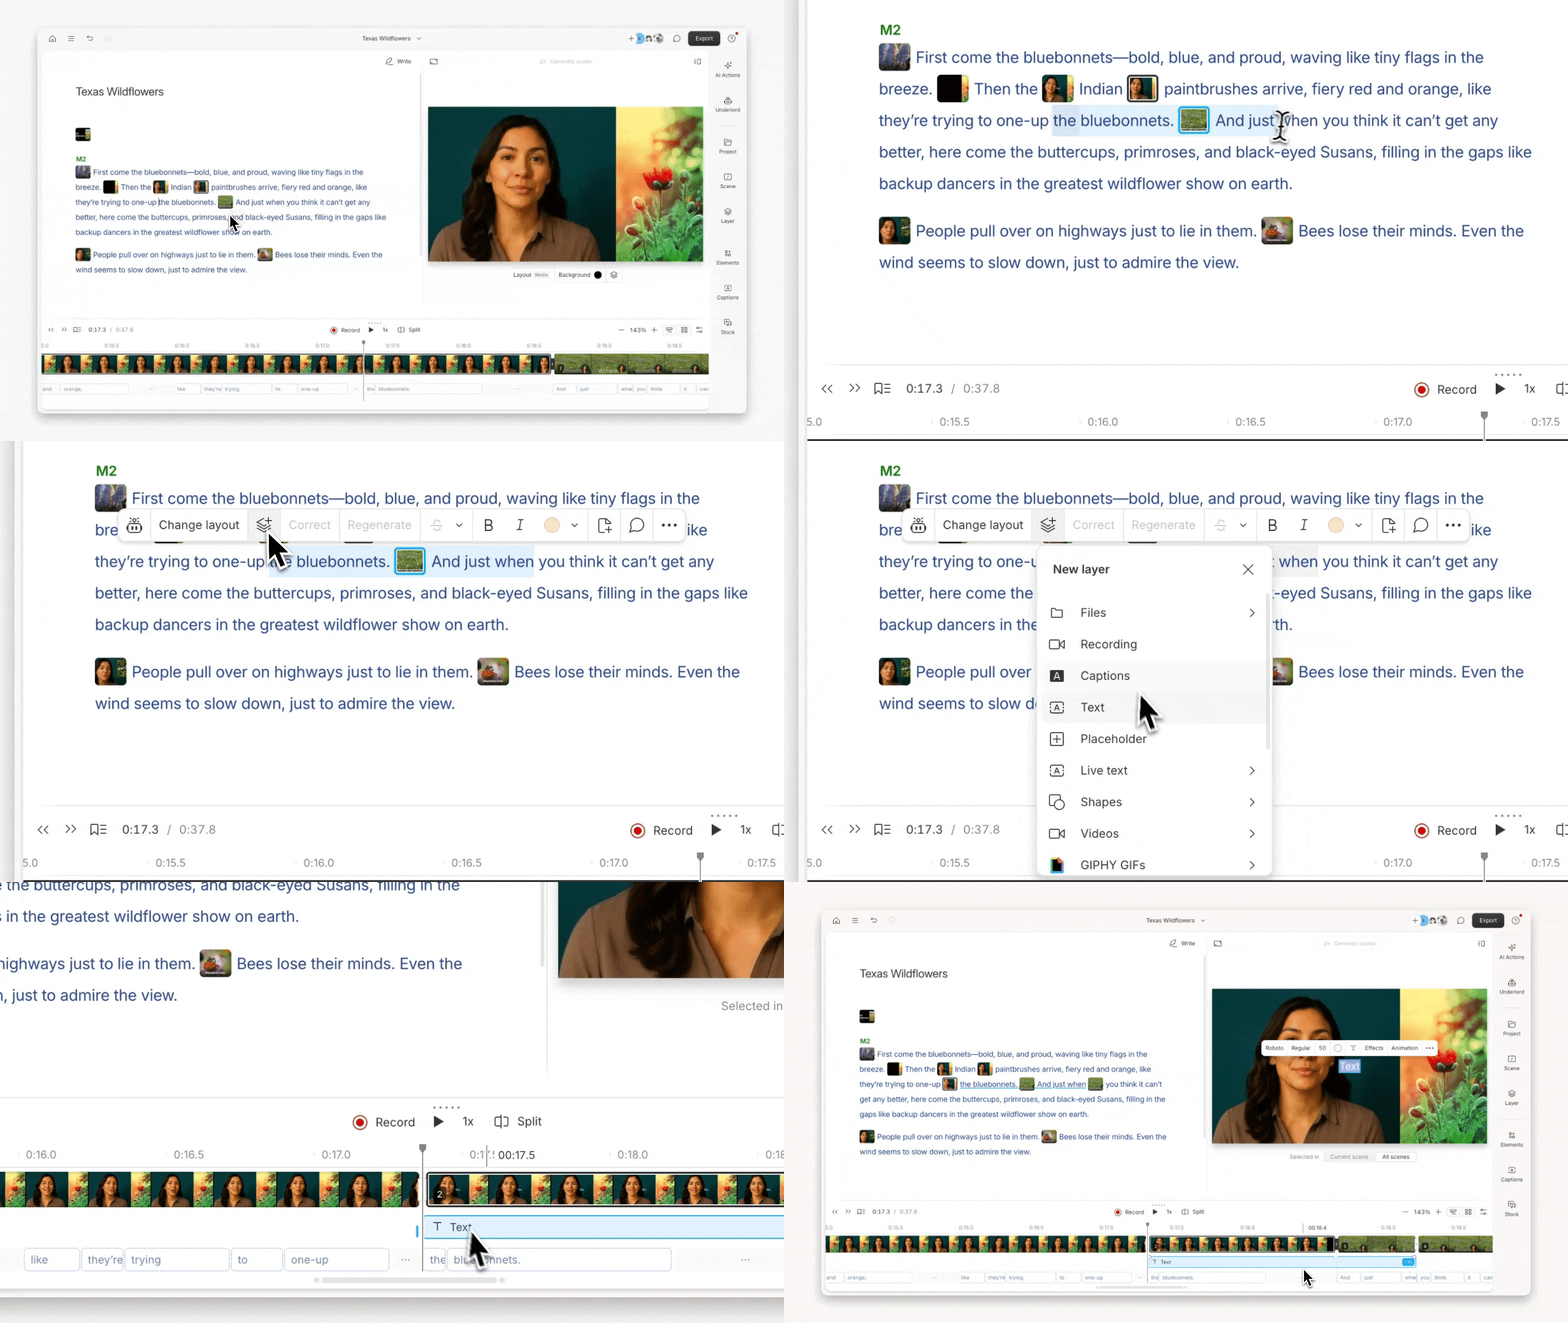
Create text layers
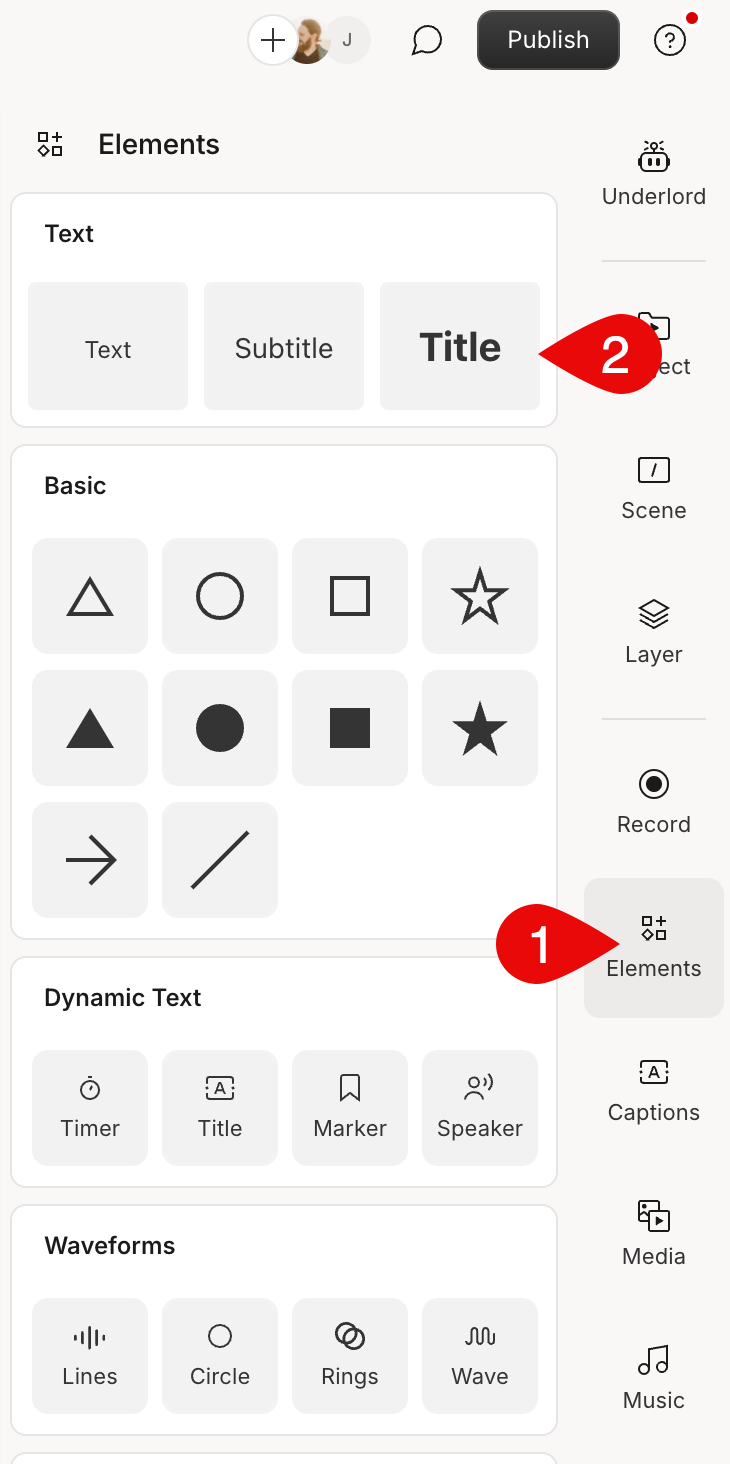
From the Elements panel in the right-hand sidebar, choose one of the three fully customizable text options:- Text – for body text
- Subtitle – for secondary titles
- Title – for primary titles
Customize fonts, color, and layout
Select a text layer in the scene editor. Use the toolbar or Properties panel to adjust font, size, alignment, colors, borders, background, and position.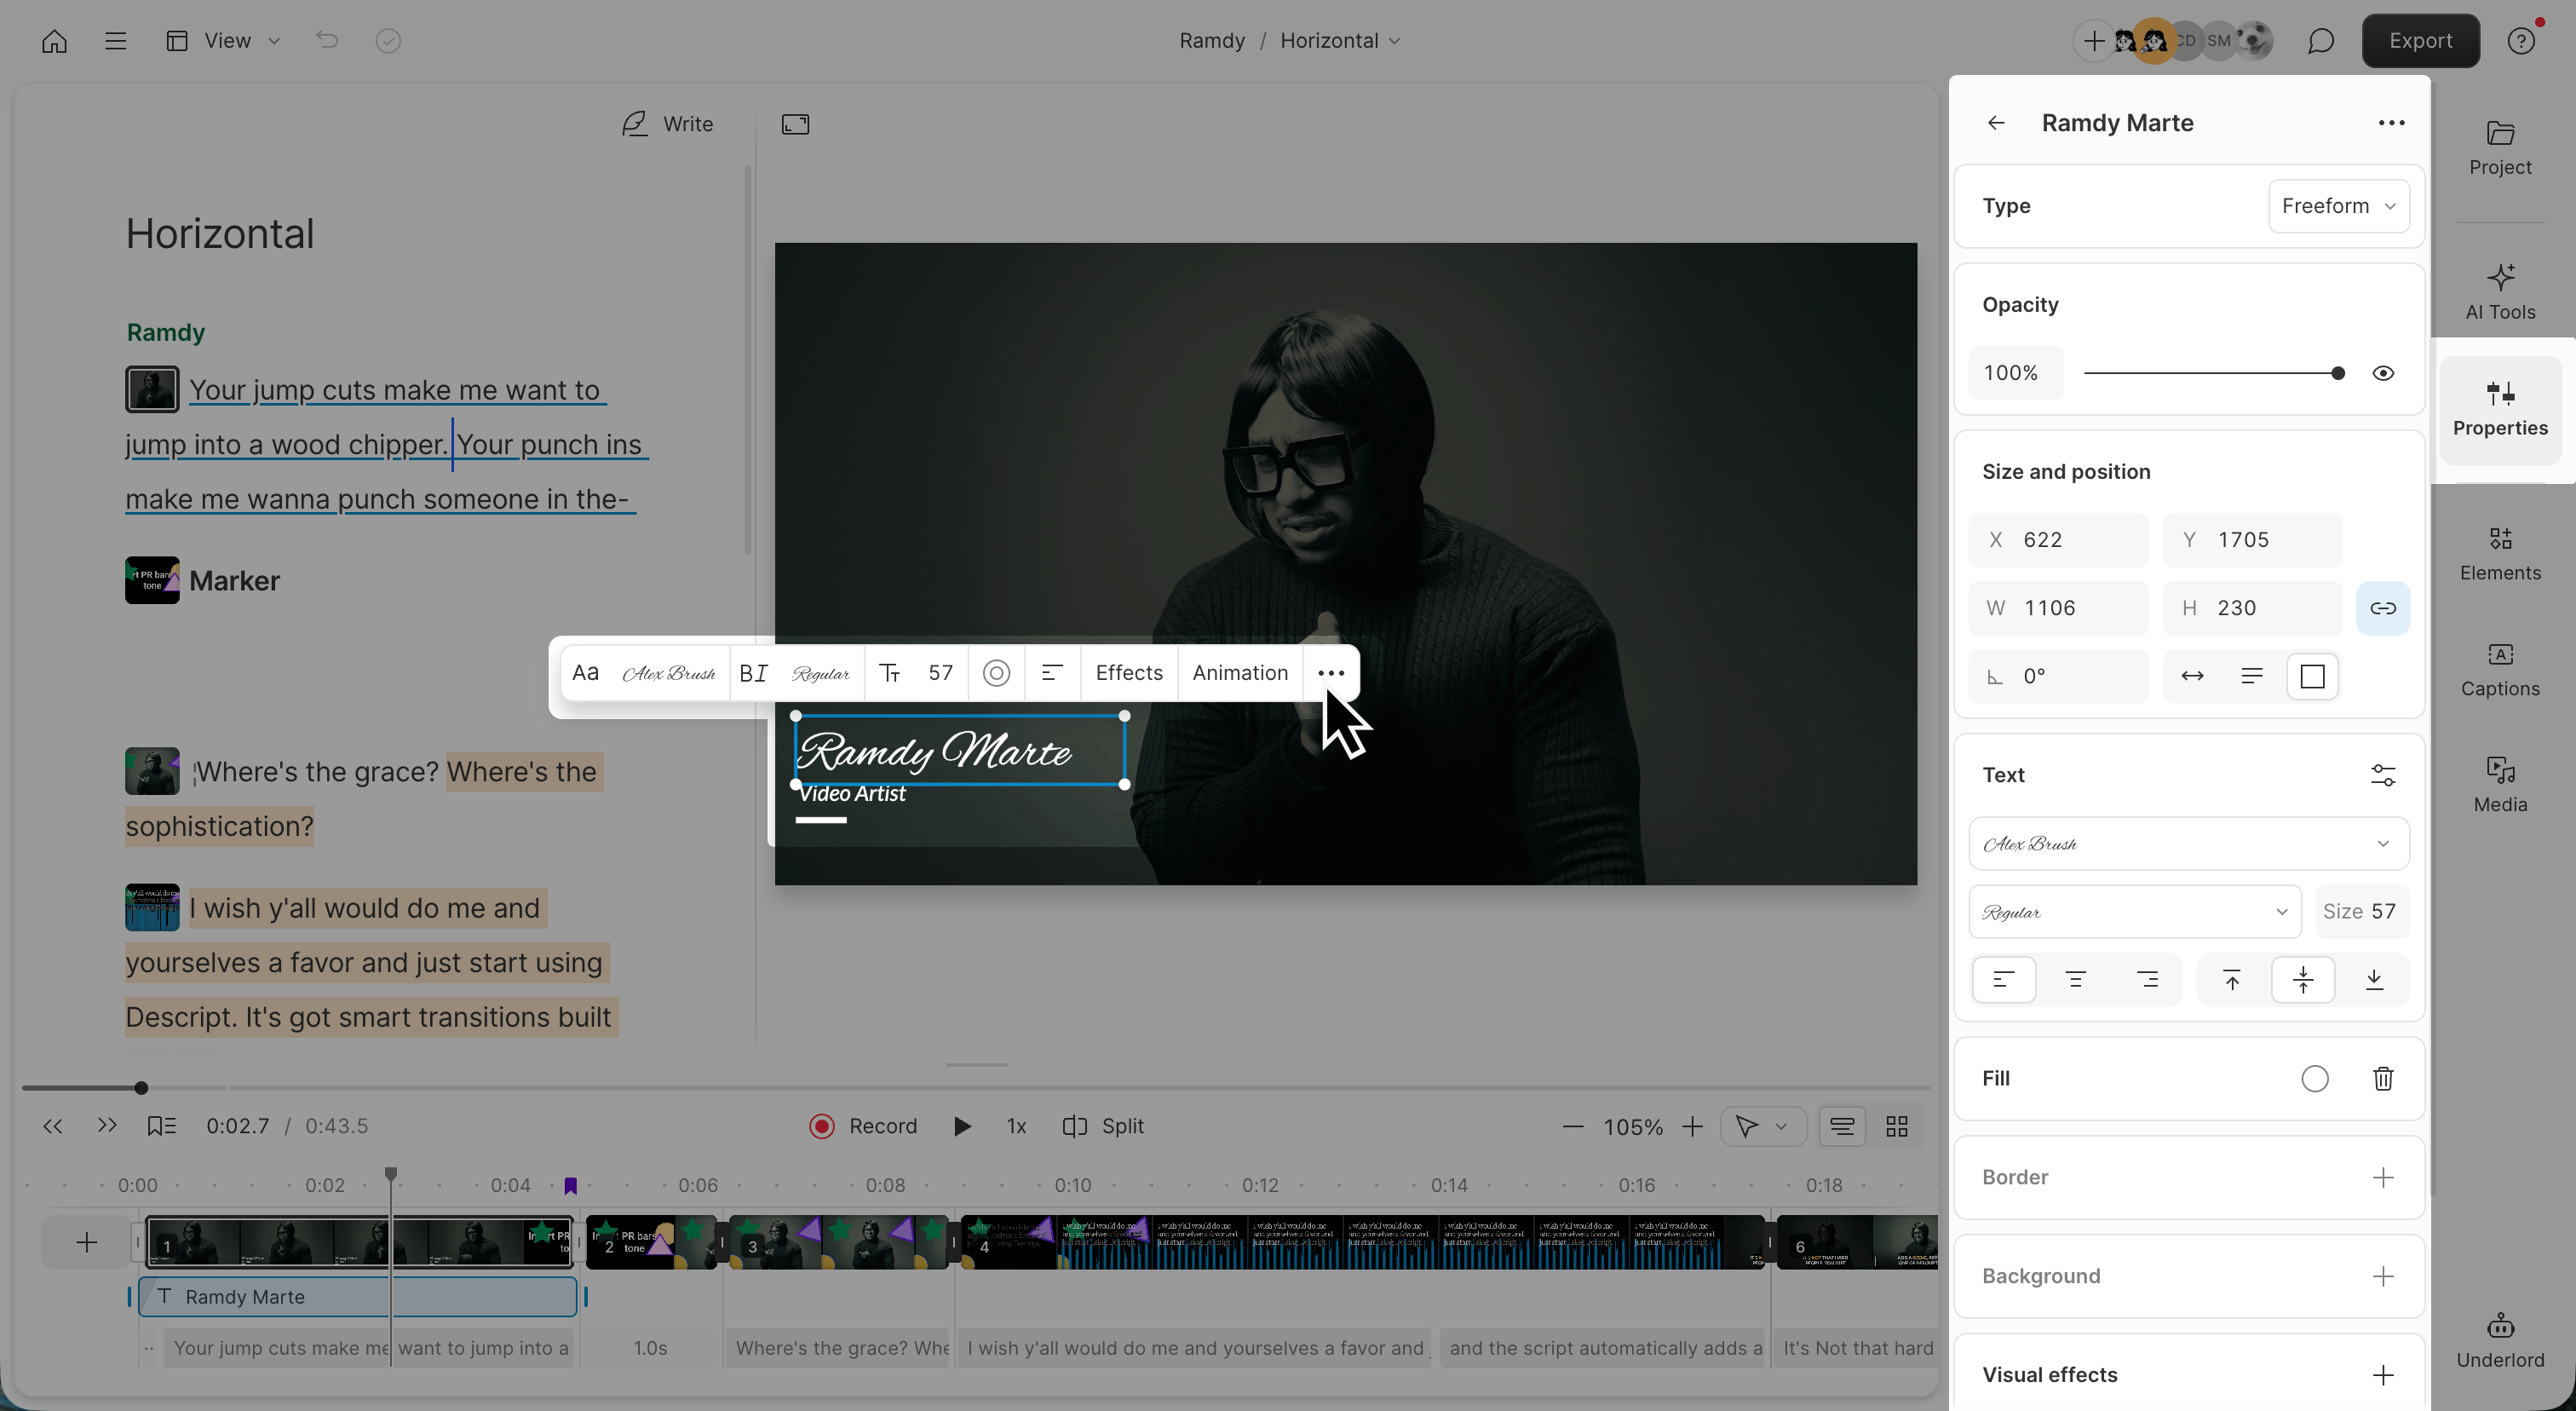
Set text layer type
The Type setting controls what content a text layer displays. By default, text layers are set to Freeform, which lets you type whatever you want. Other options will display dynamic information that updates automatically.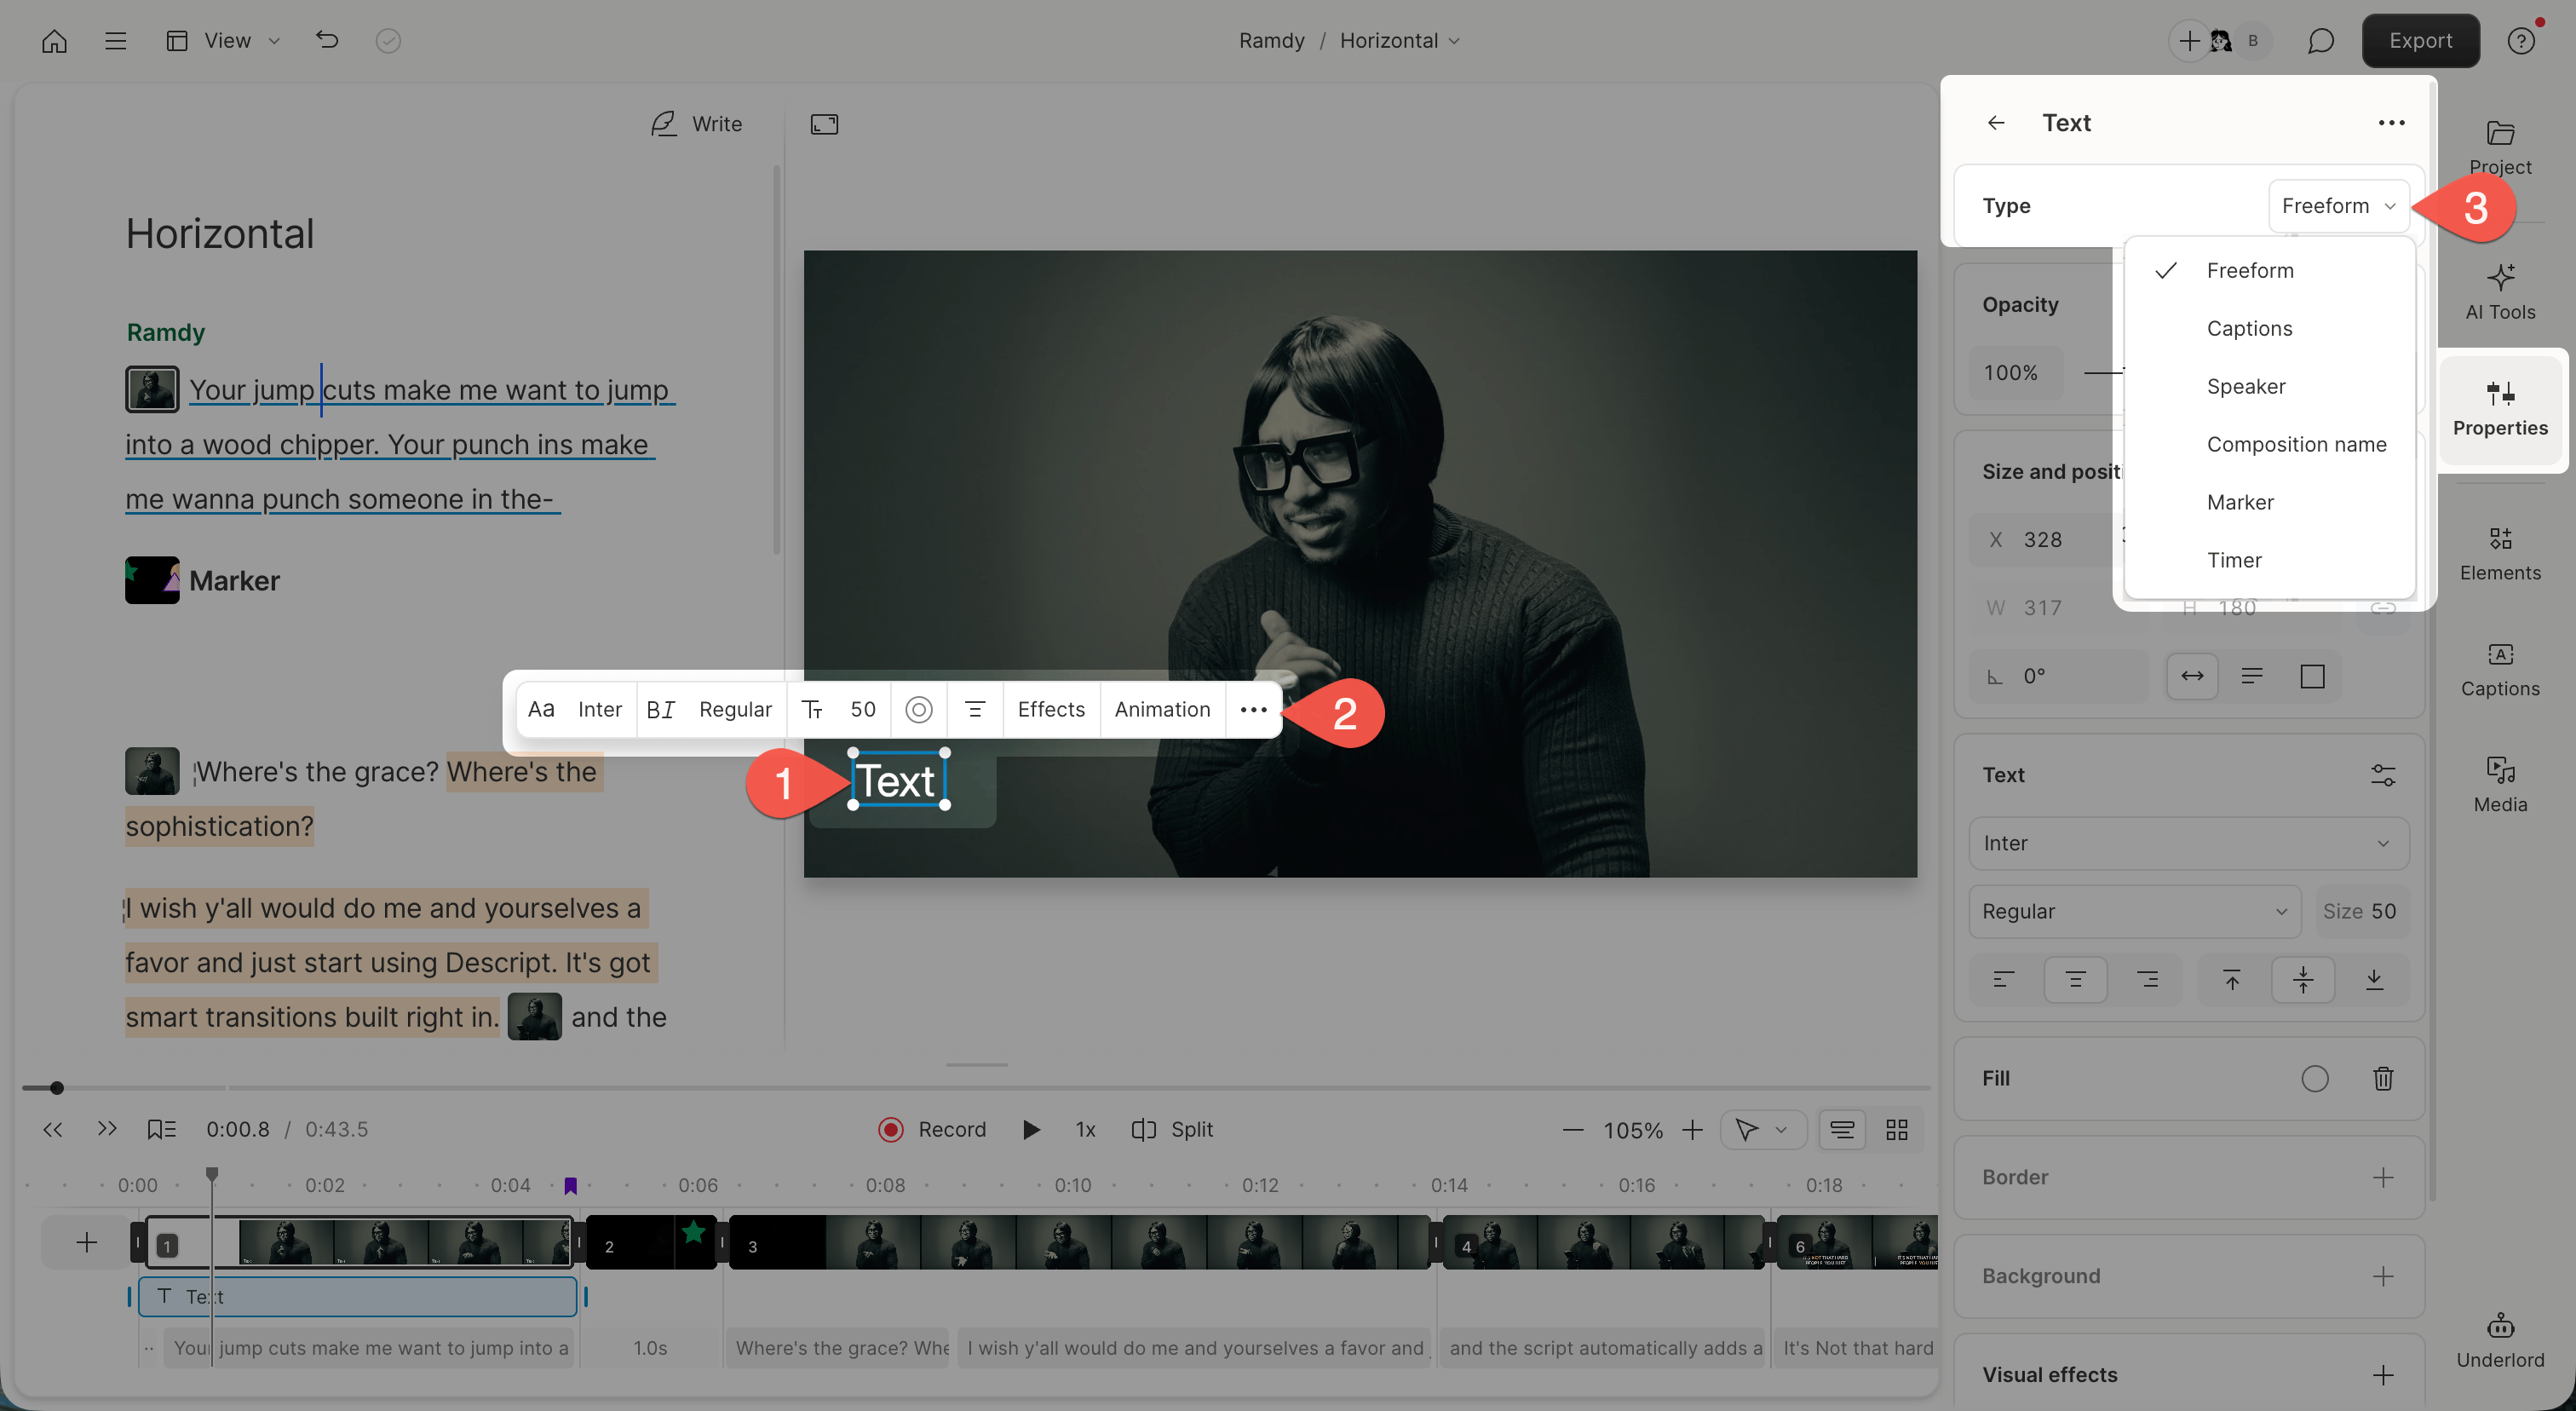
- Select the text layer
- In the hover menu, click the ellipsis button at the far right. The Properties panel will open in the right-hand sidebar.
- Choose a type:
- Freeform: Type your own text manually
- Captions: Displays synced captions from your script
- Speaker: Displays the active speaker’s name
- Composition name: Displays the composition name
- Marker: Displays the current or most recent marker
- Timer: Counts up or down from the beginning, end, or last marker
Add a background to text
Enhance readability or emphasize key messages by adding a background to your text layer. Options include:- Bounding box: Resize the text area manually in the scene editor. Toggle between fixed and auto sizing under Size and position.
- Border radius: Soften the corners of the background.
- Background color: Pick a color for contrast or brand alignment.
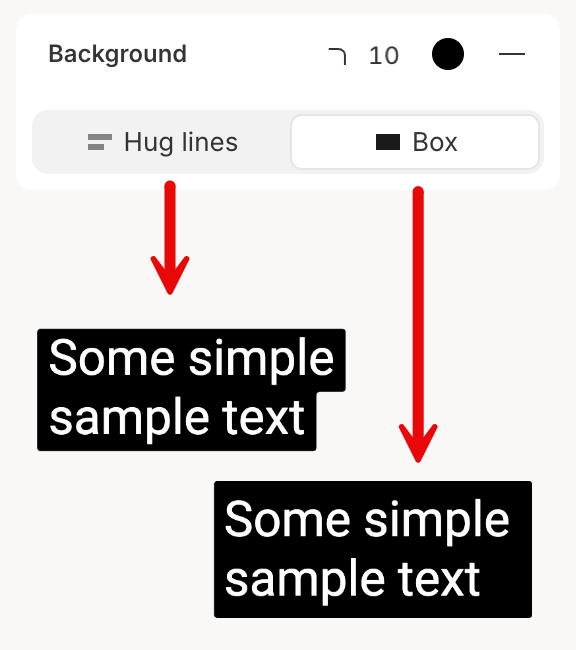
- Hug lines: Wrap the background tightly around each line of text.
- Box: Display the full text inside a fixed-width background box.
Add emojis to text
- Create a text layer, then paste an emoji (like 🎉, 👍, or 💡) into the text box