

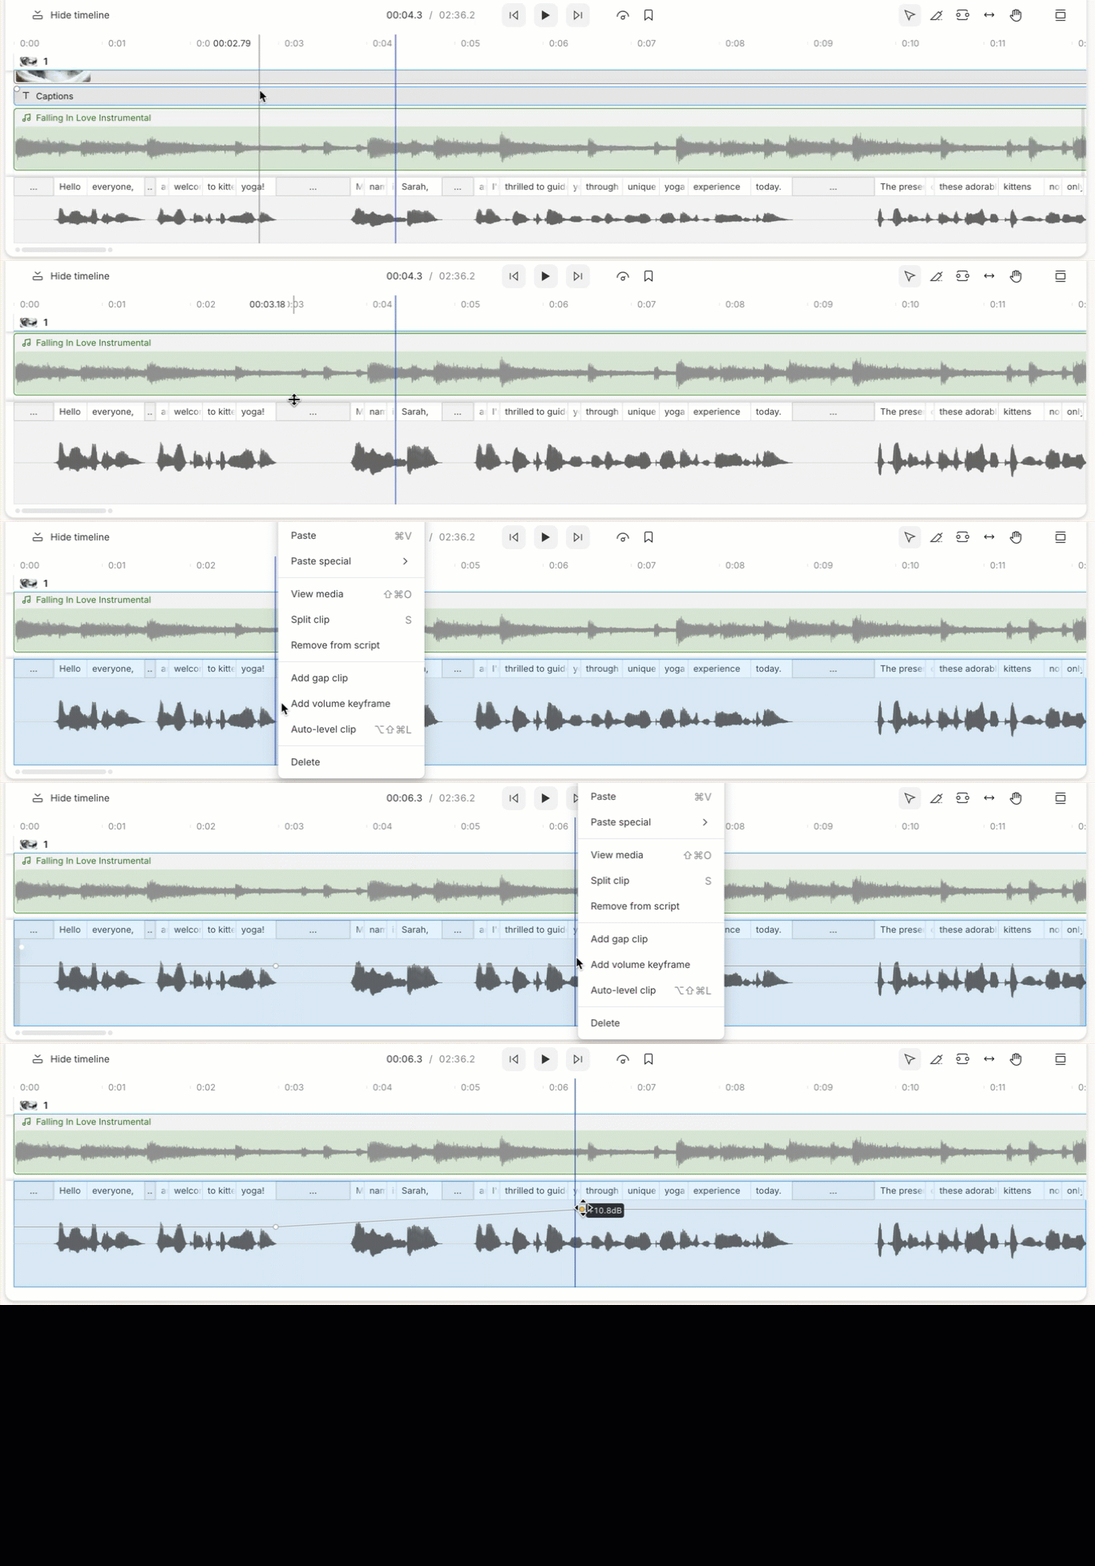
- If the Timeline is hidden, click Show timelinein the lower left corner. Click and drag the edge of the Timeline upwards to expand it.
- Find the clip or audio layer that you want to apply a volume keyframe to, right-click the point where you want to add the keyframe, and select Add volume keyframe. Alternately you can hold
Option(macOS) orAlt(Windows) and left-click the point where you want to add the keyframe. You will need to add at least two keyframes to increase or decrease the volume over time. - You can then click and drag the keyframe in the Timeline to adjust the volume of your audio and the keyframe’s position.\
Volume automation and keyframes
Add volume keyframes in the timeline to fade audio up or down over a clip.
Volume keyframes let a clip’s volume rise and fall over its length, for fades, ducking under a voiceover, or a fade-out at the end: