
- Scene transitions: applied at the boundary between two scenes. They affect all visuals in the scene at once and are selected from the transitions picker.
- Clip transitions: applied to individual clips within a scene directly from the timeline.
Smart TransitionsBy default, Descript automatically applies Smart Transitions between scenes when you add new content. This article covers how to apply and customize transitions manually.
Apply a transition to a scene
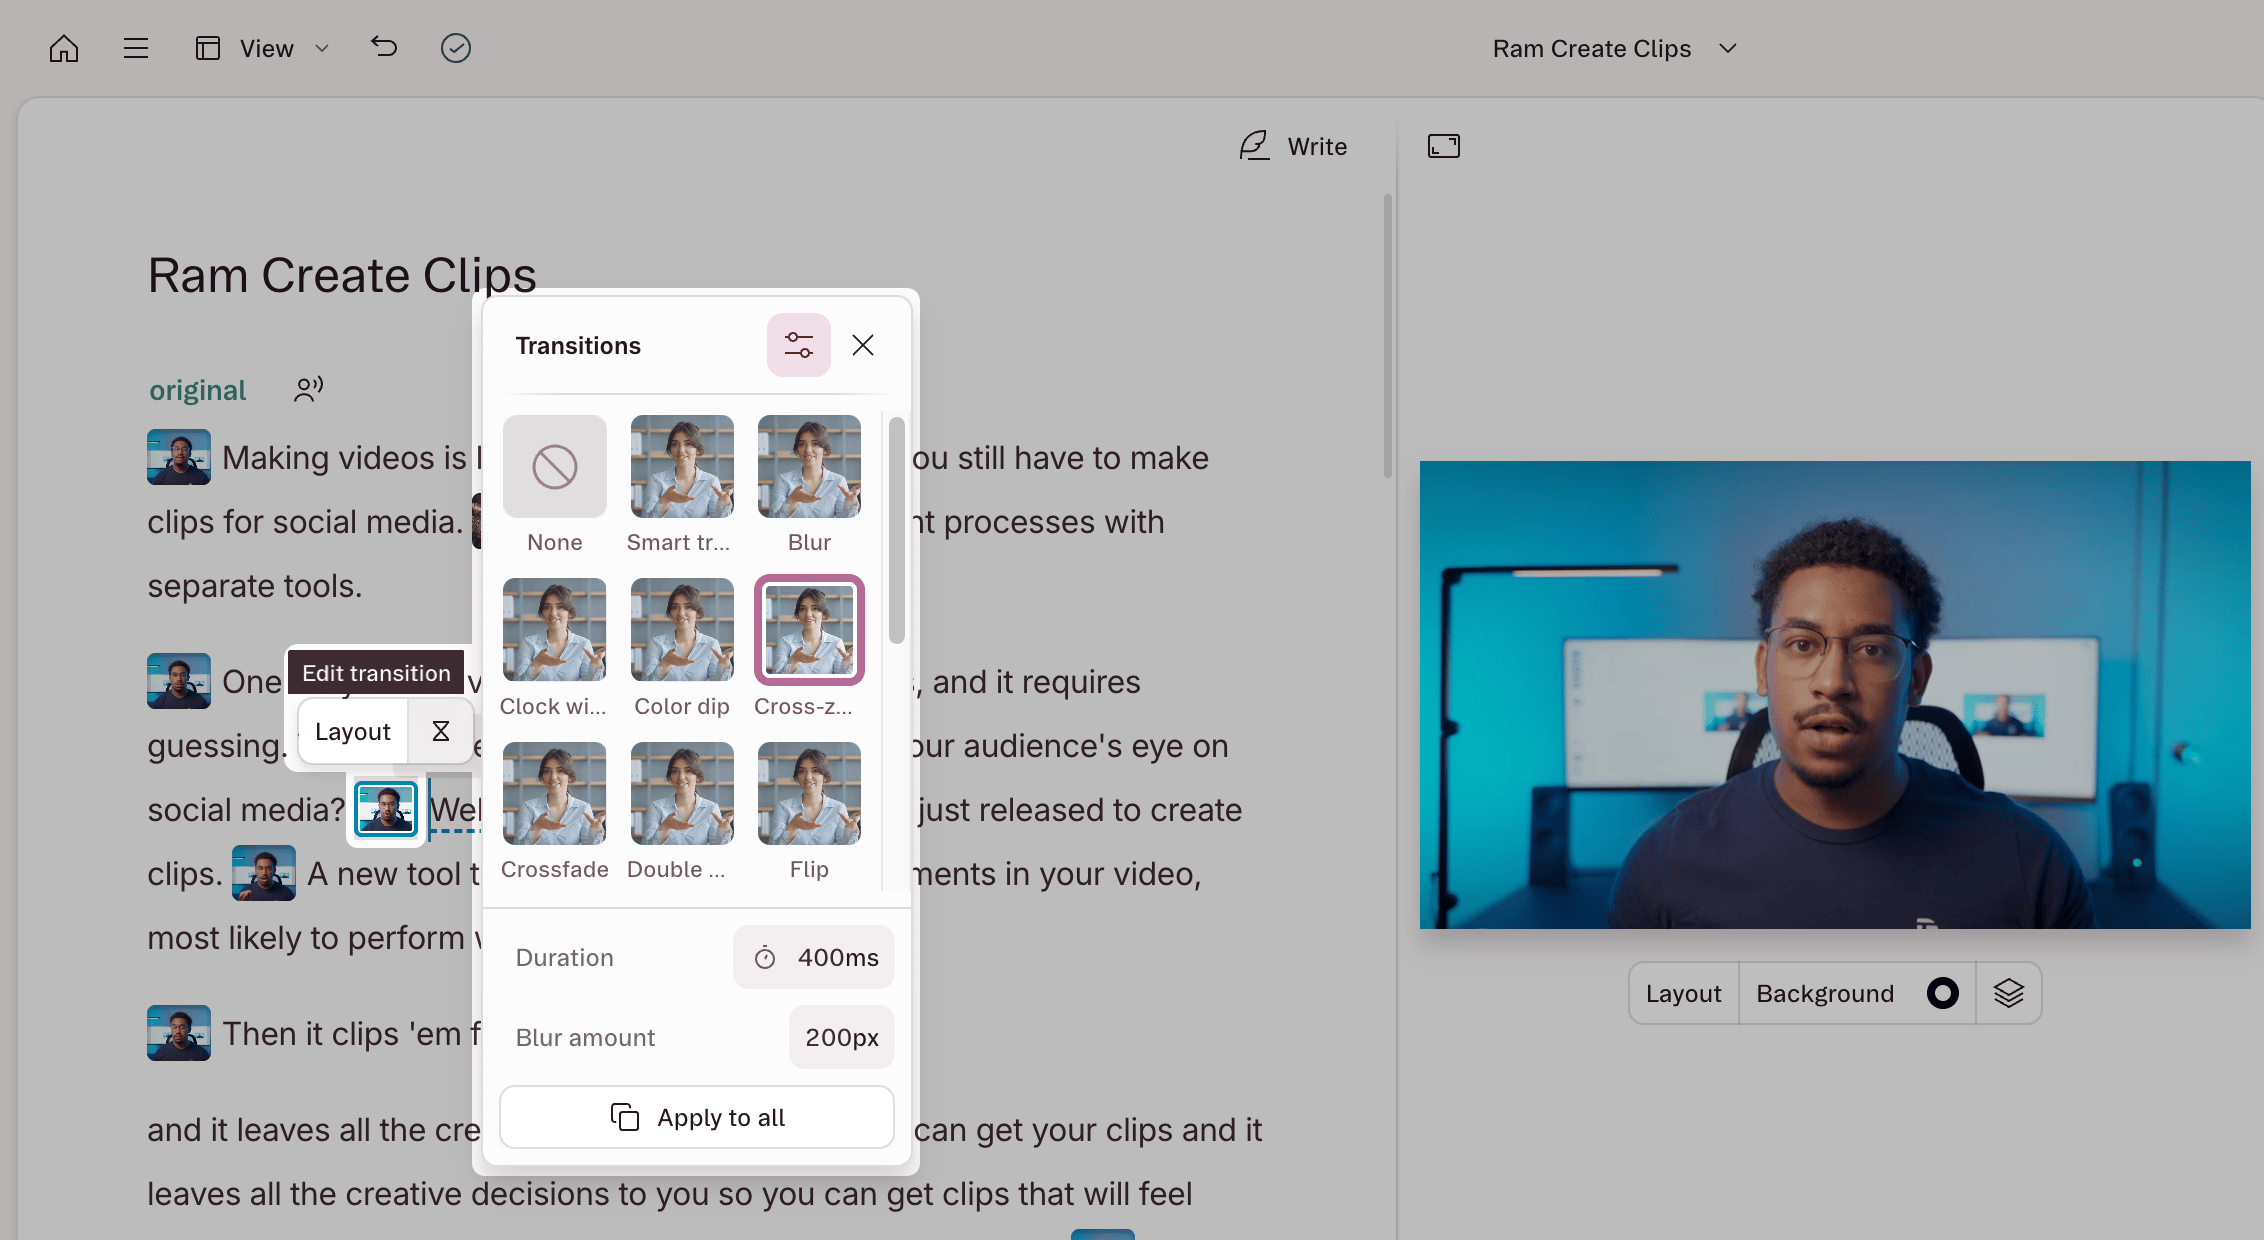
Scene transitions play at the boundary between two scenes. To apply or adjust a scene transition:- Click a scene thumbnail in the script panel. In the hover menu that appears, click the hourglass icon.
- Not seeing the hourglass icon? You may need to unfocus the current scene first. Click the white space around the Scene Editor — the transition icons between scenes should then appear in the timeline.
- The transitions picker opens as a visual grid. Hover over any thumbnail to preview the transition, then click to apply.
- (Optional) Adjust the options and parameters for the transition. Available settings vary by transition type and may include:
- Duration: how long the transition takes to play
- Direction: which way the transition moves
- Feather: how soft or sharp the transition edge appears
- Easing: how the transition accelerates or decelerates over time
- (Optional) Click Apply to all to apply your transition to all scenes in the composition. This replaces all existing scene transitions with the selected type.
- Timeline: Click the transition icon between two scene thumbnails at the top of the timeline.
- Properties panel: Select a scene, then go to the Transitions section in the right-hand sidebar.
See all scene transition options
See all scene transition options
Remove a scene transition
Open the transitions picker and select None. Playback will cut directly from one scene to the next with no visual effect.Apply a transition to a clip
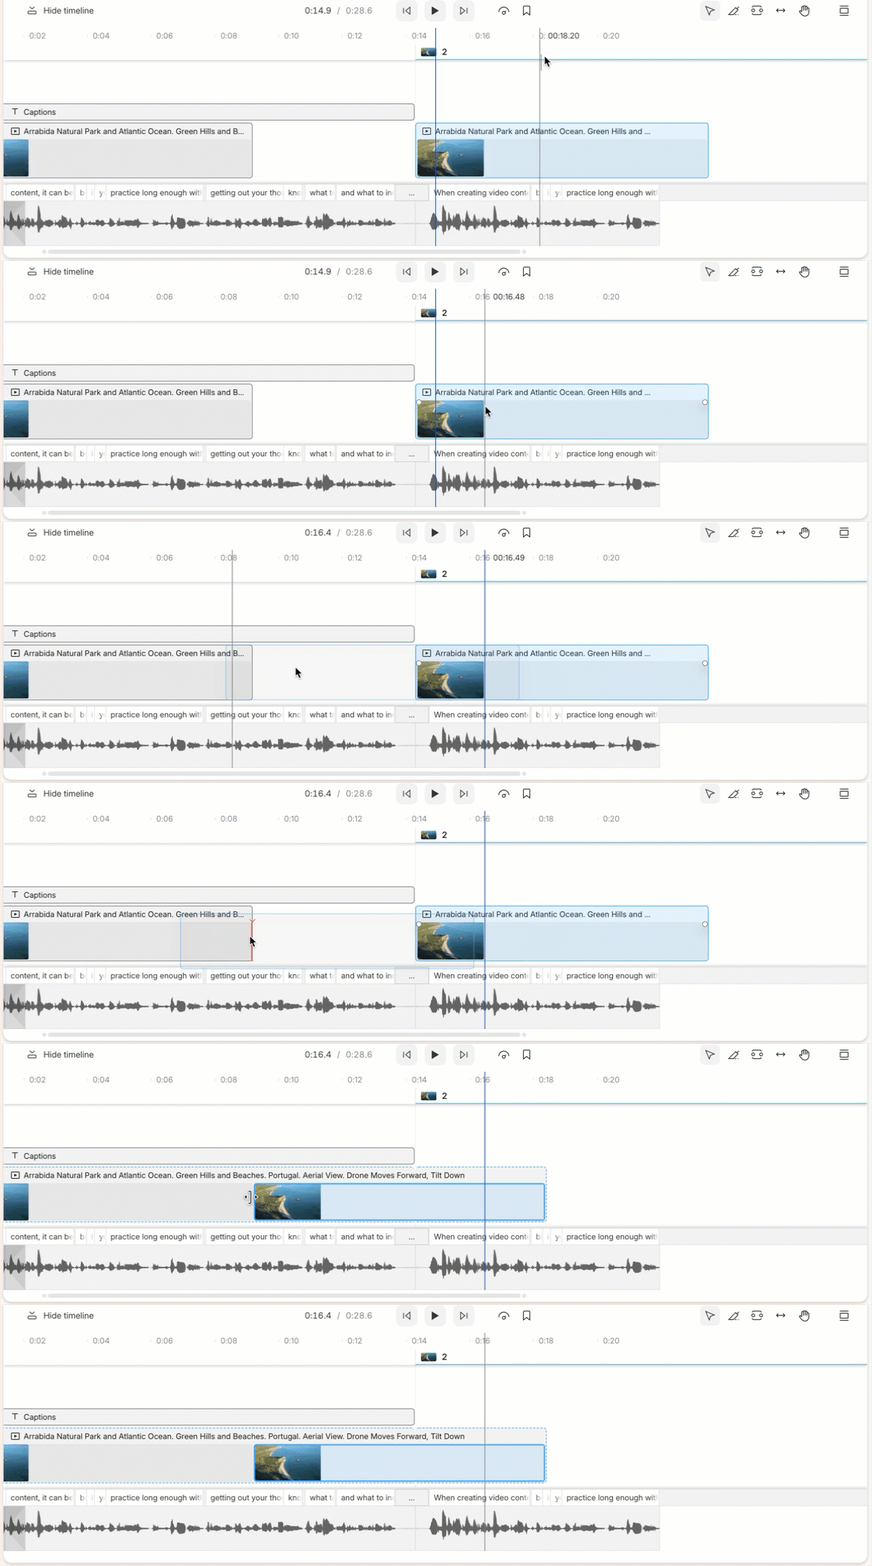
Clip transitions are independent of scene transitions — they apply to individual clips within a scene and are set separately from the timeline. Clip transitions have a separate set of options from scene transitions.- Expand the timeline (click and drag up) to display your clips.
- Hover over a clip. A small white dot — the transition handle — appears at the clip’s edge. Click and drag the handle to apply a fade, or click it to open the clip transition menu.
- Select a transition from the menu, then adjust the duration, loops, and fade direction as needed.
- Use the Play button in the top-right corner of the menu to preview.
Crossfade and cross-zoom
Crossfade and cross-zoom are unique transitions. They create a moment of overlap where the first clip or scene fades out as the second fades in. For these transitions to work properly, each clip needs extra footage beyond its visible start or end point to draw from during the overlap.Why isn’t crossfade available?
If a clip is trimmed to the very start or end of its source file, there’s no extra footage to work with — crossfade and cross-zoom won’t be available. Trim one or both clips to make room. Learn how to trim a clip.Crossfade clips on separate layers
To crossfade two clips, they must be on the same layer. Drag one clip onto the other until a red line appears, then release to combine them. Apply the crossfade as usual.