
Add a speaker label
Descript offers two ways to label speakers in your transcript:Automatic Speaker detection
When you upload a file, Descript automatically detects the distinct voices throughout and then prompts you to identify them. For those steps, see Automatic speaker detection.Or, add a Speaker manually
- Open the Speaker menu: click Add speaker at the top of a paragraph, or place your cursor in the script and press
@. - Start typing to create a new Speaker label, or pick one of the other options:
- In this project: apply a label using a Speaker already created in this project.
- Add AI speaker to project: apply a label using a Speaker saved to your Drive, but not yet in this project.
- Browse stock AI speakers: choose from Descript’s library of stock voices.
- Create a new speaker: make a new voice clone.
@, and use the same steps to assign a Speaker to that selection.
Manage Speaker labels
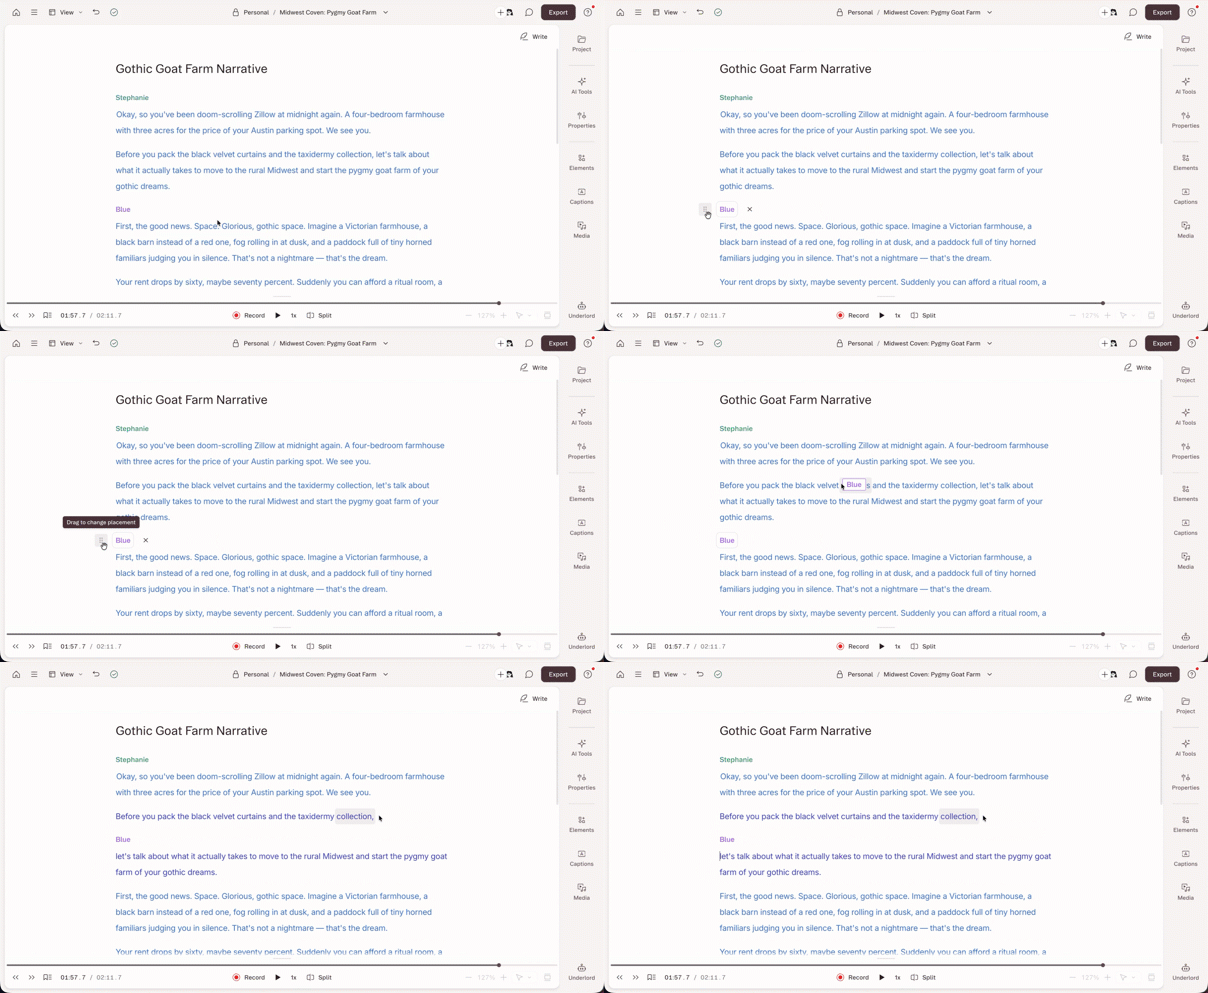
Move a Speaker
- Hover over the speaker label and click the reposition icon to its left.
- Drag and drop it to a new spot in the script.
Rename a Speaker
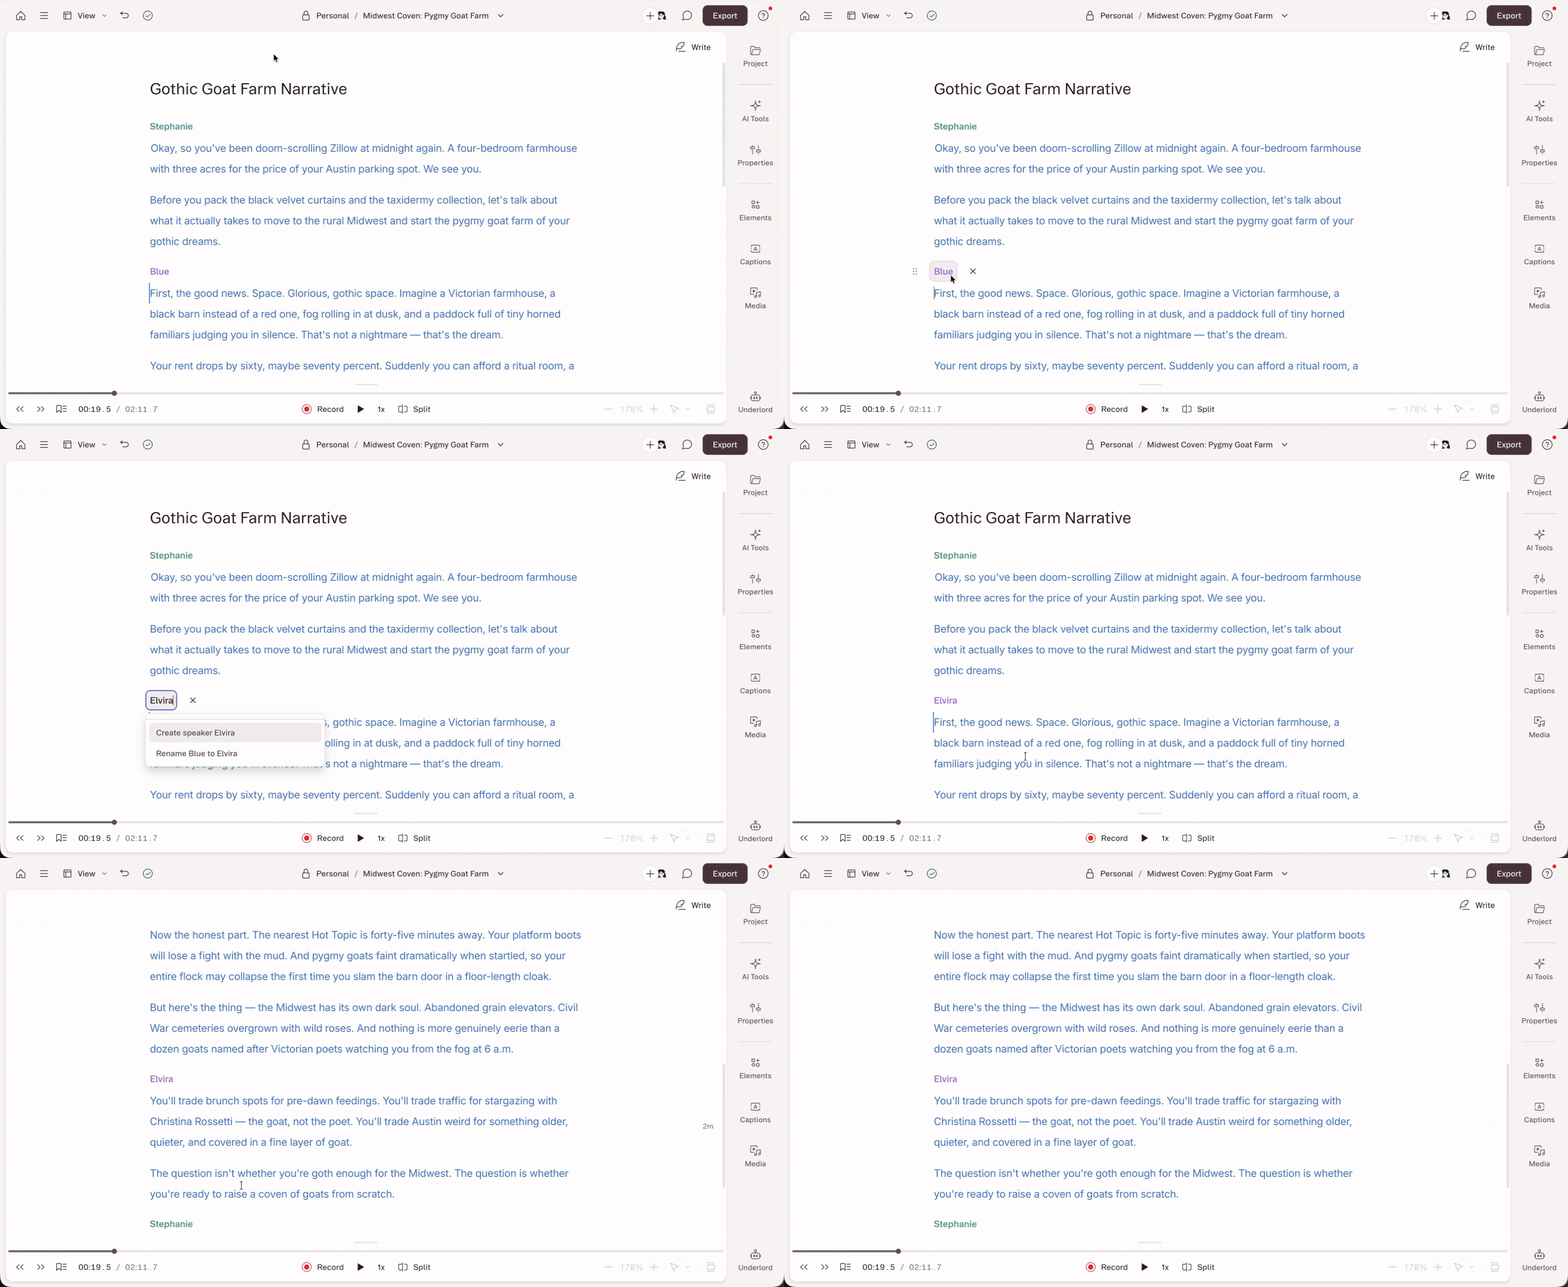
- Click any instance of the label.
- Type the new name.
- In the dropdown, click Rename [old name] to [new name].
Replace or merge a Speaker across a project
- Make sure the replacement speaker is already in the project.
- Click any instance of the label you want to replace.
- Click the speaker options button (⋯), select Replace in project with…, then choose the replacement.
Change label color
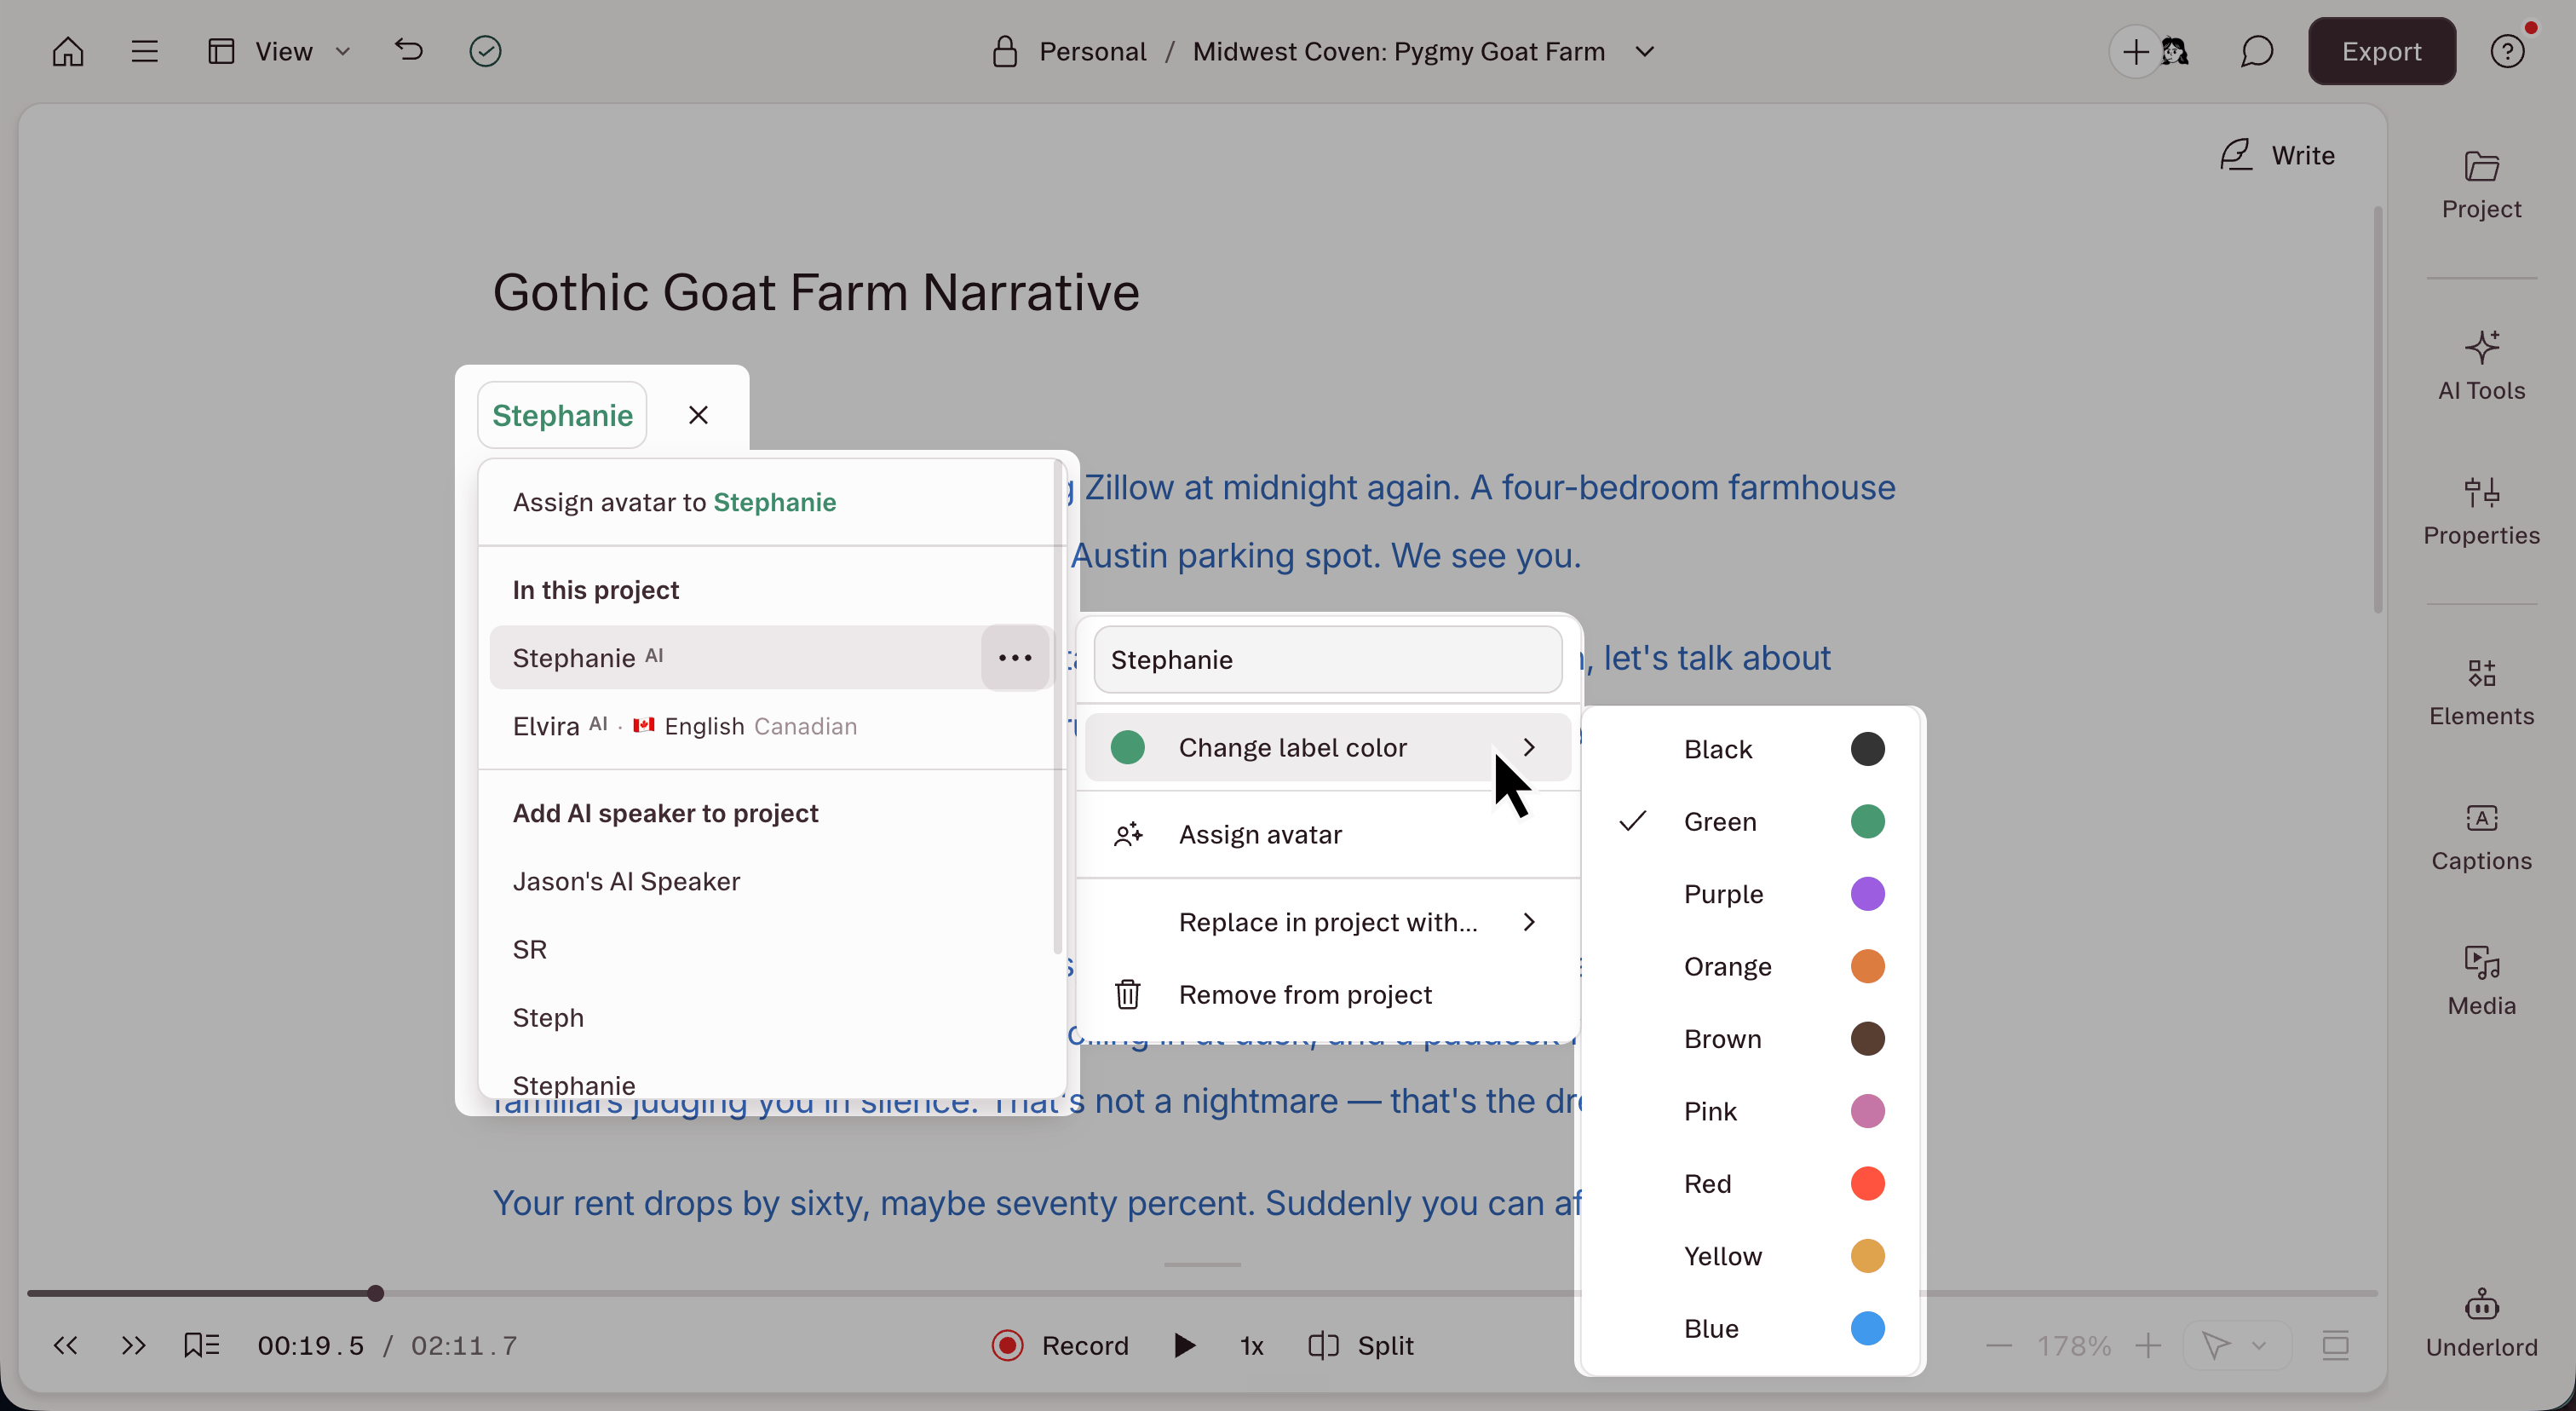
Click any instance of the label, click the speaker options button (⋯), select Change label color, and pick a color.