
New to sequences?If you’re not familiar with how sequences work in Descript, start with our Sequence overview to learn what they are and how they’re used in your composition.
How to open the Sequence Editor
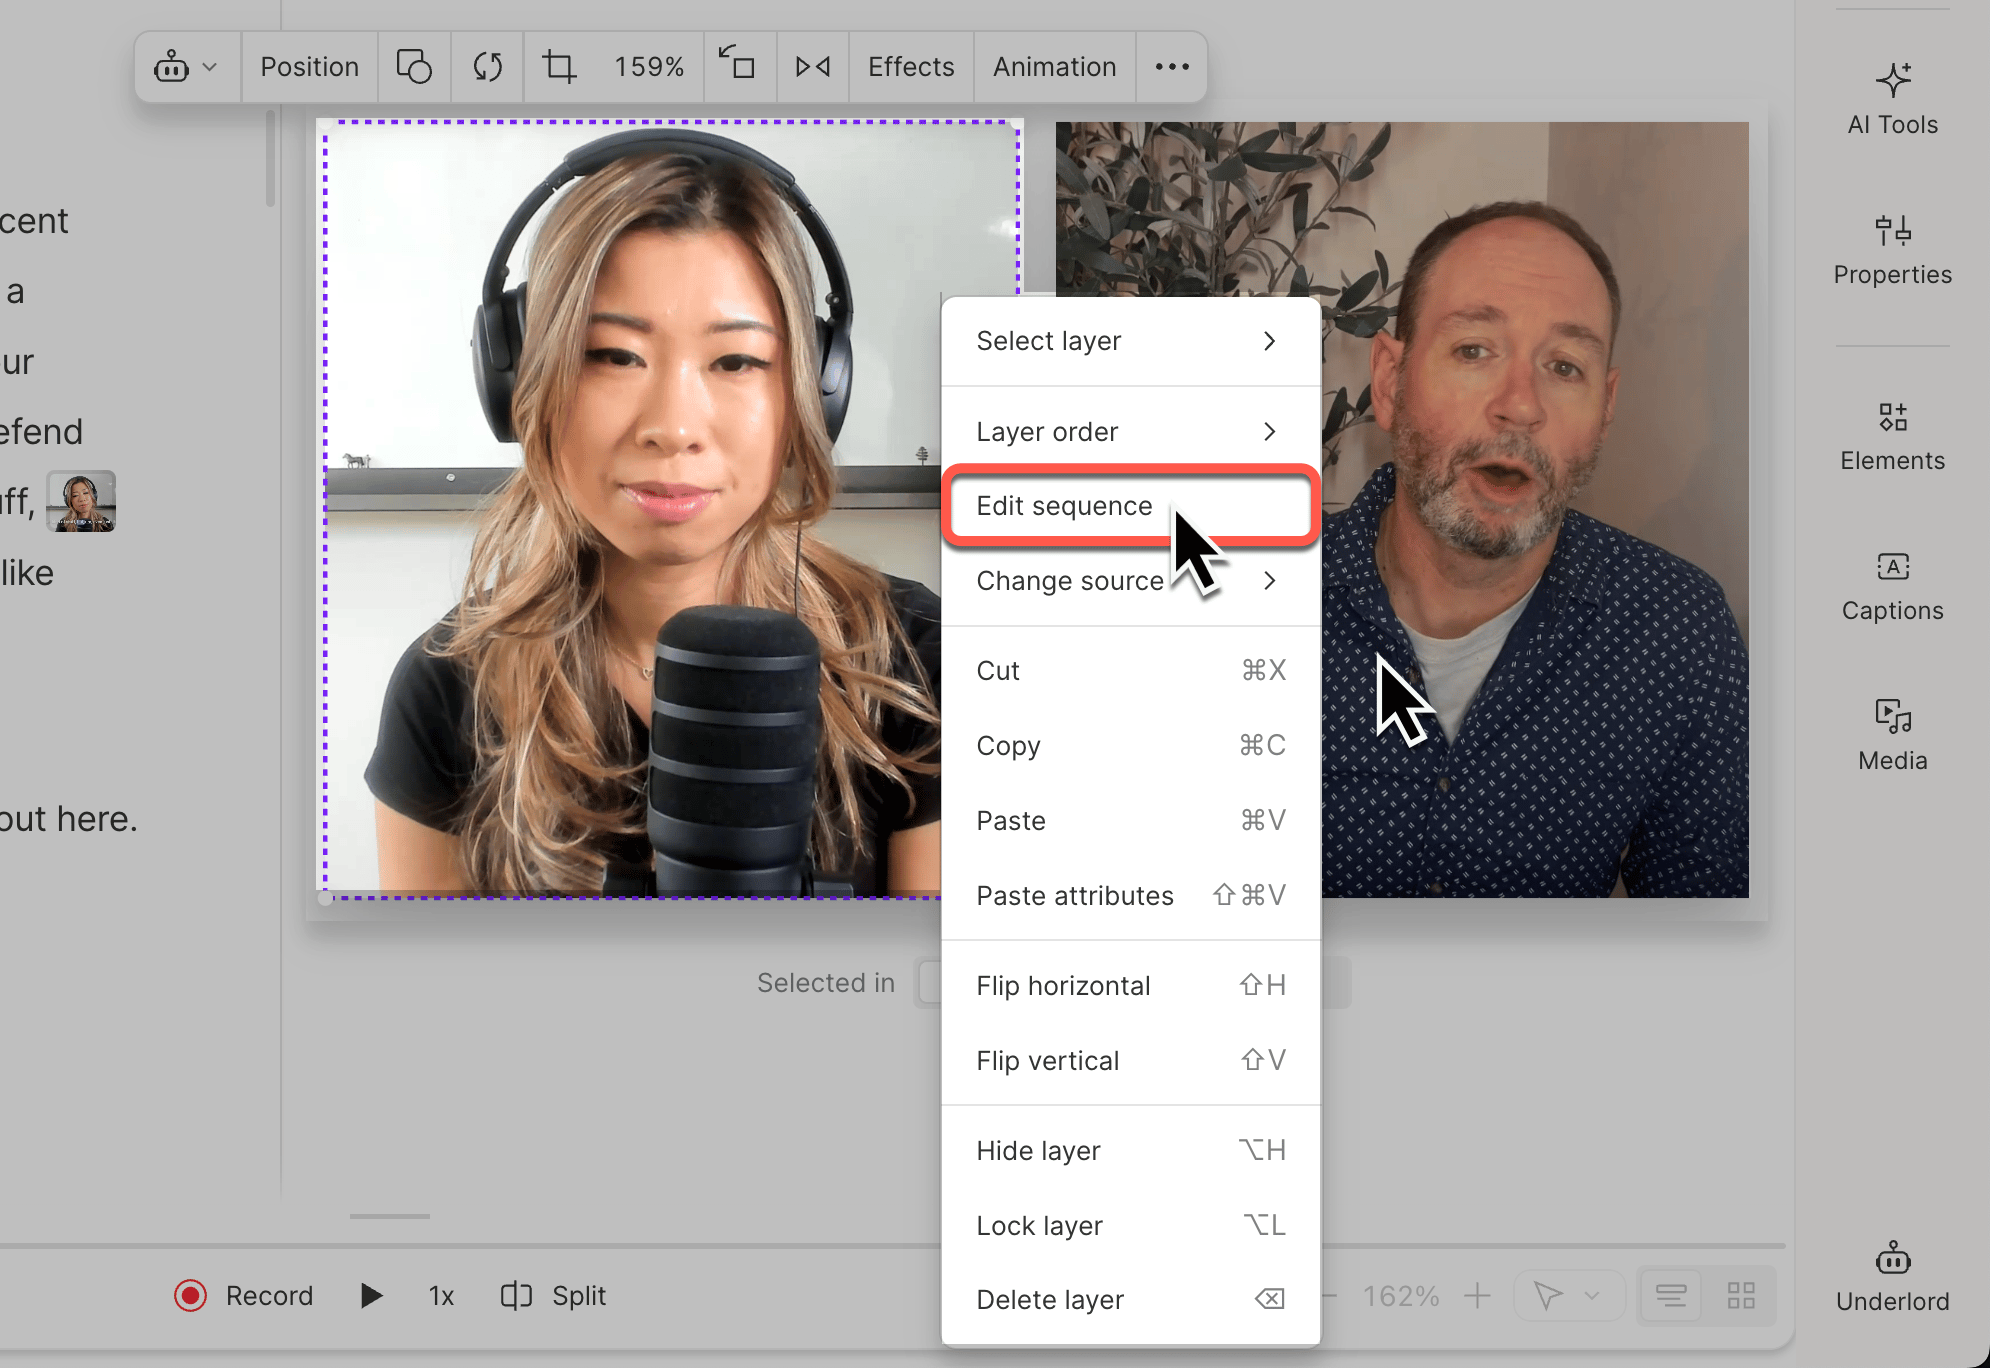
There are two entry points to the Sequence Editor:- From the timeline or scene editor: right-click the media and select Edit sequence.
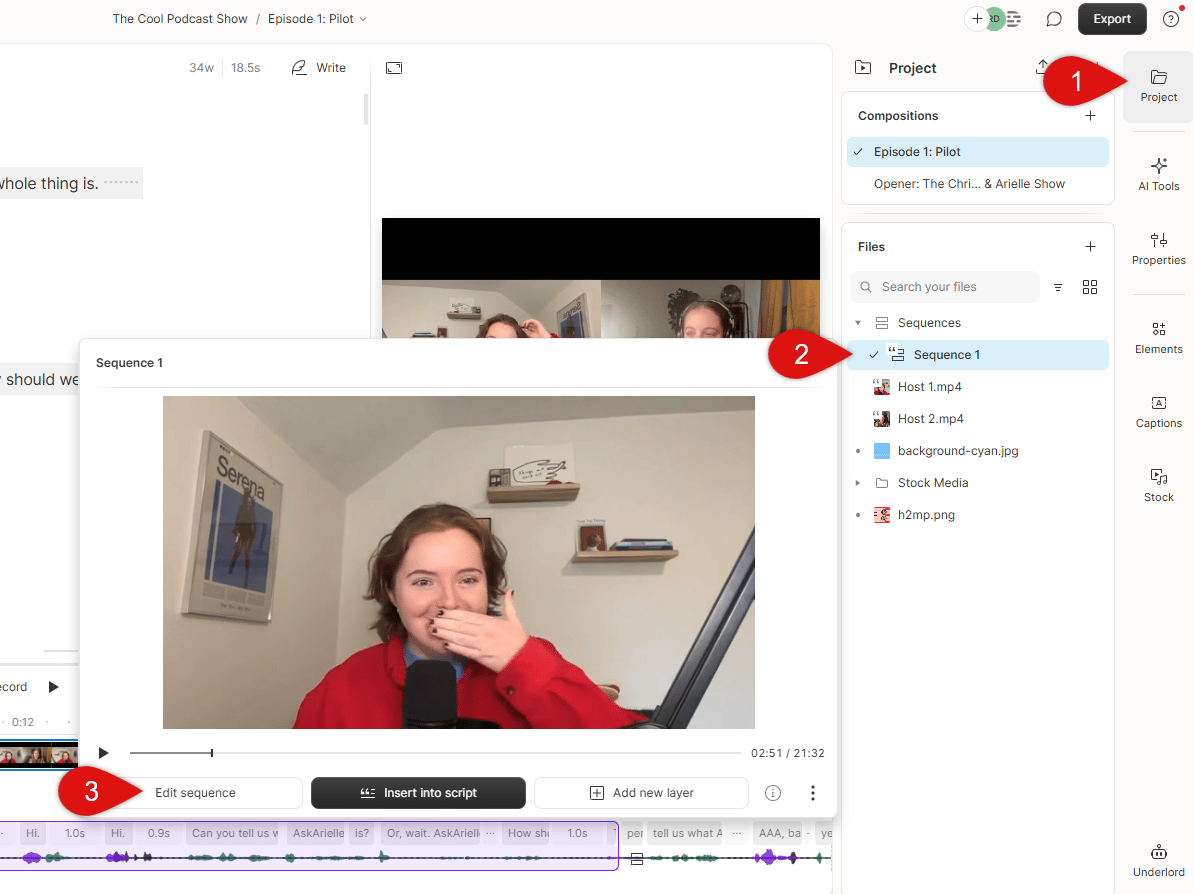
- From the Project panel: select a sequence and click Edit sequence.
Esc.
Adjust individual tracks
Once you’ve opened the Sequence Editor, you can control track visibility, edit clips and timing, and apply effects to individual tracks.Mute or solo a track
Use the right sidebar to mute or solo individual tracks using the speaker and S icons.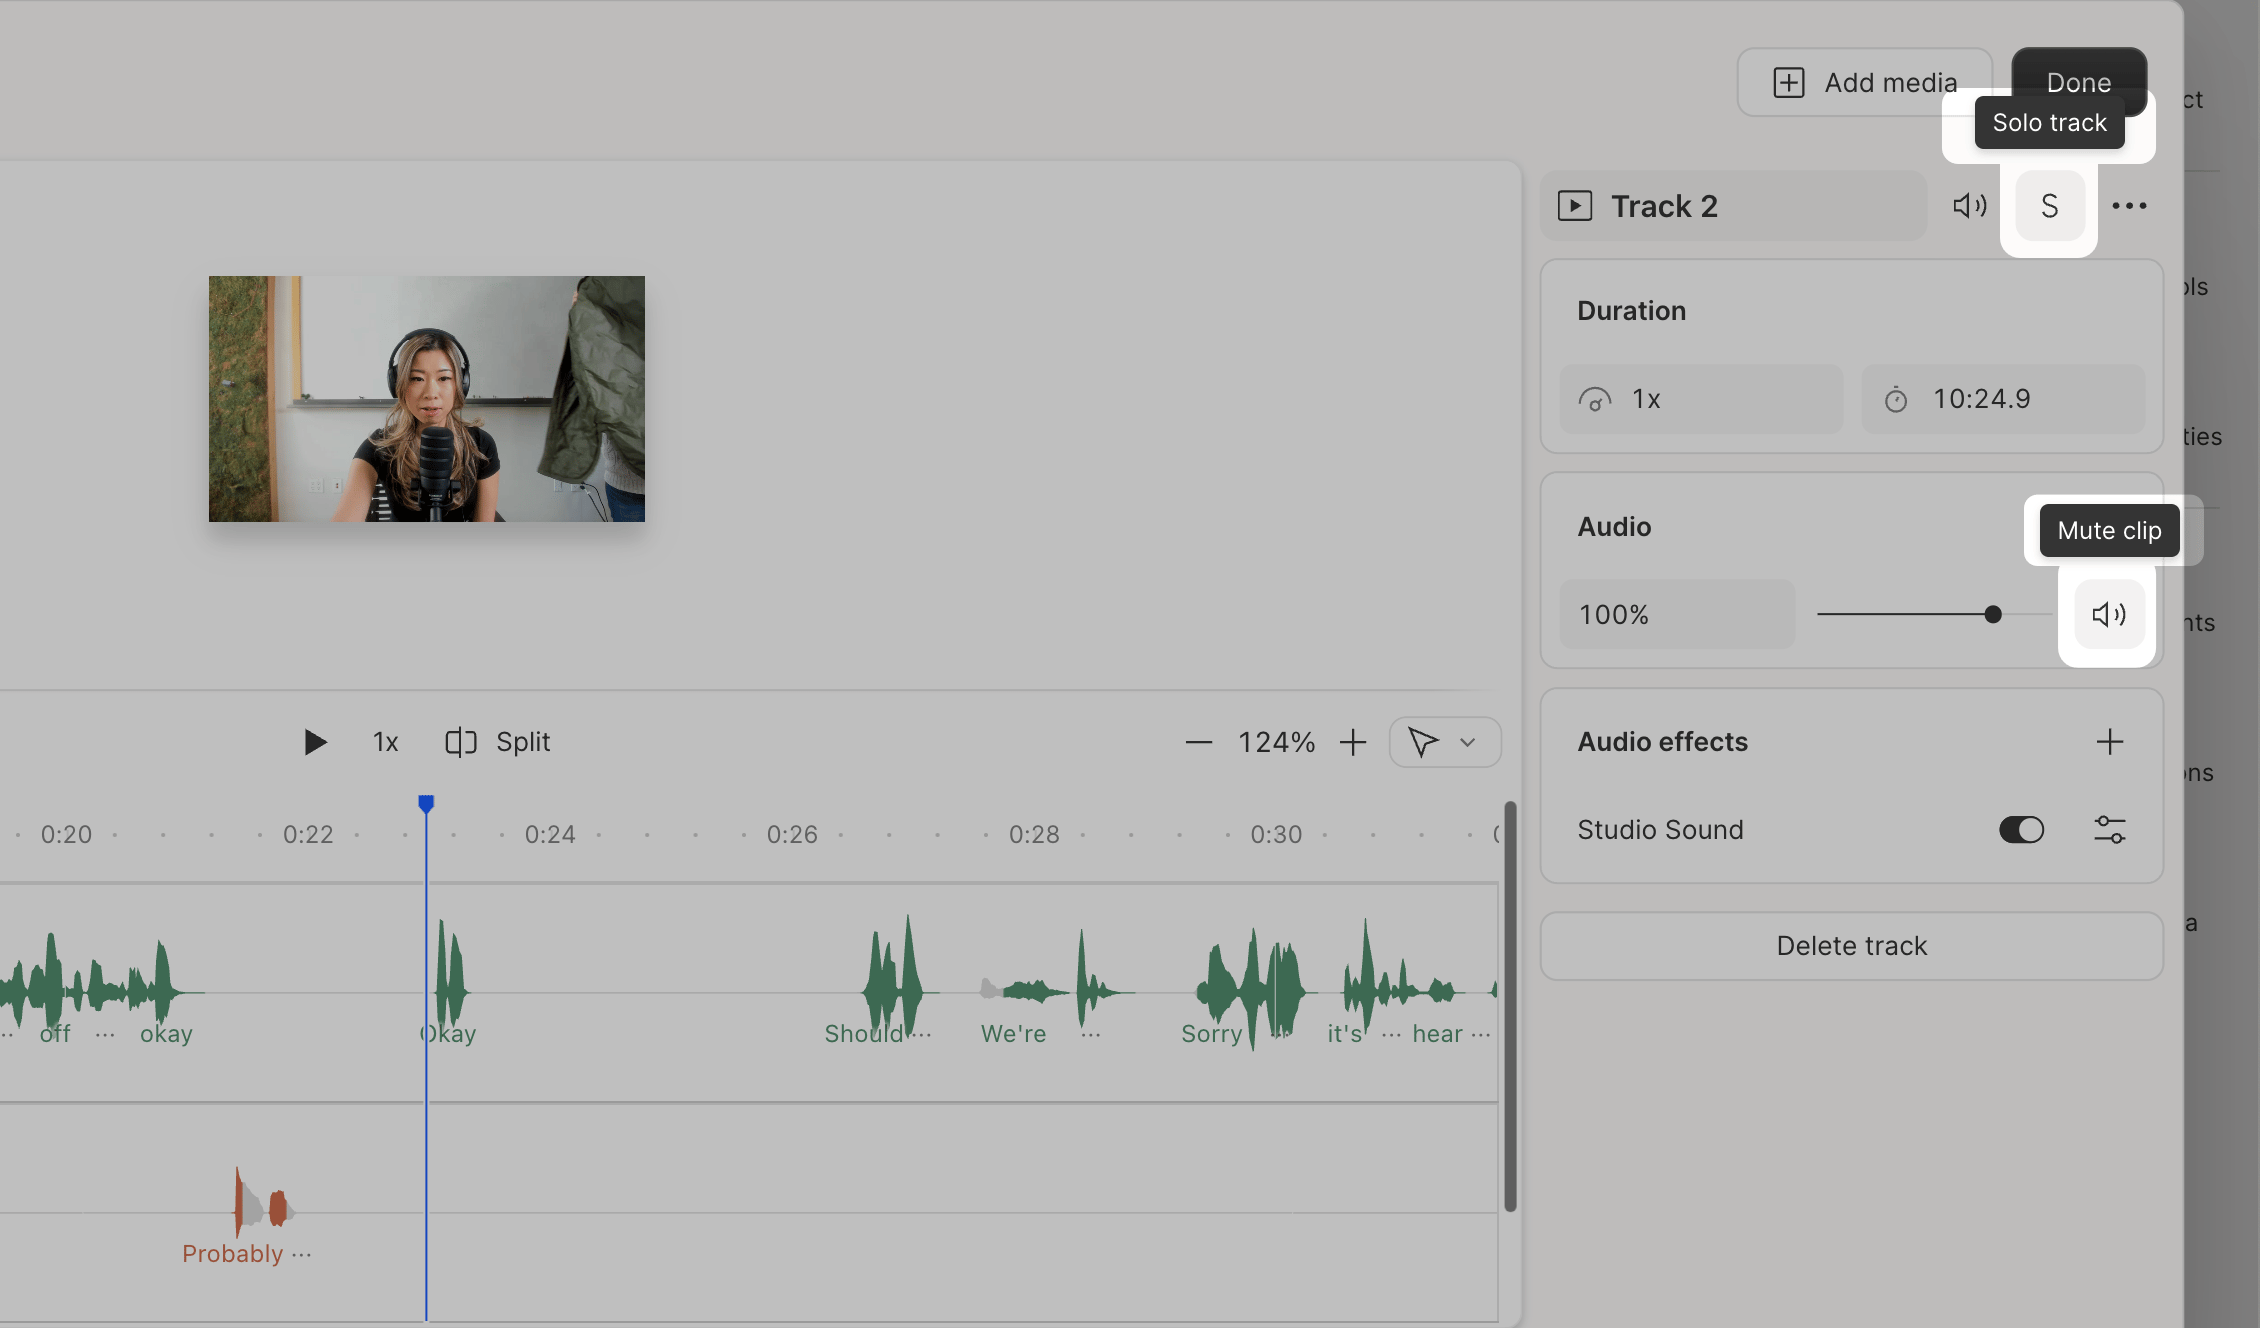
Edit clips and timing
Trim, split, and rearrange clips within each track like you would in the main timeline. Use Blade, Slip, and Range tools to adjust timing and positioning. Learn more about timeline tools.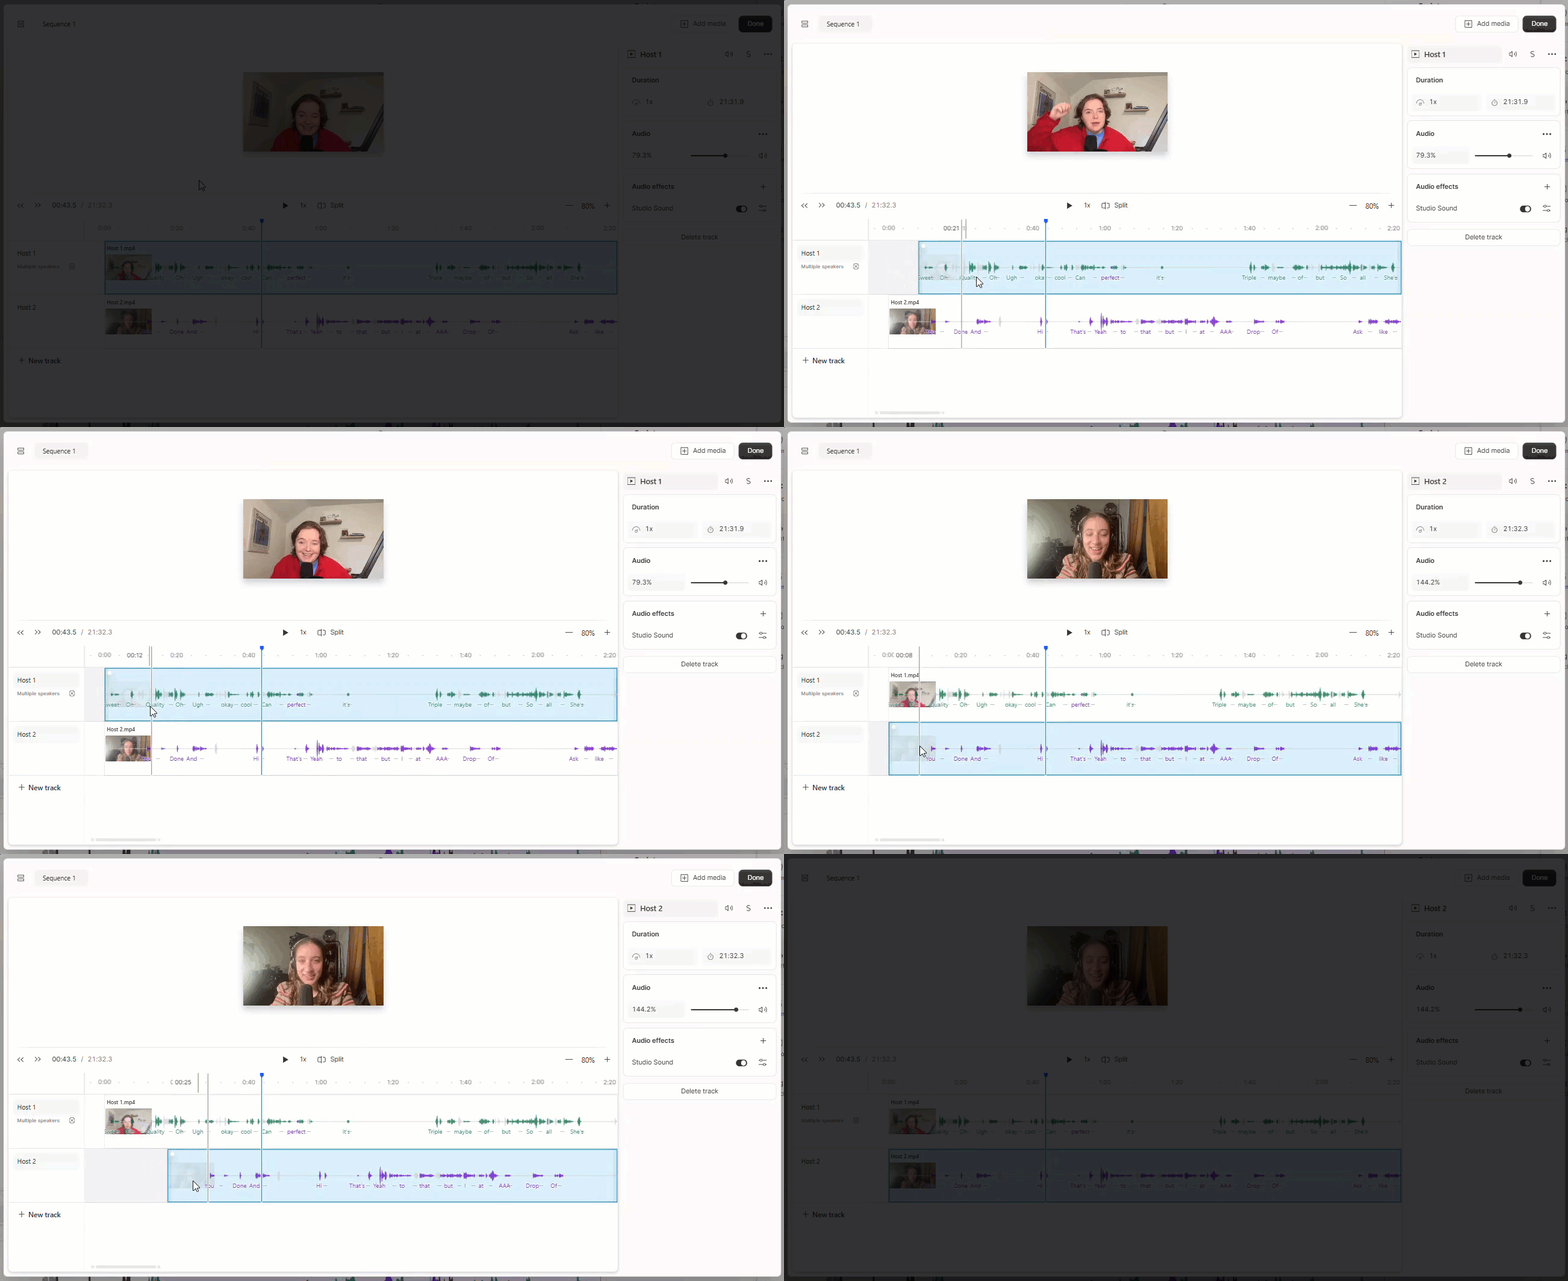
Automatically align tracks
Multi-Track Autosync
Descript’s built in Autosync function aligns two or more audio-enabled tracks automatically.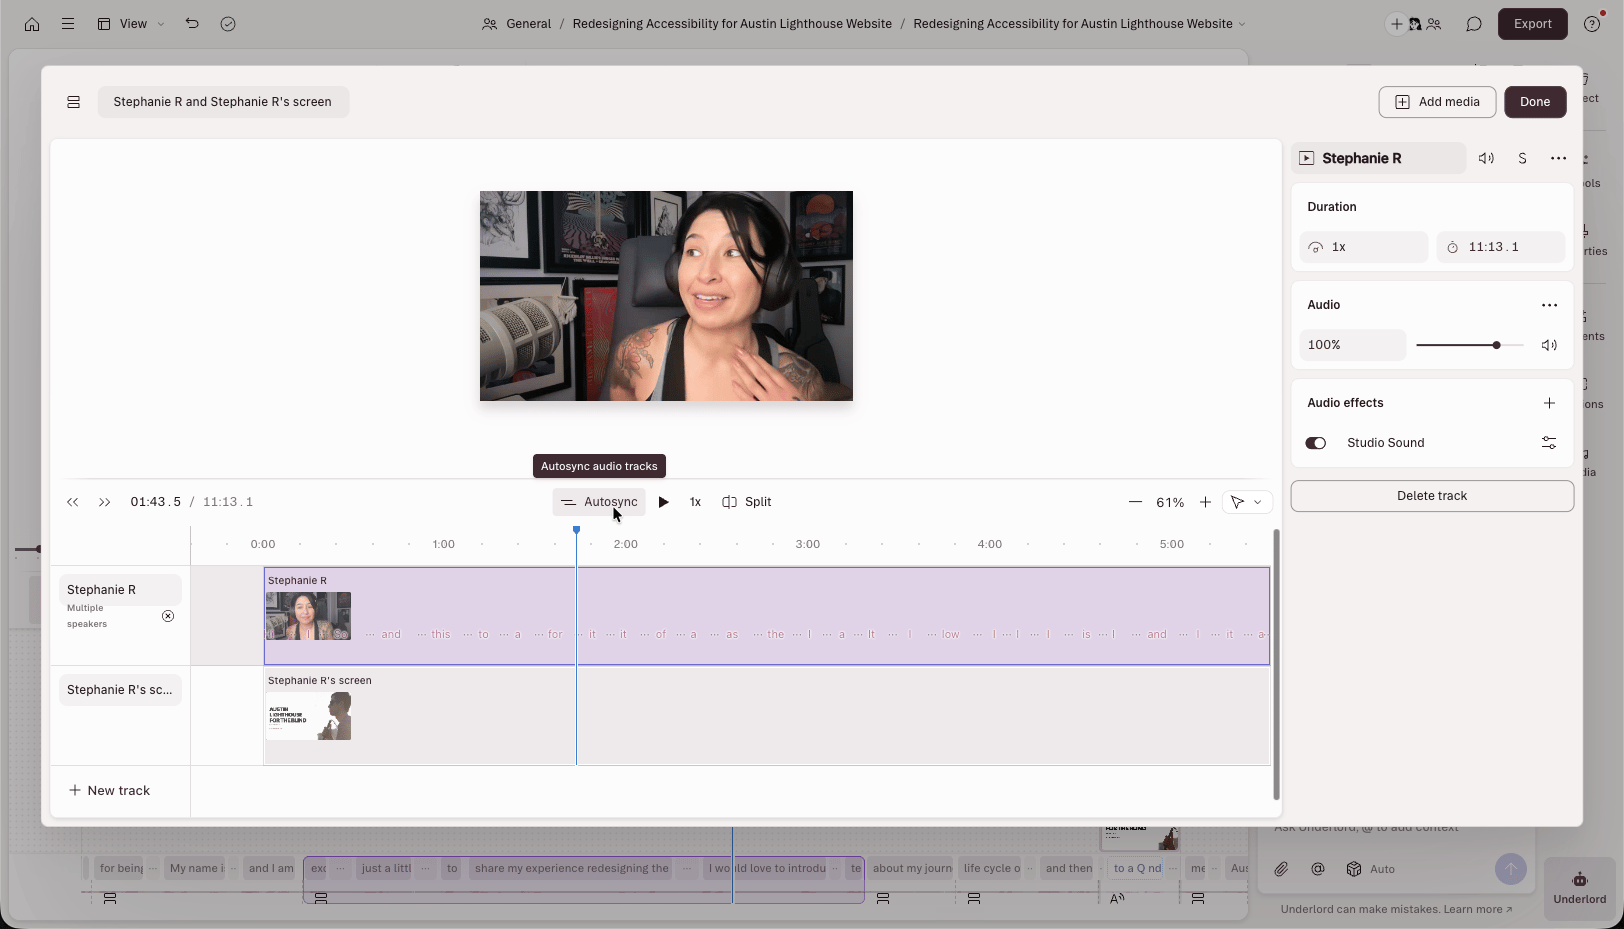
Nudge clips for precise sync adjustment
For frame-level precision when syncing audio to video, use arrow keys to nudge selected clips in the Sequence Editor. If the delay is consistent throughout a single file, use A/V sync offset instead.- Open the Sequence Editor and select the clip you want to adjust.
- Press the left or right arrow key to move the clip by one frame.
Apply effects and adjustments:
From the properties panel in the Sequence Editor, you can apply effects and adjustments to a single track—just like you would in your main composition. This includes:- Pan and volume controls
- Volume automation
- Effects (Studio Sound, EQ, etc.)
- Auto-leveling
Add tracks to a sequence
Descript supports up to 14 tracks per sequence. To add a new track:- Open the Sequence Editor.
- Click Add media in the top-right corner.
- Select a file from your library or upload a new one.
- Click Add new track or drag the file into the timeline.
Include or exclude tracks from the script
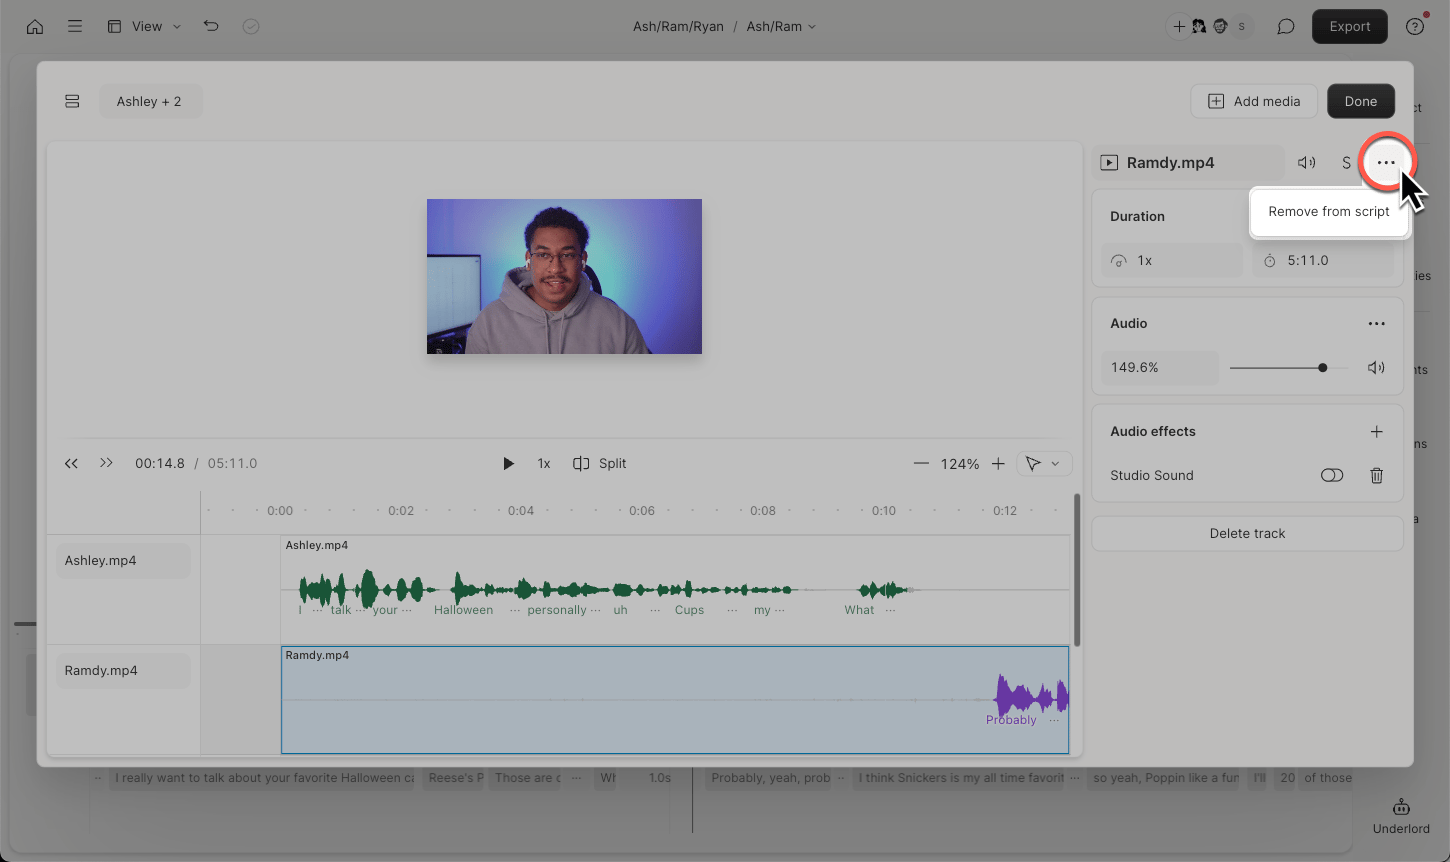
If a sequence contains multiple audio files of the same recording—or mic bleed across multiple tracks—you may see duplicate transcriptions in your combined script. This can cause issues with script accuracy and speaker labels. To fix this, choose which tracks are included in the combined script:- Open the Sequence Editor.
- Select the track you want to include or exclude.
- Click the ··· icon in the top-right corner.
- Select Remove from script or Include in script.