> ## Documentation Index
> Fetch the complete documentation index at: https://help.descript.com/llms.txt
> Use this file to discover all available pages before exploring further.
# Add and Style Captions
> Add, style, and assign captions generated from your script.
Because Descript builds captions straight from your script, they're timed and synced automatically, with no keying them in by hand.
This article covers how to:
* [Add a captions layer](#add-a-captions-layer)
* [Convert a text layer to captions](#convert-a-text-layer-to-captions)
* [Style your captions](#style-your-captions)
* [Add captions for multiple speakers](#add-captions-for-multiple-speakers)
* [Remove captions from your project](#remove-captions)
**How captions differ from text layers**
Captions follow your script and update automatically when you make edits. Text layers aren't connected to your transcript, though you can display dynamic content like speaker names, or static custom text you enter manually. [Learn more about using text layers](/visuals/text-layers).
## Add a captions layer
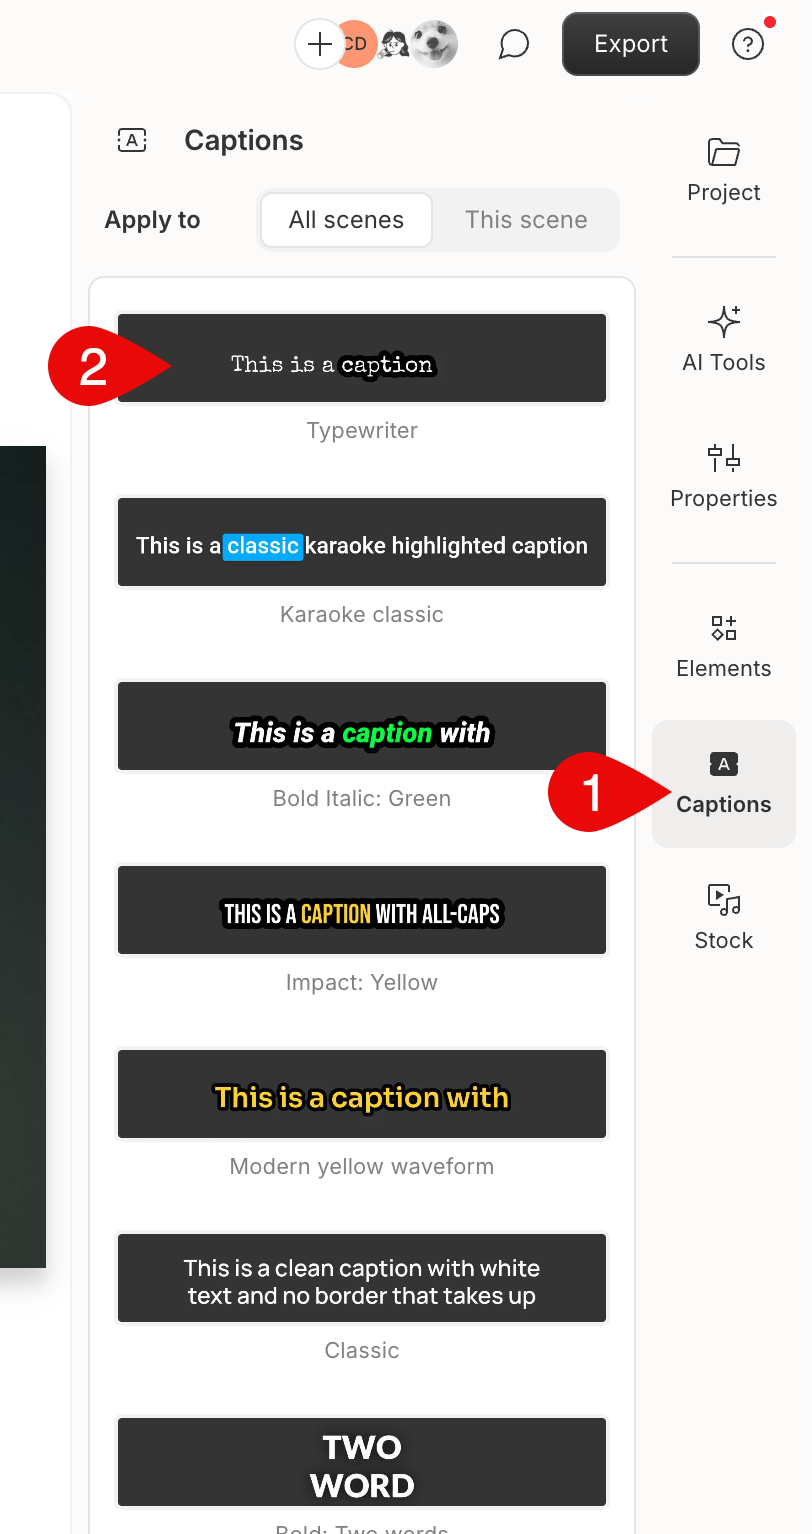
1. Open the right-hand sidebar and click the **Captions** panel.
2. Choose where to apply captions: Use the toggle at the top to apply captions to just the current scene or all scenes. Do this before applying a captions style.
3. Select a captions style from the available options to add a new captions layer. Descript will generate captions based on your script and sync them to the timeline.
 ## Convert a text layer to captions
You can also convert any text layer to a captions layer:
1. Select the text layer, then click the **ellipsis button** in the selection toolbar.
2. In the right-hand sidebar, open the **Type** dropdown and switch from **Freeform** to **Captions**.
## Convert a text layer to captions
You can also convert any text layer to a captions layer:
1. Select the text layer, then click the **ellipsis button** in the selection toolbar.
2. In the right-hand sidebar, open the **Type** dropdown and switch from **Freeform** to **Captions**.
 ## Style your captions
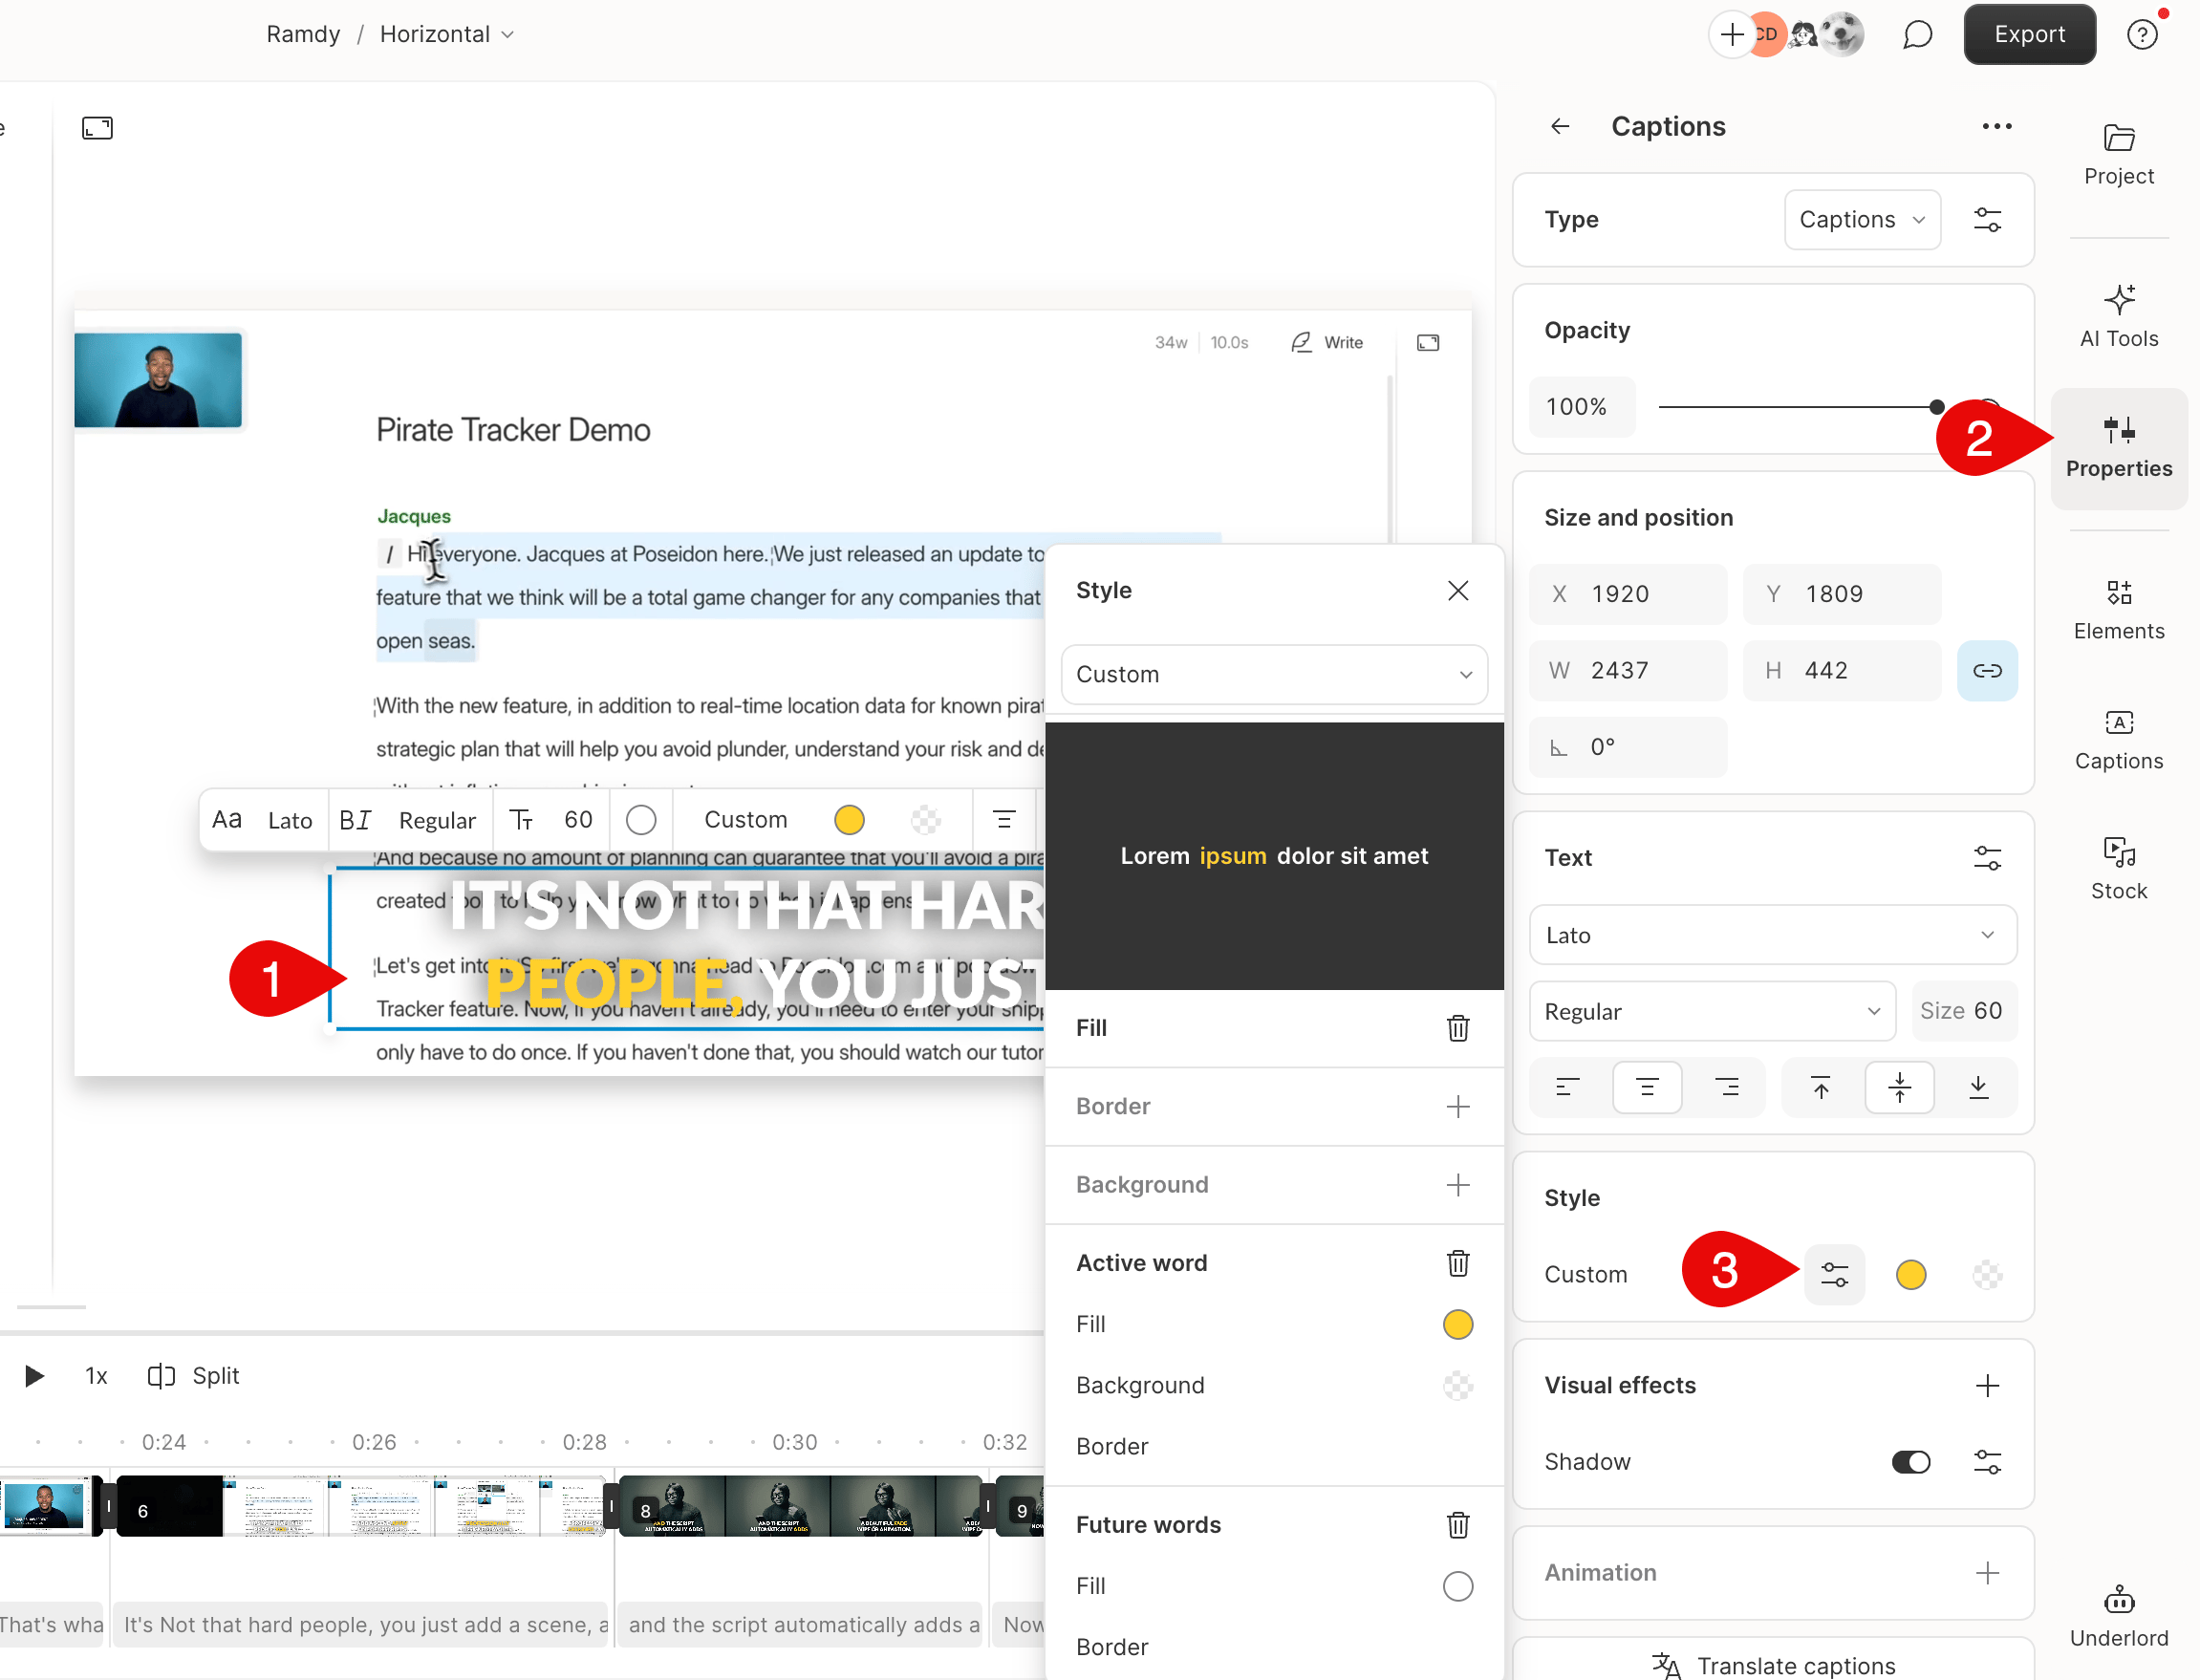
Use the **Style** section of [the Properties panel](/descript-tour/properties-panel) to customize the look of your captions. Styling changes apply to the selected scene or captions layer.
You can adjust:
* Font, size, and alignment
* Text and background colors
* Borders
* Styles for active words and future words
## Style your captions
Use the **Style** section of [the Properties panel](/descript-tour/properties-panel) to customize the look of your captions. Styling changes apply to the selected scene or captions layer.
You can adjust:
* Font, size, and alignment
* Text and background colors
* Borders
* Styles for active words and future words
 ## Reuse your caption style across projects
Want to use the same caption styling in more than one project? Save your styled captions layer in a custom layout.
Layouts let you reuse design elements, including captions, across any scene in any composition. Once saved, you can apply that layout to future projects with just a few clicks. [Learn how to create and apply custom layouts.](/templates-and-presets/layouts-save)
## Add captions for multiple speakers
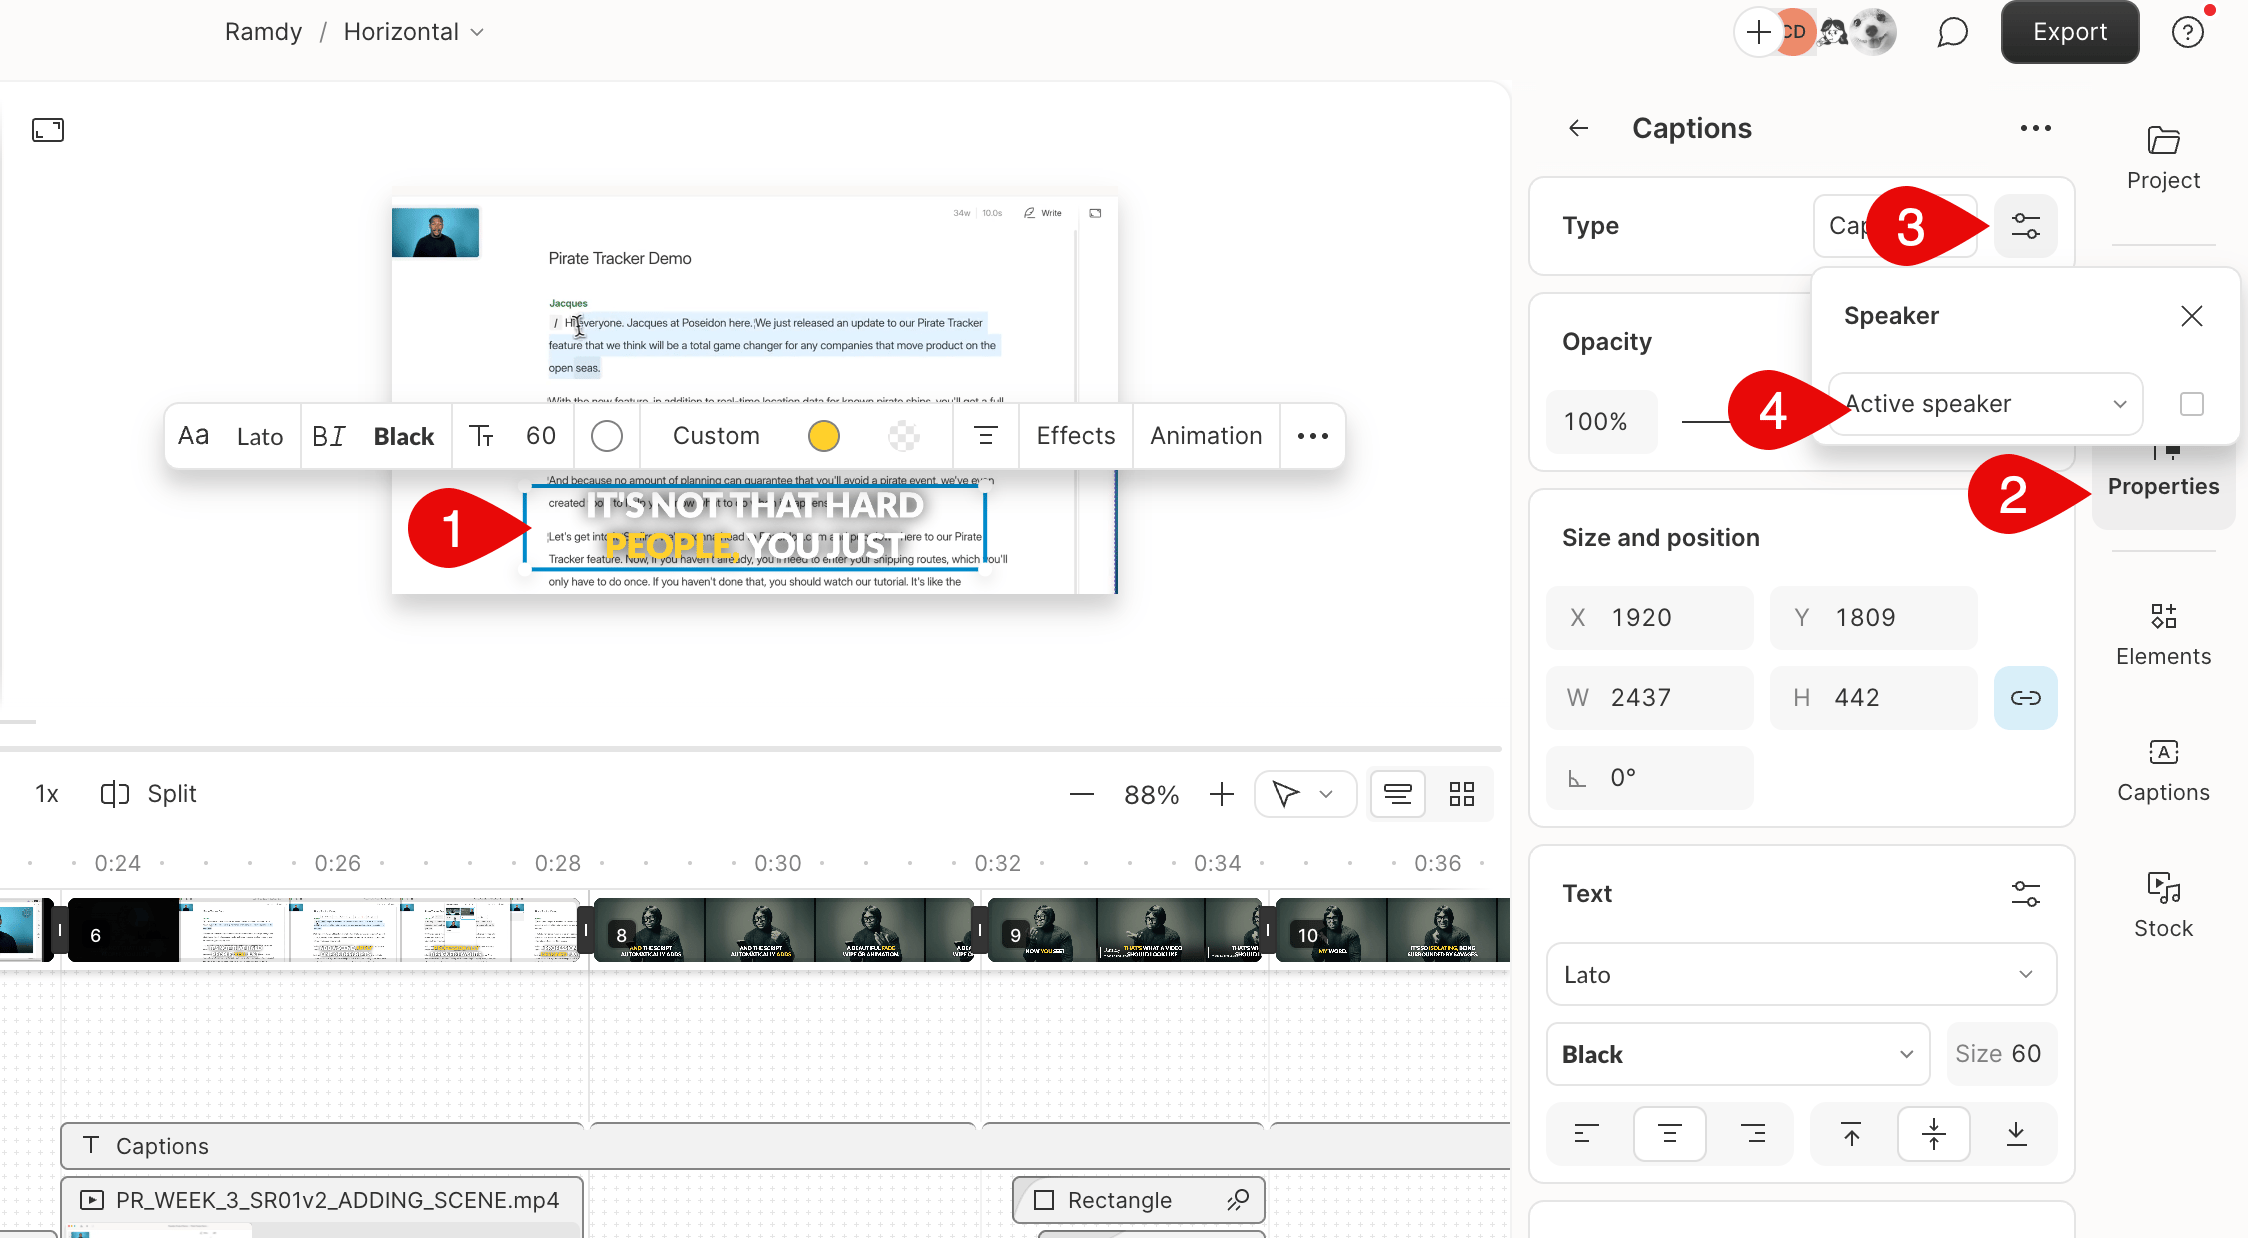
Create a separate captions layer for each speaker to make dialogue easier to follow visually.
1. Click **Captions** in the right-hand sidebar to add a new layer.
2. Select the captions layer in the scene or timeline, then open [the Properties panel](/descript-tour/properties-panel)
3. Click the **options slider icon** next to the layer type and choose the speaker from the dropdown.
4. Repeat for each speaker as needed.
Each captions layer can be styled and positioned independently.
## Reuse your caption style across projects
Want to use the same caption styling in more than one project? Save your styled captions layer in a custom layout.
Layouts let you reuse design elements, including captions, across any scene in any composition. Once saved, you can apply that layout to future projects with just a few clicks. [Learn how to create and apply custom layouts.](/templates-and-presets/layouts-save)
## Add captions for multiple speakers
Create a separate captions layer for each speaker to make dialogue easier to follow visually.
1. Click **Captions** in the right-hand sidebar to add a new layer.
2. Select the captions layer in the scene or timeline, then open [the Properties panel](/descript-tour/properties-panel)
3. Click the **options slider icon** next to the layer type and choose the speaker from the dropdown.
4. Repeat for each speaker as needed.
Each captions layer can be styled and positioned independently.
 ## Remove captions
To delete a captions layer without affecting your script:
* Select the captions layer in the scene or timeline.
* Press **Delete** on your keyboard, or right-click and choose **Delete**.
## Remove captions
To delete a captions layer without affecting your script:
* Select the captions layer in the scene or timeline.
* Press **Delete** on your keyboard, or right-click and choose **Delete**.