> ## Documentation Index
> Fetch the complete documentation index at: https://help.descript.com/llms.txt
> Use this file to discover all available pages before exploring further.
# Scene Boundaries
> Scene boundaries define where one scene ends and another begins in your Descript composition .
Each [scene](/getting-started/scenes) has its own visual layers, and scene boundaries set the timing for them: when a layer appears, changes, or ends as one scene gives way to the next.
Descript automatically trims visuals to fit within each scene, so you usually don’t need to adjust timing manually — though you can [extend layers across multiple scenes](/visuals/scenes-layers) if needed.
**New to scenes?**
Scenes are the building blocks of your video. If you're not familiar with how scenes work in Descript, check out the [Scenes overview](/getting-started/scenes) guide first.
## This article covers
* [How to add a scene boundary](#add-a-scene-boundary)
* [How to move a scene boundary](#move-a-scene-boundary)
* [How to delete a scene boundary](#delete-a-scene-boundary)
## Add a scene boundary
You can add a scene boundary using one of these methods:
1. **Script shortcut:** Place your cursor in the script and type `/` to insert a new scene boundary.
2. **Timeline:** Move the playhead to your desired time, then click the **Split** button. [Learn more about the Split button](/timeline/split-button)
## Move a scene boundary
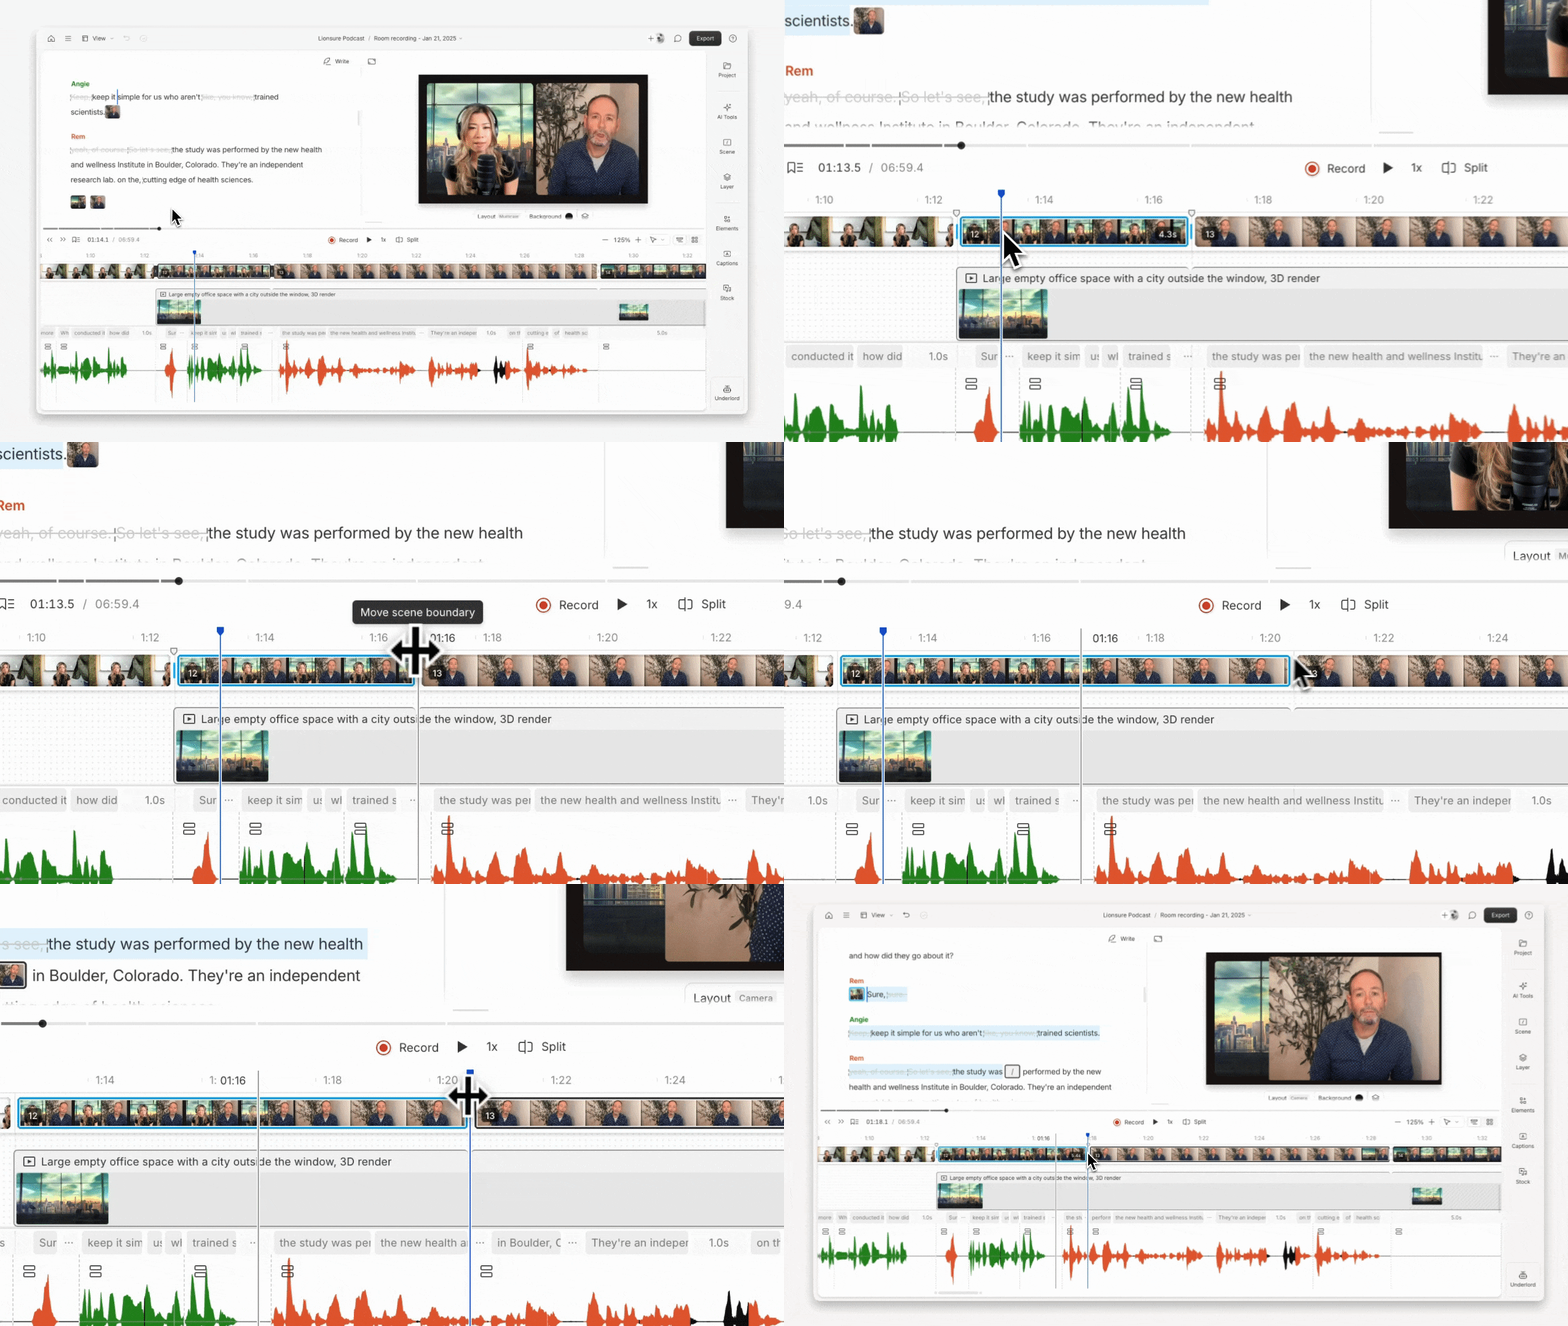
You can move an existing scene boundary in either the script or the timeline — just note that you can’t drag it past another existing boundary.
* **Script panel:** Click a scene thumbnail to select it. In the timeline ruler, you’ll see boundary markers appear. Drag either marker to a new position. As you move it, the script will highlight where the new boundary will be placed—just before the highlighted word.
* **Timeline view:** Click the scene thumbnail in the scene preview track at the top of the timeline. A handle will appear in the ruler — drag it to reposition the boundary.
 ## Delete a scene boundary
To delete a scene boundary:
1. **Right-click:** Right-click the scene thumbnail and select **Delete boundary**. This merges the scene’s content into the previous one.
2. **Click + Delete:** Click once on the thumbnail, then press **Delete** or **Backspace**. This removes the boundary and shifts its content into the previous scene.
**Be careful when deleting scenes**
Double-clicking a scene thumbnail selects the entire scene. If you press **Delete** after that, you’ll remove both the boundary *and* all content within the scene.
## Delete a scene boundary
To delete a scene boundary:
1. **Right-click:** Right-click the scene thumbnail and select **Delete boundary**. This merges the scene’s content into the previous one.
2. **Click + Delete:** Click once on the thumbnail, then press **Delete** or **Backspace**. This removes the boundary and shifts its content into the previous scene.
**Be careful when deleting scenes**
Double-clicking a scene thumbnail selects the entire scene. If you press **Delete** after that, you’ll remove both the boundary *and* all content within the scene.