> ## Documentation Index
> Fetch the complete documentation index at: https://help.descript.com/llms.txt
> Use this file to discover all available pages before exploring further.
# Speaker labels
> Add, move, rename, replace, and remove Speaker labels in your script.
At its simplest, a Speaker label is just a name in your transcript. Give that Speaker a voice or an avatar and the same label can generate speech or put a presenter on screen.
In this article, we’ll cover the mechanics of managing labels for Speakers in your script. For more info about the Speaker concept and related workflows, see our [Speakers](/script-editing/speakers) guide.
## Add a speaker label
Descript offers two ways to label speakers in your transcript:
### **Automatic Speaker detection**
When you upload a file, Descript automatically detects the distinct voices throughout and then prompts you to identify them. For those steps, see [Automatic speaker detection](/script-editing/speaker-detection).
### **Or, add a Speaker manually**
1. Open the Speaker menu: click **Add speaker** at the top of a paragraph, or place your cursor in the script and press `@`.
2. Start typing to create a new Speaker label, or pick one of the other options:
* **In this project:** apply a label using a Speaker already created in this project.
* **Add AI speaker to project:** apply a label using a Speaker saved to your Drive, but not yet in this project.
* **Browse stock AI speakers:** choose from Descript's library of [stock voices](/ai-speech/stock-voices).
* **Create a new speaker:** make a new [voice clone](https://help.descript.com/hc/en-us/articles/10119641262221).
You can also select a portion of the script to re-label, press `@`, and use the same steps to assign a Speaker to that selection.
## Manage Speaker labels
### **Move a Speaker**
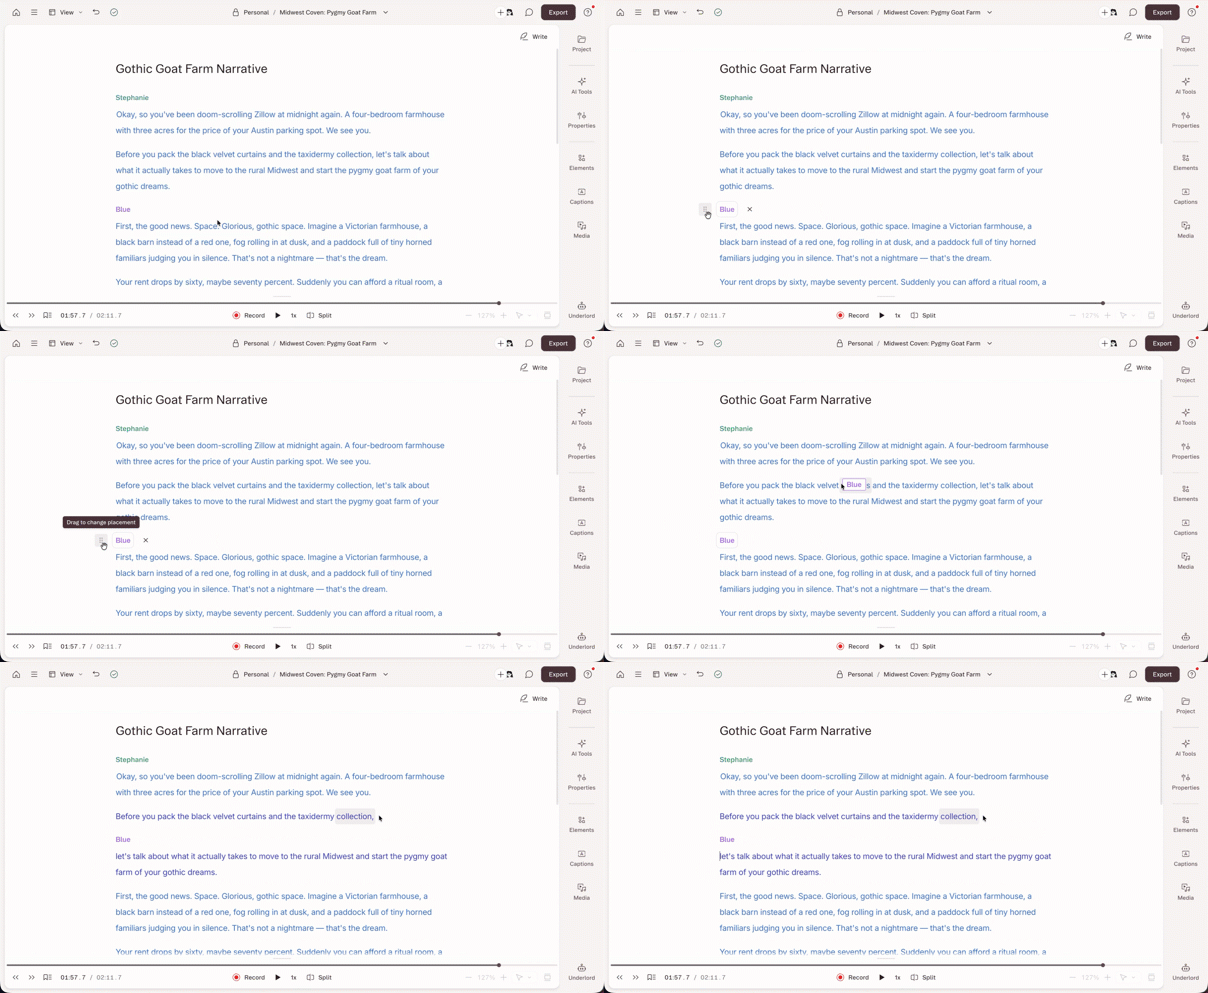
1. Hover over the speaker label and click the reposition icon to its left.
2. Drag and drop it to a new spot in the script.
Words highlight as you drag. Drop on a word to place the label before it.
 ### **Rename a Speaker**
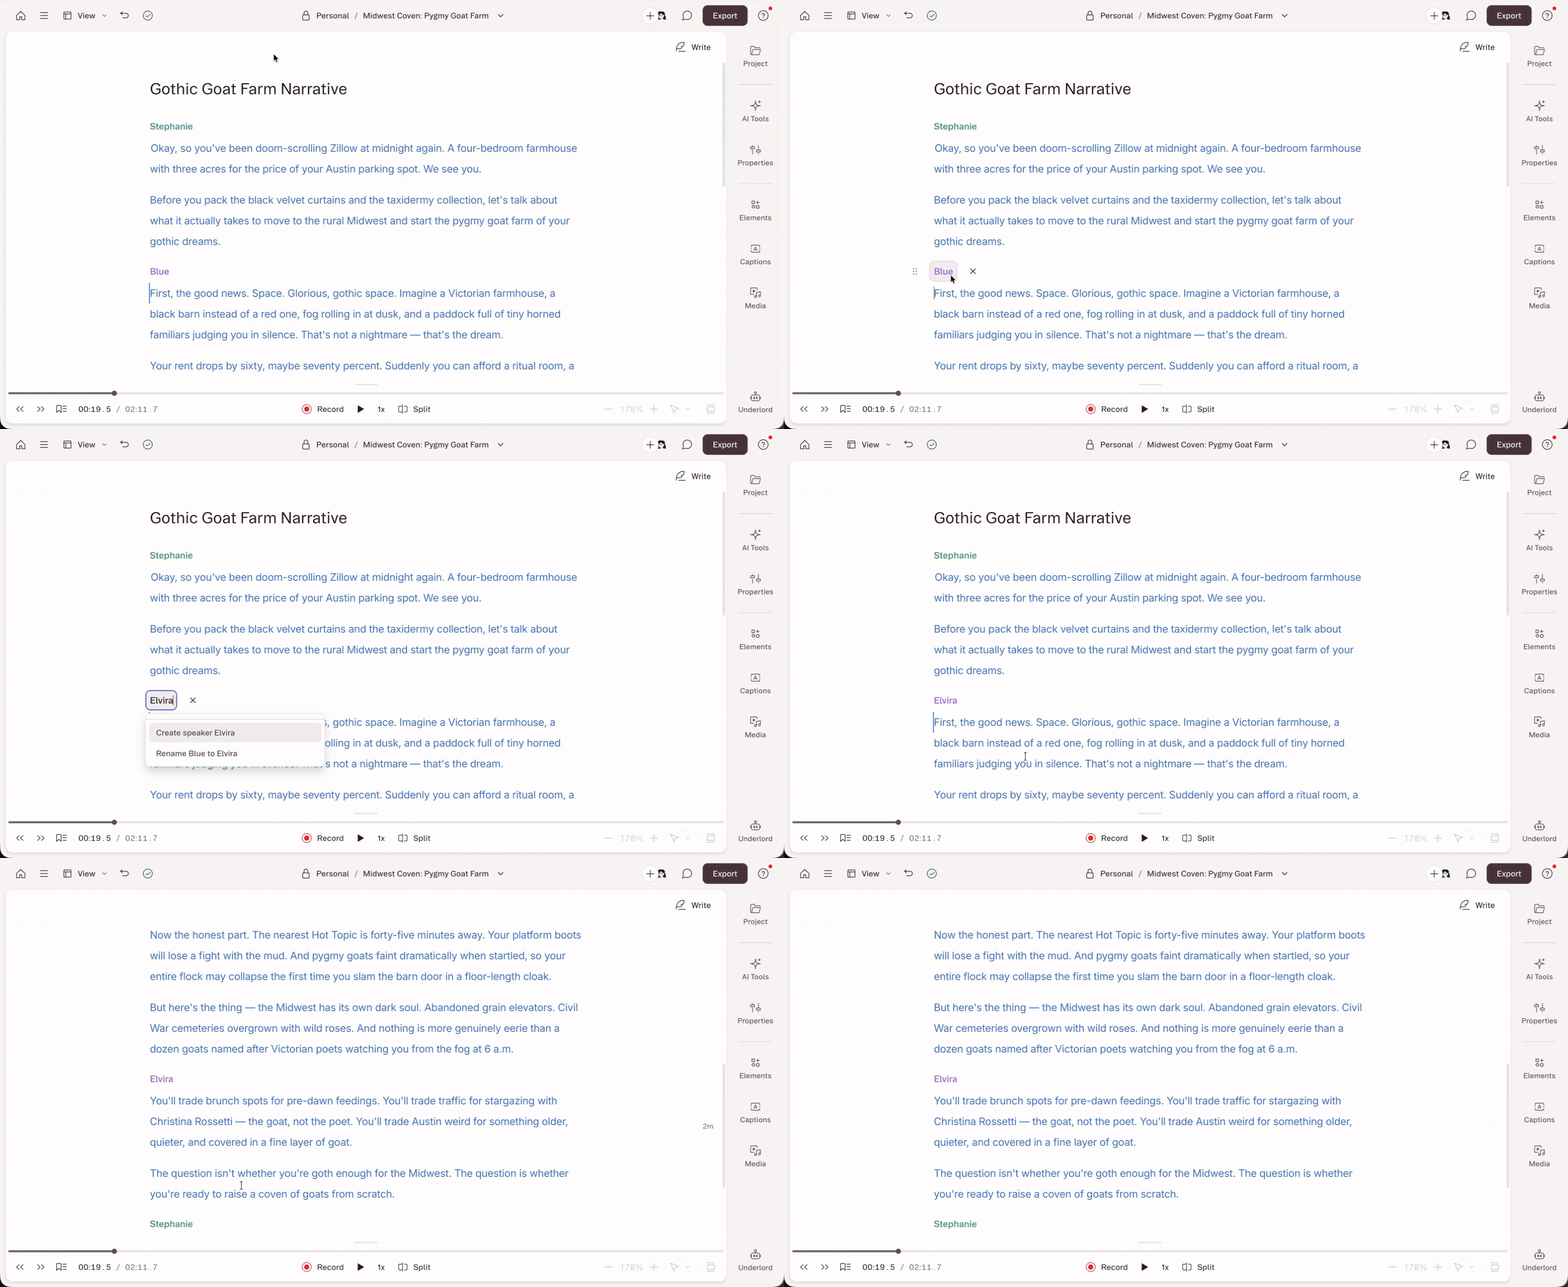
1. Click any instance of the label.
2. Type the new name.
3. In the dropdown, click **Rename \[old name] to \[new name]**.
Renaming changes the Speaker within this project only.
### **Rename a Speaker**
1. Click any instance of the label.
2. Type the new name.
3. In the dropdown, click **Rename \[old name] to \[new name]**.
Renaming changes the Speaker within this project only.
 ### **Replace or merge a Speaker across a project**
1. Make sure the replacement speaker is already in the project.
2. Click any instance of the label you want to replace.
3. Click the speaker options button (⋯), select **Replace in project with…**, then choose the replacement.
### **Change label color**
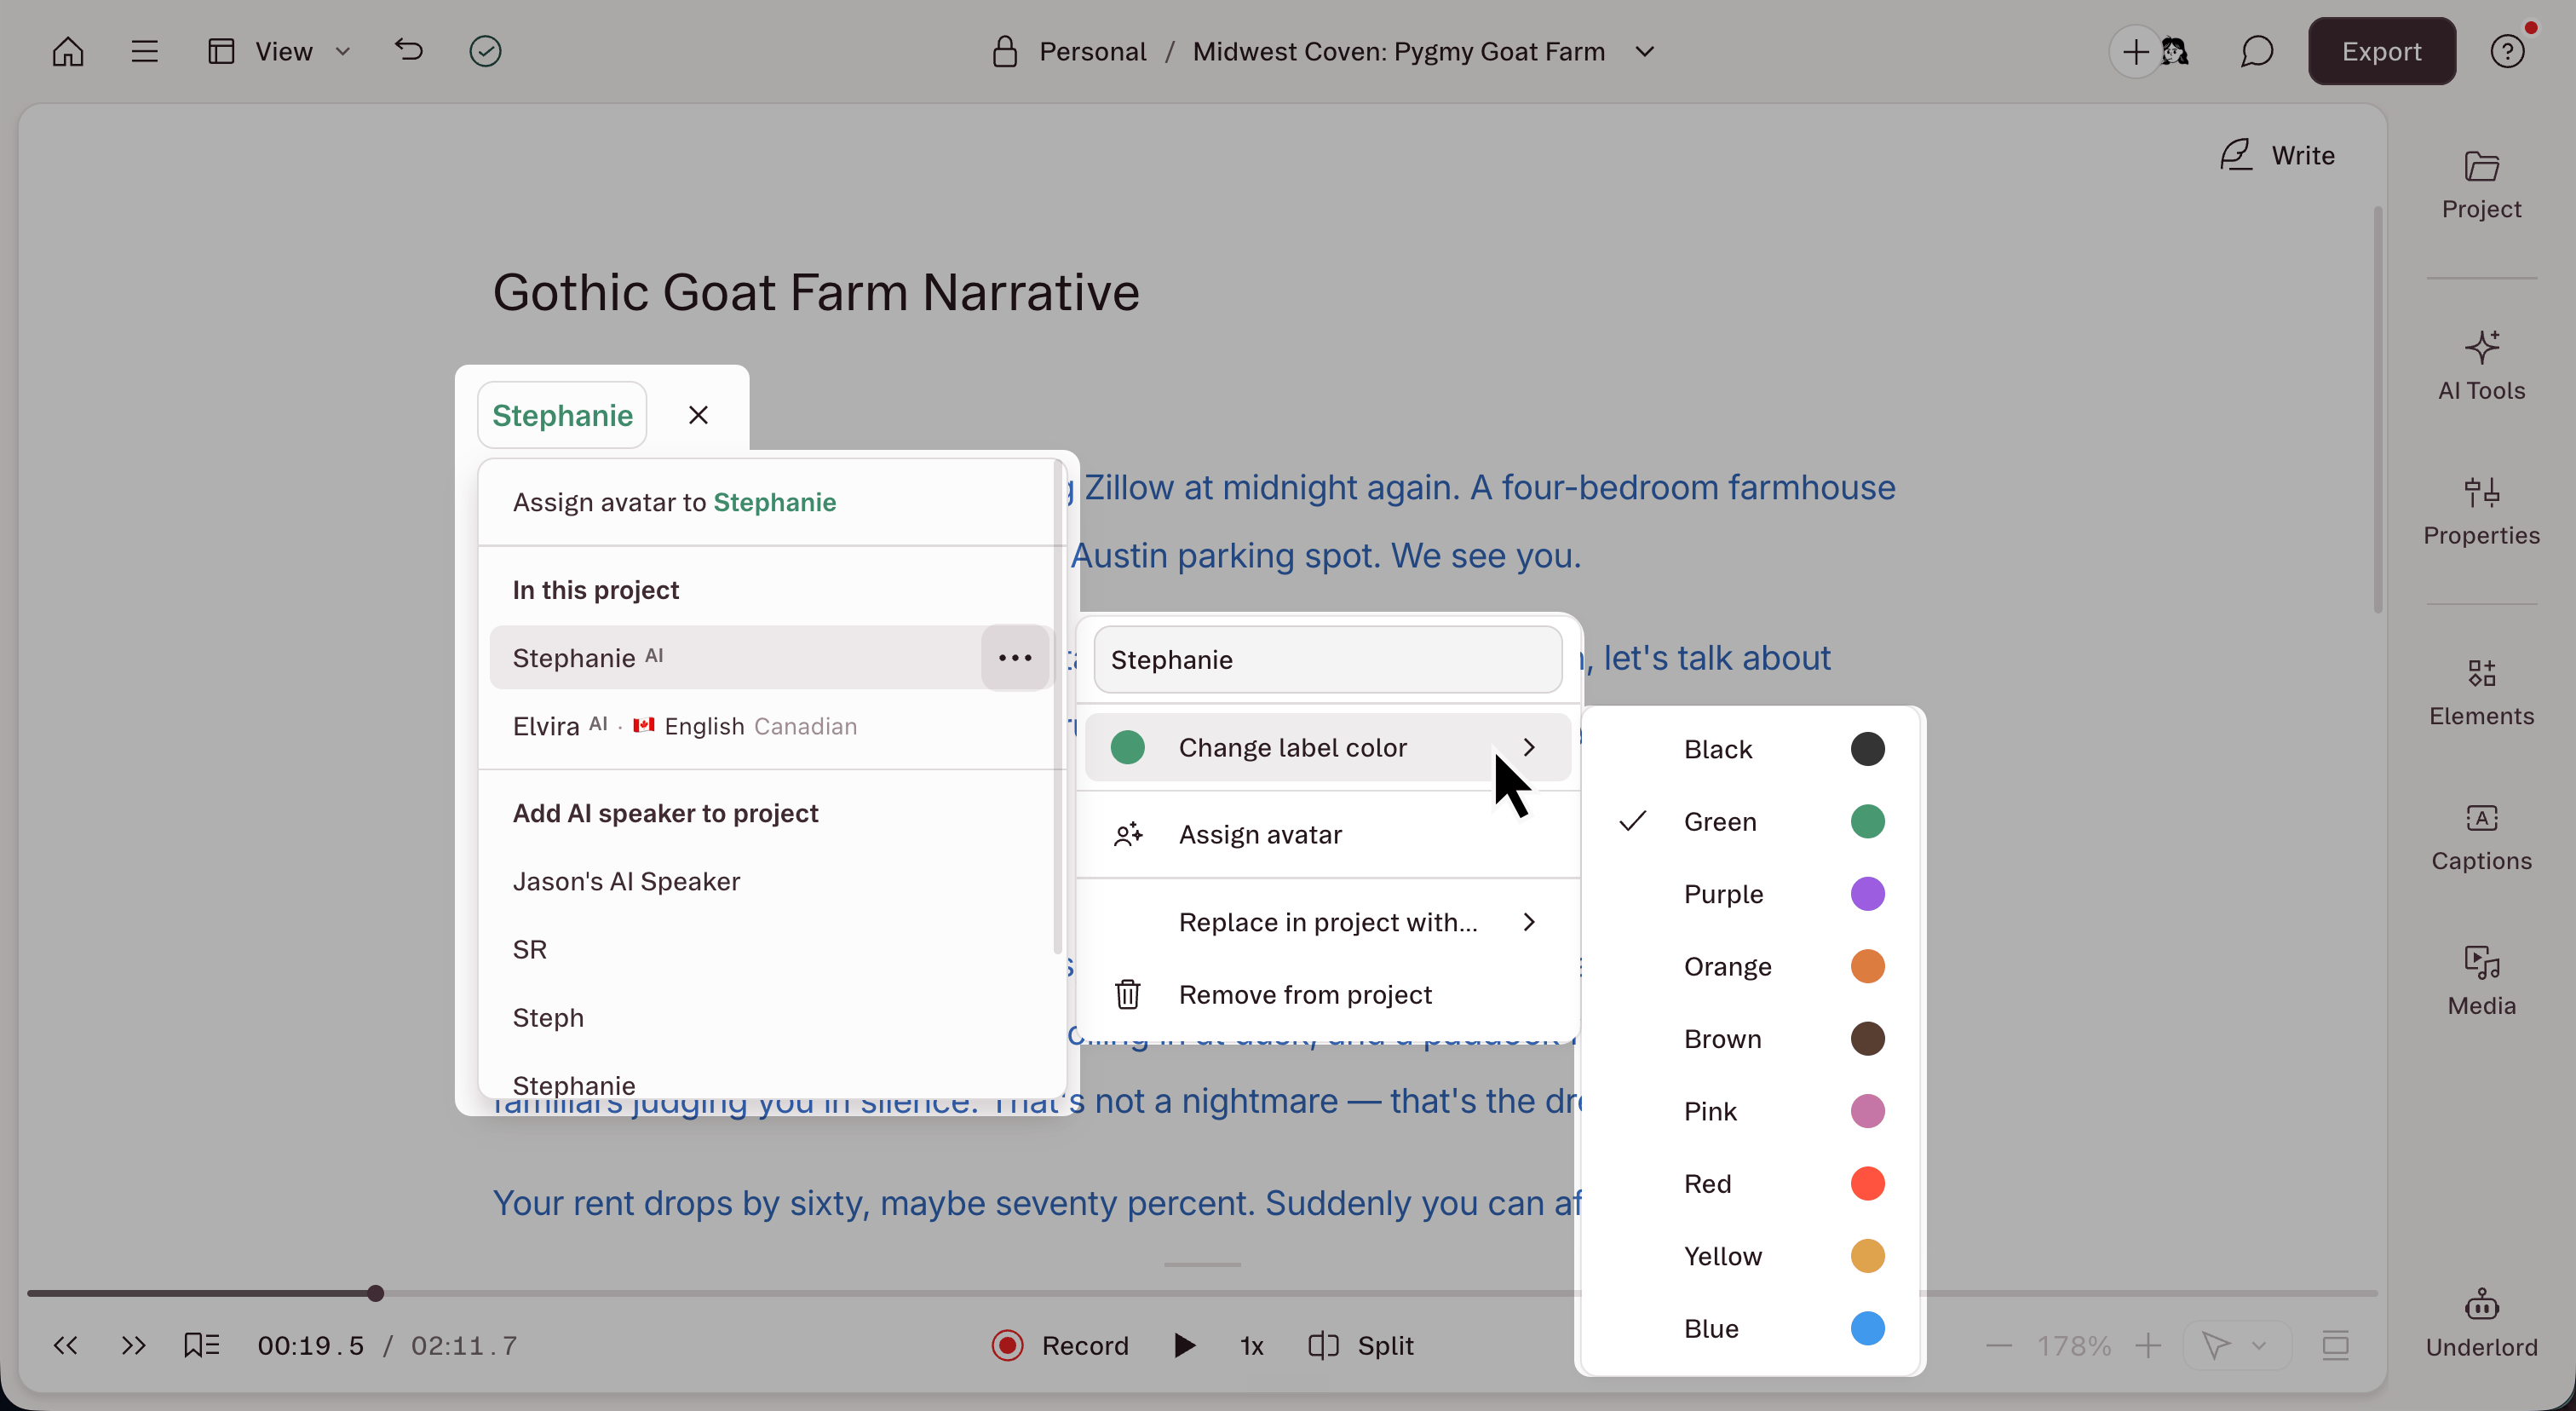
Click any instance of the label, click the speaker options button (⋯), select **Change label color**, and pick a color.
### **Replace or merge a Speaker across a project**
1. Make sure the replacement speaker is already in the project.
2. Click any instance of the label you want to replace.
3. Click the speaker options button (⋯), select **Replace in project with…**, then choose the replacement.
### **Change label color**
Click any instance of the label, click the speaker options button (⋯), select **Change label color**, and pick a color.
 ### **Remove a Speaker from a project**
Click any instance of the label, click the speaker options button (⋯), and select **Remove from project**. Script sections assigned to it get attributed to the speaker above.
### **Remove a Speaker from a project**
Click any instance of the label, click the speaker options button (⋯), and select **Remove from project**. Script sections assigned to it get attributed to the speaker above.