> ## Documentation Index
> Fetch the complete documentation index at: https://help.descript.com/llms.txt
> Use this file to discover all available pages before exploring further.
# Import and Upload Files into Descript
> Choose how to import your content into Descript.
Import media into a project from your computer, another Descript project, a connected Zoom account, or a pasted URL.
**Before you begin**
Make sure your file is in a supported format. Descript works with most common audio, video, image, and document types. [See supported file types](/add-and-manage-media/supported-file-types)
## Choose how to import your file
Each import method has its own guide. Choose the one that matches where your file is coming from:
* [**Upload from your computer**](https://help.descript.com/hc/en-us/articles/10165766313357): Add locally saved audio, video, or image files to your project.
* [**Import files from another project**](/add-and-manage-media/projects): Add content from an existing Descript project.
* [**Import files from the Media Library**](/add-and-manage-media/import-media-library): Add content already in the drive Media Library.
* [**Import from Zoom**](/add-and-manage-media/zoom): Connect your Zoom account to Descript to bring recordings into your project directly from the cloud.
* [**Import from mobile**](/reference-manual/import-and-upload-content-to-descript/upload-media-from-your-phone-to-descript): Use a QR code to import content from your phone.
* [**Import a slide deck (PDF)**](/add-and-manage-media/slides): Drag and drop your PDF file into your project. Descript turns each slide into a media layer you can add to scenes and timelines.
* [**Import with Edit in Descript**](/add-and-manage-media/editInDescript): Bring recordings from partner tools like SquadCast and Riverside into Descript without downloading and re-uploading.
## Track progress and cancel uploads
When you upload files into Descript, the **Activity panel** in the corner of the app shows what's happening with each file, no matter which import method you used.
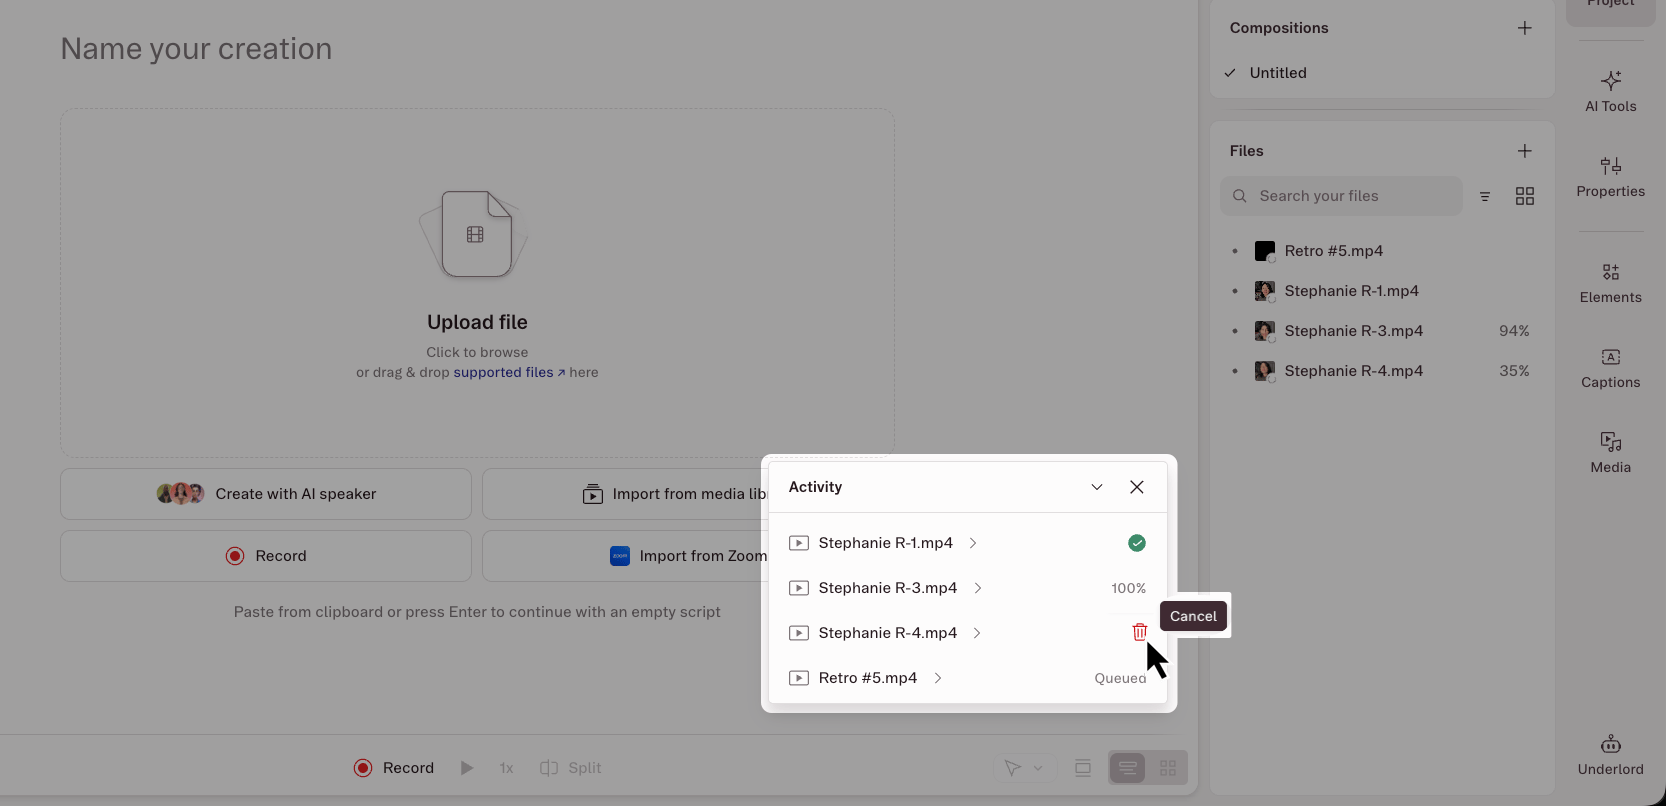 To cancel a single file, hover over it in the Activity panel and click the **trash icon**. To cancel everything at once, click the **X** in the Activity panel header and confirm. Cancelling one file doesn't affect the others — they keep uploading.
**You won't be charged any media minutes for cancelled uploads.**
To upload a cancelled file later, drag it back in to start fresh.
## Next steps after uploading
When you upload a file, it's stored in the Files section of the [Project panel](/descript-tour/project-panel) in the right-hand sidebar. From there:
* **Add it to the script** to transcribe the speech audio and edit by text. [Learn more about editing like a doc](/getting-started/edit-like-a-doc)
* **Use it as a layer** in the timeline — for visuals, background music, or B-roll. [Learn more about layers](/visuals/working-with-layers-and-clips-overview)
To cancel a single file, hover over it in the Activity panel and click the **trash icon**. To cancel everything at once, click the **X** in the Activity panel header and confirm. Cancelling one file doesn't affect the others — they keep uploading.
**You won't be charged any media minutes for cancelled uploads.**
To upload a cancelled file later, drag it back in to start fresh.
## Next steps after uploading
When you upload a file, it's stored in the Files section of the [Project panel](/descript-tour/project-panel) in the right-hand sidebar. From there:
* **Add it to the script** to transcribe the speech audio and edit by text. [Learn more about editing like a doc](/getting-started/edit-like-a-doc)
* **Use it as a layer** in the timeline — for visuals, background music, or B-roll. [Learn more about layers](/visuals/working-with-layers-and-clips-overview)