> ## Documentation Index
> Fetch the complete documentation index at: https://help.descript.com/llms.txt
> Use this file to discover all available pages before exploring further.
# Generate AI Images and Video
> Create AI images and video from a text prompt in Descript.
Describe an image or video in words and Descript generates it, straight into your project.
This article covers generating new AI media. To sync your speaker's mouth to updated audio, see [Regenerate](/script-editing/change-meaning) instead.
**Usage note**
On current plans, this feature uses **AI Credits**. Learn more about [tracking your Media Minutes and AI Credits](/billing-payments-plans/track-and-understand-your-media-minutes-and-ai-credits).
Legacy and Sunset plans track usage differently. See our [Understanding your Legacy and Sunset plan](/billing-payments-plans/legacy-sunset) guide for details.
## Use cases for AI-generated images and video
AI-generated visuals can help when you don't have existing footage, need supporting visuals, or want to quickly explore a visual direction.
1. [Animated title cards](https://www.descript.com/blog/article/generate-animated-titles-in-descript)
2. [Looping backgrounds](https://www.descript.com/blog/article/stylized-background-loops)
3. [Social shorts](https://www.descript.com/blog/article/how-to-generate-an-entire-animated-video-in-descript)
4. [Bespoke B-roll](https://www.descript.com/blog/article/custom-b-roll-in-descript)
## Before getting started
Before you generate images or video, we recommend familiarizing yourself with [scenes](/getting-started/scenes) and the [Scene Editor](/visuals/scene-editor-overview).
## Generate an image or video
When you add a new empty [scene](/getting-started/scenes), three options appear directly on the canvas. This is the quickest way to start generating media. You can also open the generate media pane from the AI tools panel in the right-hand sidebar.
1. Add a new empty scene. There are several ways to do this:
1. Create new scene boundaries by typing two backslashes `//` in the script.
2. Place your playhead where you'd like to create a new scene boundary, and select [the **Split** button](/timeline/split-button) from the transport.
3. Use the **+** buttons between existing scenes to create a new scene.
2. Click **Generate** on the empty scene canvas.\\
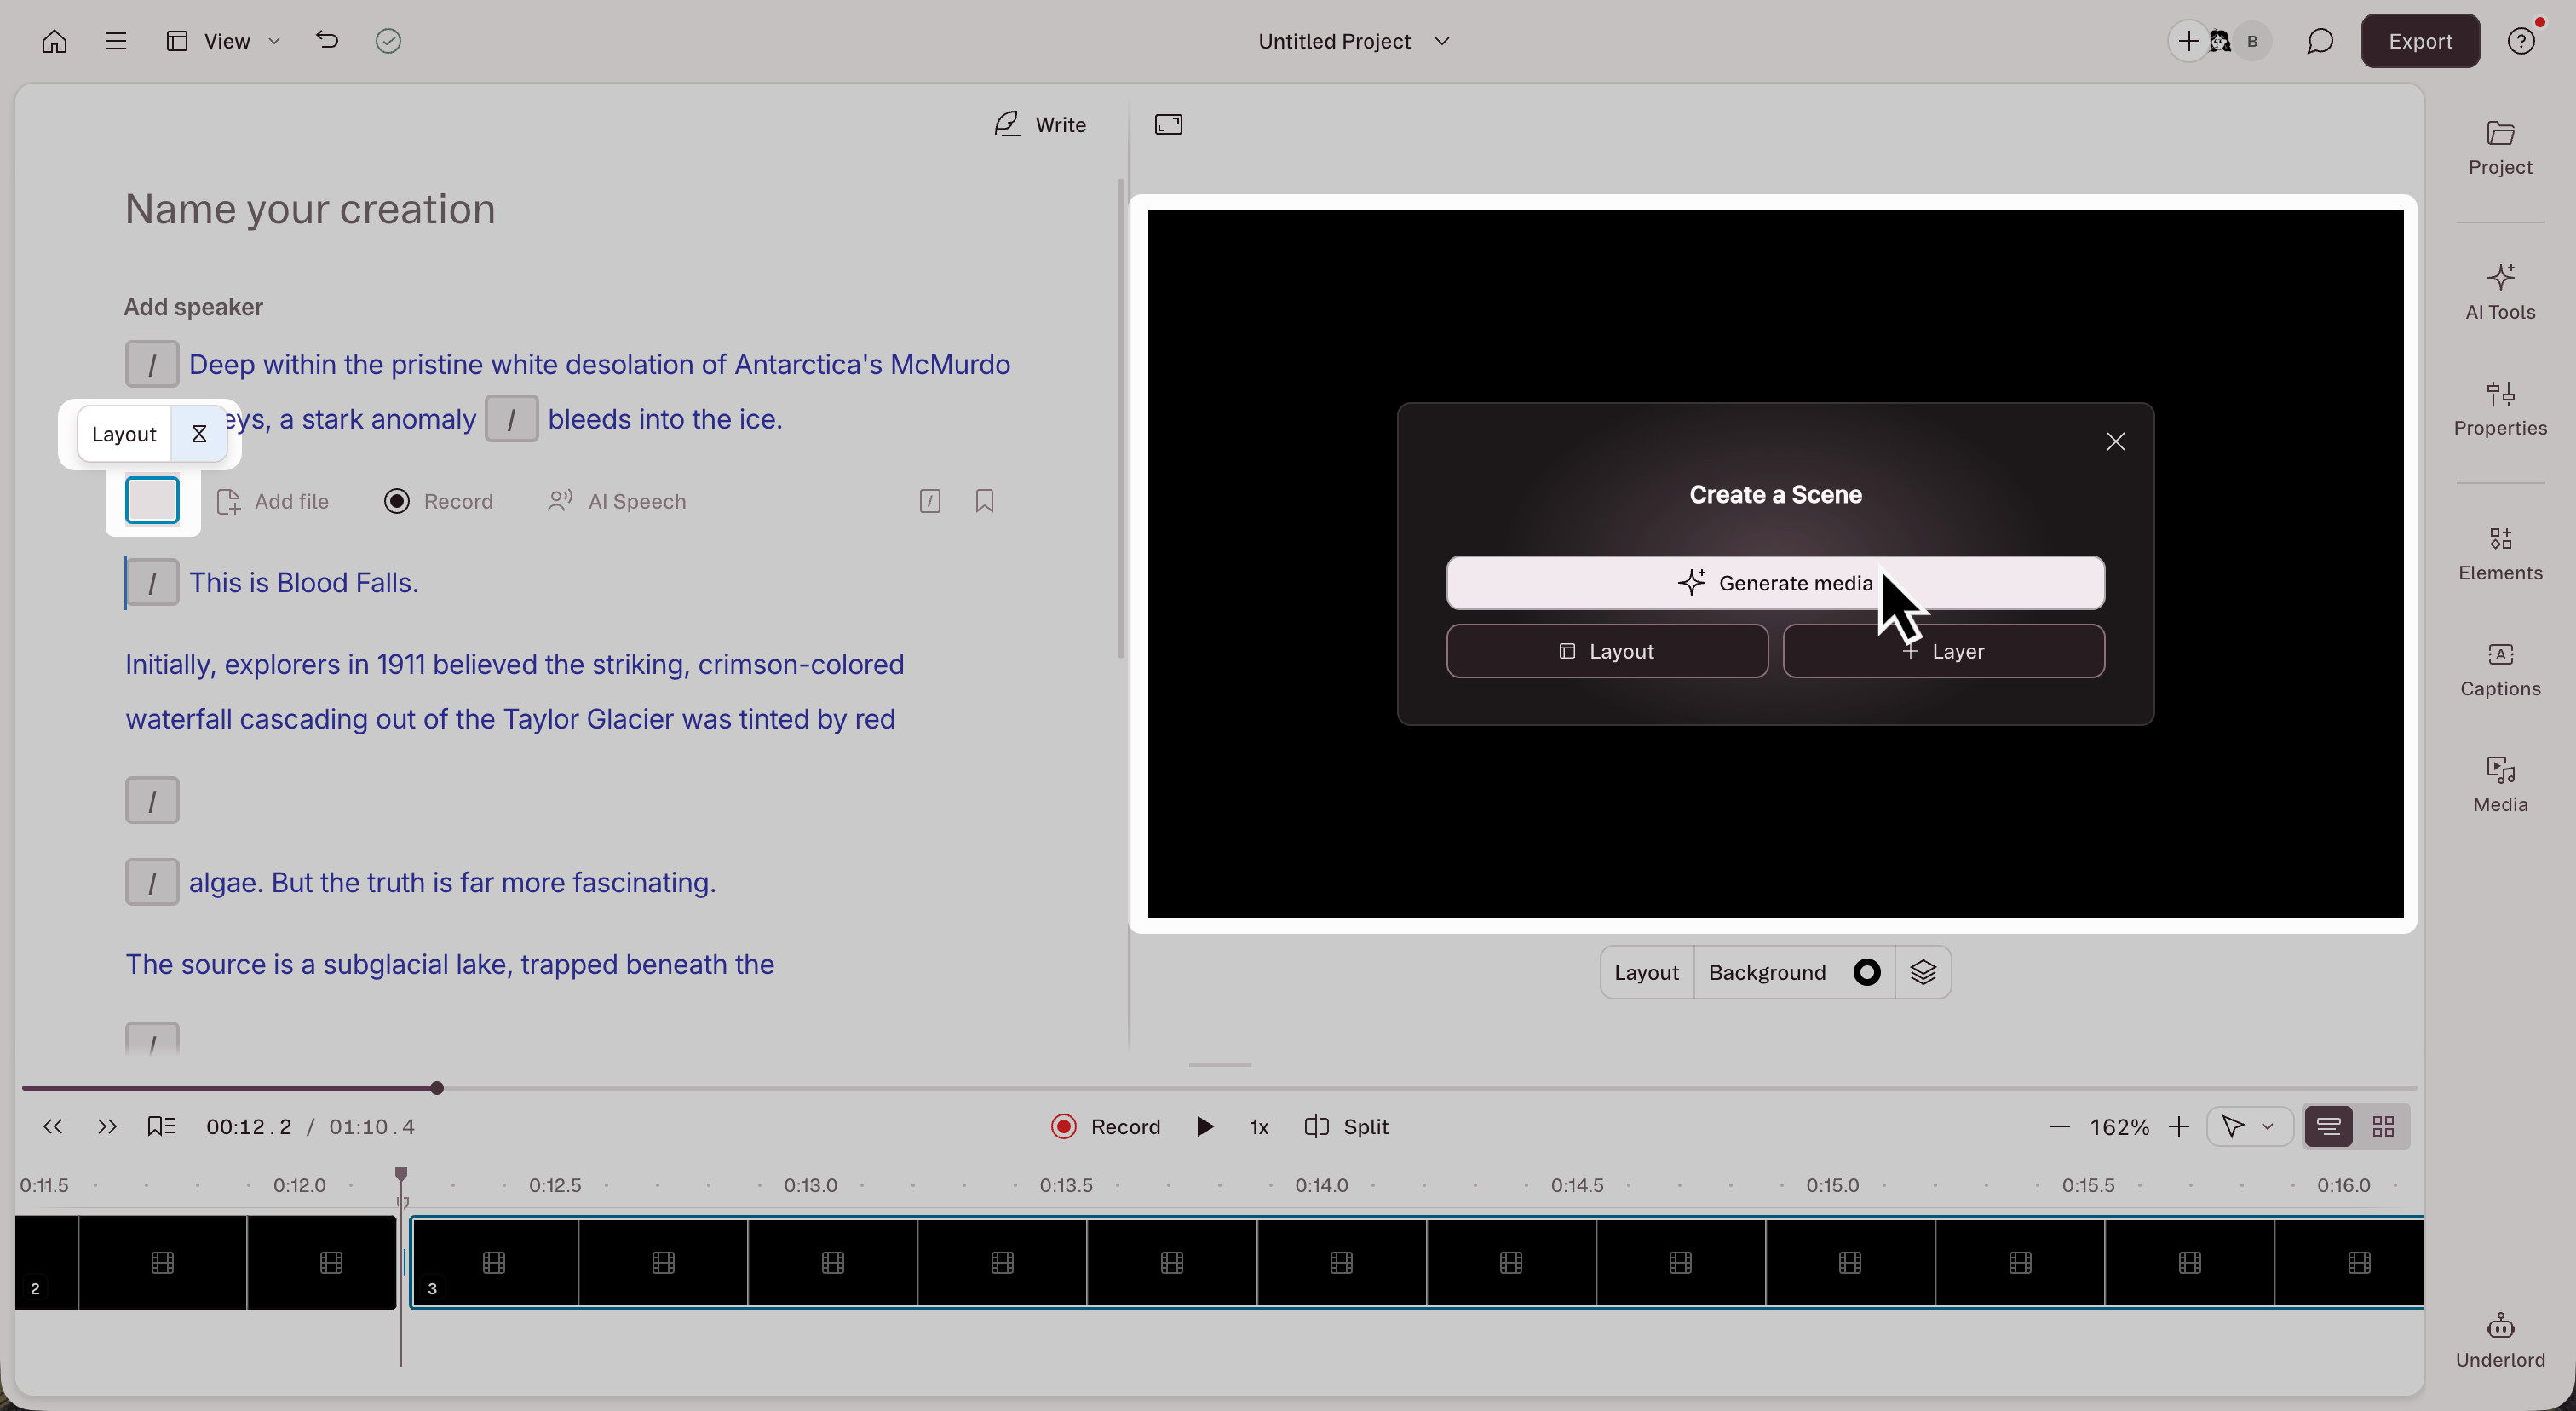 3. The generate media side pane opens. Select the **Image** or **Video** tab.
4. Type a [prompt](/ai-assistant/prompting) describing what you want to create.
5. Choose a [**model**](/generative-media/models), **aspect ratio**, and **duration** (for video) or **batch size** (for images). Adjust settings as needed.
6. Click **Generate**.
7. Browse the results in the option grid, then select one to add it to your scene, or use it to continue iterating on your content.
**Prefer to use Underlord?**
Ask [Underlord](/getting-started/underlord-beta-your-ai-co-editor-in-descript) to generate media. Note that you won't be able to adjust your generative video model parameters when using Underlord.
### Model-specific parameters
Each model offers different customization options. The parameters you see update automatically based on your selected model (only supported options are shown). [Learn more about available generative media models.](/generative-media/models)
* **Attach a file** (image only): add a reference file to include as part of your prompt.
* **Style:** Descript offers preset styles to guide the creation of your generated media.
* **Aspect ratio:** Choose from available sizes.
* **Number/Duration:** Number of generated images or duration of your generated video.
* **Resolution:** Set output quality.
* **Audio generation:** Available on select models.
* **Start and End Frame:** Creates smooth transitions between two images. [Learn more about using Start and End Frame.](/generative-media/last-frame)
## Known limitations
* **Prompts don't carry over between tabs.** Switching from the Image tab to the Video tab (or vice versa) starts a fresh prompt. Copy your prompt text before switching if you want to reuse it.
* **Generation history is separate for each media type.** Image generation history only appears in the Image tab, and video generation history only appears in the Video tab.
* **Model capabilities vary.** Some video models support first frame, last frame, or reference image inputs—others don't. Unsupported options appear as disabled buttons.
## Troubleshooting AI image and video generation
If image or video generation fails, the error usually comes from model safety filters, temporary provider issues, or model-specific limitations. Try the steps below, then generate again.
This can happen when a generated video contains a checkered placeholder layer with a message like "Custom prompt required" or "Image generation rejected based on content." It means the image generation provider rejected the prompt Descript sent.
To replace the placeholder layer:
1. Select the placeholder layer in the editor.
2. Select **Add Media** in the hover menu.
3. Choose a media source, upload a file, or generate a new image with your own prompt.
4. Replace the placeholder with the new media.
This error means your prompt or input image was flagged by the selected model provider's safety filters.
To fix this:
* Remove sensitive or policy-violating language from the prompt.
* Use neutral, descriptive language.
* If you're using a reference image, try a different image or remove it and generate from text only.
This error usually means the selected model could not process the prompt, reference image, or generation request.
To fix this:
* Try generating again after a few minutes.
* Remove any reference images and generate from a text-only prompt.
* Rewrite the prompt using simpler, more descriptive language.
* Switch to a different available model. See [Generative image and video models in Descript](/generative-media/models) for model details.
This general error can happen because of rate limiting, a temporary provider issue, or content policy restrictions.
To fix this:
1. Wait a few minutes, then try again.
2. If you're using [AI Video Maker](/ai-assistant/ai-video-maker), simplify your script:
* Remove section headers, speaker labels, and bracketed notes.
* Delete extra spaces or special characters.
* Translate non-English scripts to English before generating.
3. Rewrite your prompt with simpler, more descriptive language.
4. Try generating a still image first, then use that image as a reference input when generating video.
3. The generate media side pane opens. Select the **Image** or **Video** tab.
4. Type a [prompt](/ai-assistant/prompting) describing what you want to create.
5. Choose a [**model**](/generative-media/models), **aspect ratio**, and **duration** (for video) or **batch size** (for images). Adjust settings as needed.
6. Click **Generate**.
7. Browse the results in the option grid, then select one to add it to your scene, or use it to continue iterating on your content.
**Prefer to use Underlord?**
Ask [Underlord](/getting-started/underlord-beta-your-ai-co-editor-in-descript) to generate media. Note that you won't be able to adjust your generative video model parameters when using Underlord.
### Model-specific parameters
Each model offers different customization options. The parameters you see update automatically based on your selected model (only supported options are shown). [Learn more about available generative media models.](/generative-media/models)
* **Attach a file** (image only): add a reference file to include as part of your prompt.
* **Style:** Descript offers preset styles to guide the creation of your generated media.
* **Aspect ratio:** Choose from available sizes.
* **Number/Duration:** Number of generated images or duration of your generated video.
* **Resolution:** Set output quality.
* **Audio generation:** Available on select models.
* **Start and End Frame:** Creates smooth transitions between two images. [Learn more about using Start and End Frame.](/generative-media/last-frame)
## Known limitations
* **Prompts don't carry over between tabs.** Switching from the Image tab to the Video tab (or vice versa) starts a fresh prompt. Copy your prompt text before switching if you want to reuse it.
* **Generation history is separate for each media type.** Image generation history only appears in the Image tab, and video generation history only appears in the Video tab.
* **Model capabilities vary.** Some video models support first frame, last frame, or reference image inputs—others don't. Unsupported options appear as disabled buttons.
## Troubleshooting AI image and video generation
If image or video generation fails, the error usually comes from model safety filters, temporary provider issues, or model-specific limitations. Try the steps below, then generate again.
This can happen when a generated video contains a checkered placeholder layer with a message like "Custom prompt required" or "Image generation rejected based on content." It means the image generation provider rejected the prompt Descript sent.
To replace the placeholder layer:
1. Select the placeholder layer in the editor.
2. Select **Add Media** in the hover menu.
3. Choose a media source, upload a file, or generate a new image with your own prompt.
4. Replace the placeholder with the new media.
This error means your prompt or input image was flagged by the selected model provider's safety filters.
To fix this:
* Remove sensitive or policy-violating language from the prompt.
* Use neutral, descriptive language.
* If you're using a reference image, try a different image or remove it and generate from text only.
This error usually means the selected model could not process the prompt, reference image, or generation request.
To fix this:
* Try generating again after a few minutes.
* Remove any reference images and generate from a text-only prompt.
* Rewrite the prompt using simpler, more descriptive language.
* Switch to a different available model. See [Generative image and video models in Descript](/generative-media/models) for model details.
This general error can happen because of rate limiting, a temporary provider issue, or content policy restrictions.
To fix this:
1. Wait a few minutes, then try again.
2. If you're using [AI Video Maker](/ai-assistant/ai-video-maker), simplify your script:
* Remove section headers, speaker labels, and bracketed notes.
* Delete extra spaces or special characters.
* Translate non-English scripts to English before generating.
3. Rewrite your prompt with simpler, more descriptive language.
4. Try generating a still image first, then use that image as a reference input when generating video.