> ## Documentation Index
> Fetch the complete documentation index at: https://help.descript.com/llms.txt
> Use this file to discover all available pages before exploring further.
# How to Write Effective Prompts for Descript’s AI Features
> Write clearer prompts for AI features by adding specifics and context that improve your results.
With Descript, you can [use Underlord to edit your content](/getting-started/underlord-beta-your-ai-co-editor-in-descript), generate custom [images](https://help.descript.com/hc/en-us/articles/17045119670029) or [video](/generative-media/generate-media), use [templates](/templates-and-presets/underlord-templates) for multi-step workflows, and more—just by describing what you want in plain language.
The key to good results? A clear prompt. Think of it like giving directions: the more context you provide, the better the outcome. You don't need to be a prompt expert—you just need to be specific.
## What makes a good prompt?
A good prompt usually includes these elements:
* **Action:** What job needs doing?
* **Context:** Who’s this for? Where will it be used?
* **Tone:** How should it feel?
* **Format:** What should the output look like?
* **Constraints:** What rules should it follow?
You don’t need all of these every time. Start with what’s most important, then refine from there.
**Tip: Attach reference materials**
Attach files to provide more context — for example, a starting image and (optionally) [a last frame](/generative-media/last-frame), a brand photo for color direction, or a PDF of your slides.
## Building a prompt
Let’s see how these elements come together for different AI features in Descript.
**Final prompt**
Turn this 60-minute podcast into 5-6 short clips for Instagram and TikTok. Keep them punchy and attention-grabbing, in vertical format with bold captions. Each clip should be 30-60 seconds and focus on one key insight.
| Prompt element | Example text |
| --------------- | ------------------------------------------------------------------ |
| **Action** | “Turn this 60-minute podcast into 5–6 short clips…” |
| **Context** | “…for Instagram and TikTok…” |
| **Tone** | “…keep them punchy and attention-grabbing…” |
| **Format** | “…vertical format with bold captions.” |
| **Constraints** | “…each clip should be 30–60 seconds and focus on one key insight.” |
**Example prompt for generating images:**
Generate images showing teams collaborating in modern office settings for a product demo video about our new project management software. Professional but approachable, not too corporate or staged. Cinematic-style realism, with wide-angle shots, natural lighting, 16:9 format. Show diverse teams, avoid clichés like high-fives or fist bumps.
**Example prompt for creating a template:**
Take this training recording and repurpose it as an internal training video. Remove the Q\&A sections, add chapter markers, and create an intro card showing the title and chapters. Include captions throughout. Keep it clear and instructional — friendly but professional. Final video should be 12–18 minutes. [Learn more about creating your own custom template.](/templates-and-presets/custom-templates)
### Add context to an Underlord prompt
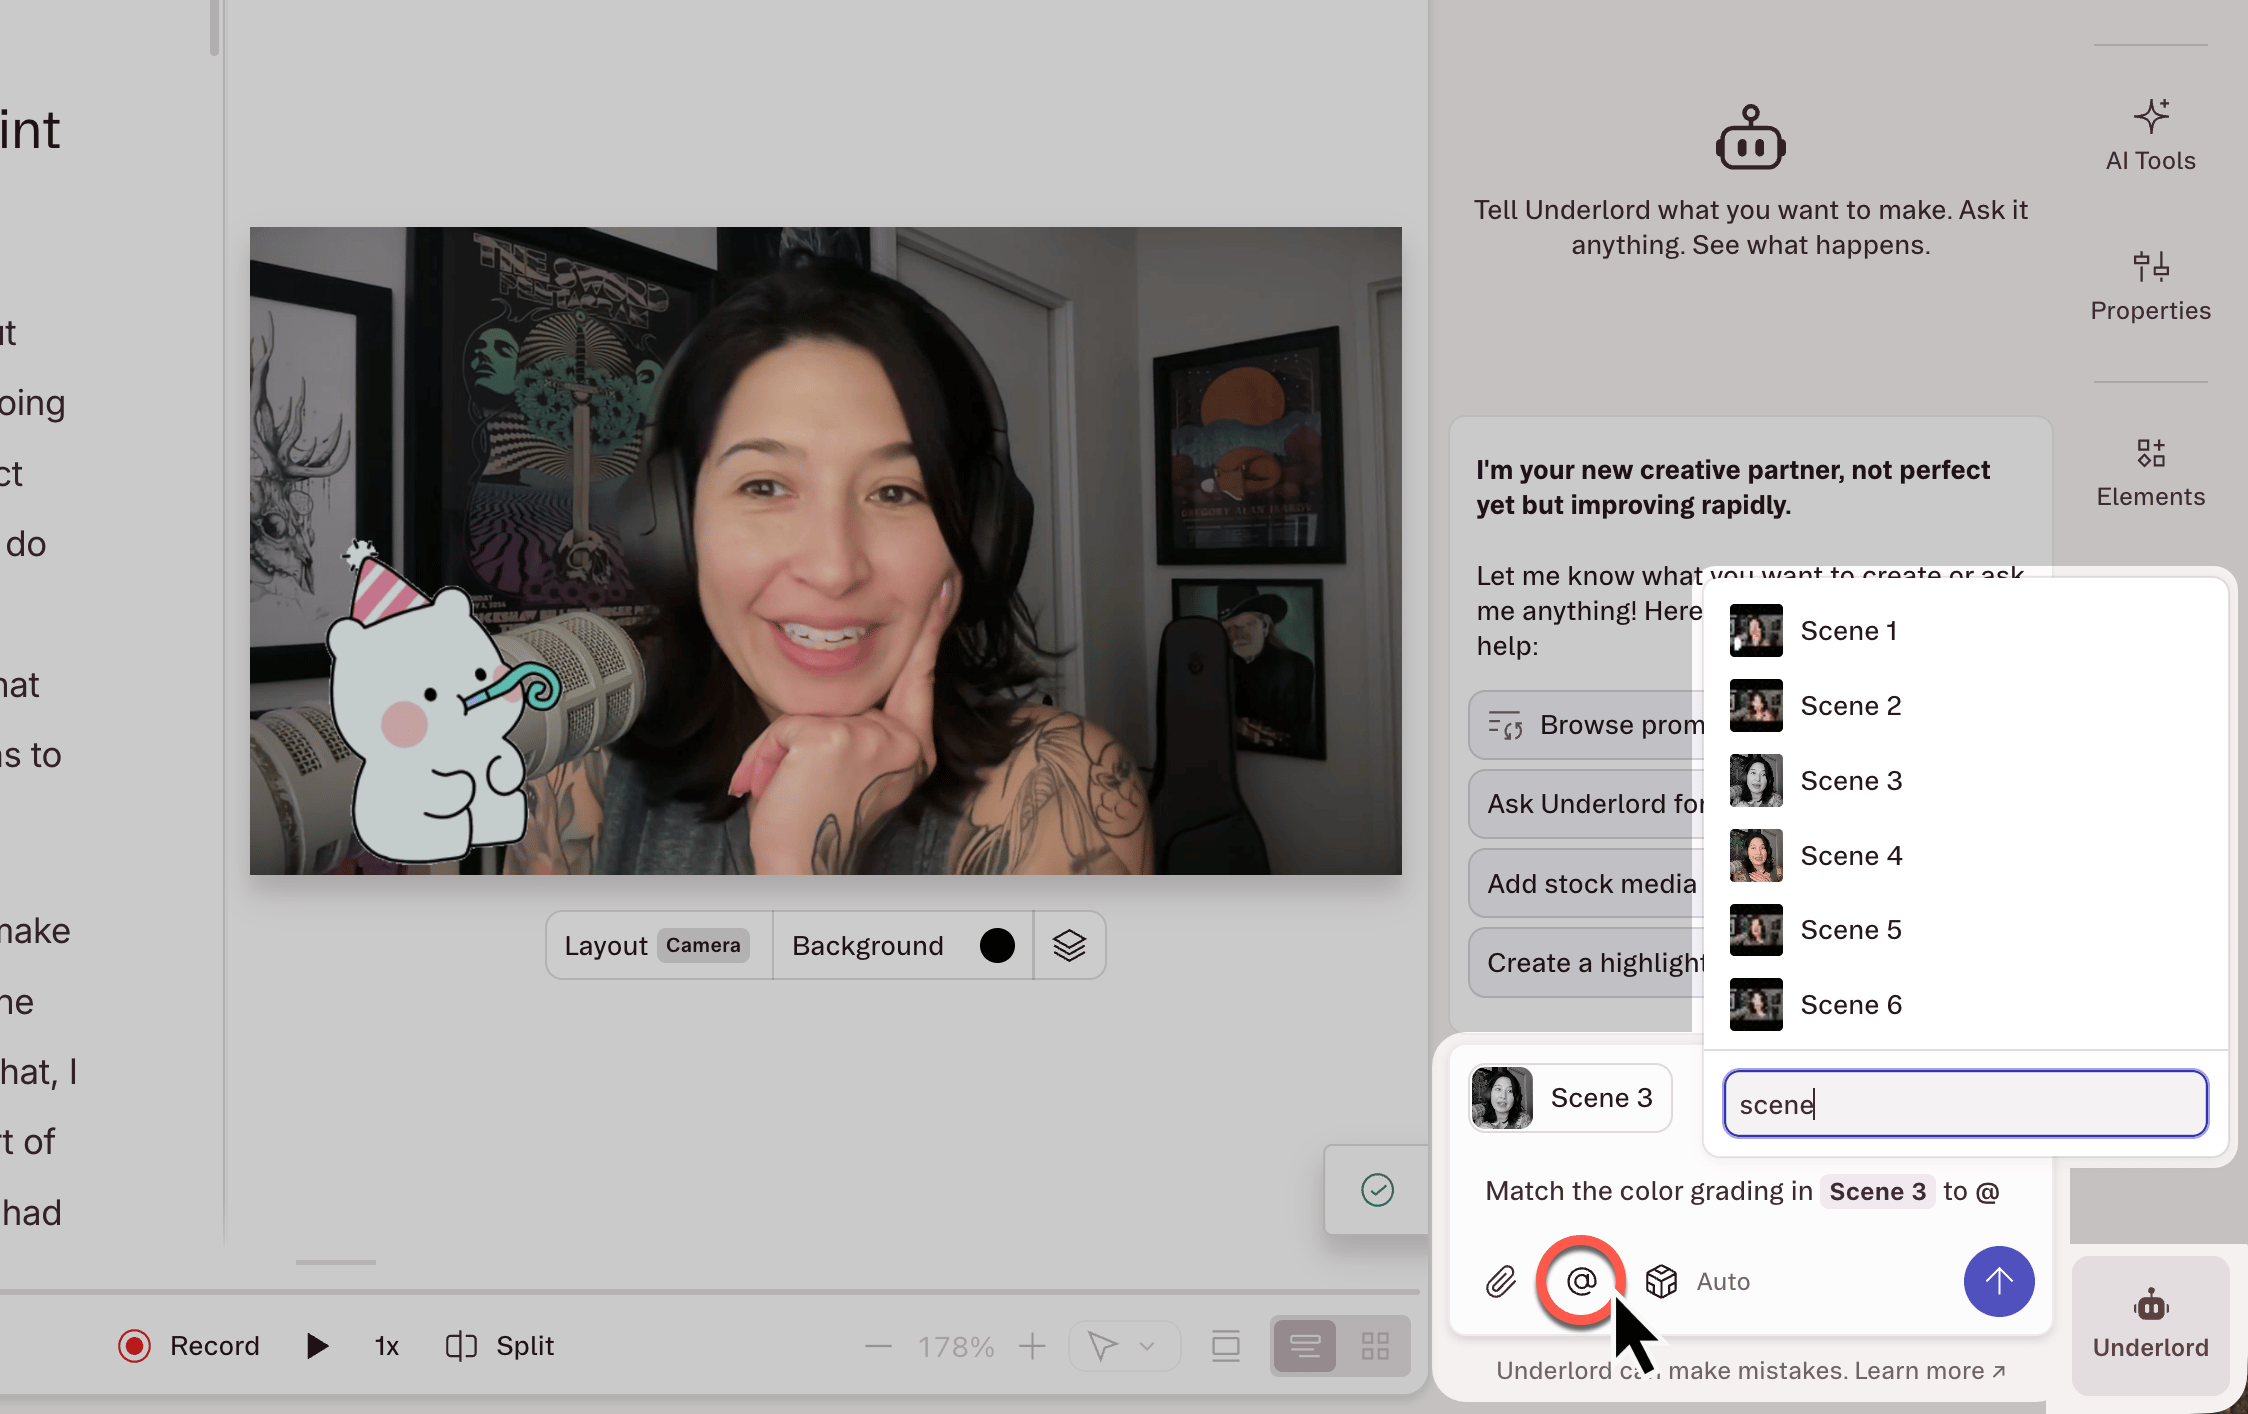
When you're working with [Underlord](/getting-started/underlord-beta-your-ai-co-editor-in-descript) inside a project, attach specific [scenes](/getting-started/scenes), script passages, [layers](/visuals/working-with-layers-and-clips-overview), [Speakers](/script-editing/speakers), or files to your prompt as **context**. This tells Underlord exactly where to focus, instead of leaving it to guess from your description — which usually means fewer follow-ups and more accurate edits.
There are three ways to add context: type **@** in the prompt box, click the **@** button below it, or right-click a selection in your script, scene editor, or timeline and choose **Add to Underlord**.
**What you can attach as context**
* **Scenes** — any scene in your composition
* **Script selections** — passages of script you've highlighted
* **Layers** — any layer on the canvas or timeline
* **Project files** — files in your project
* **Speakers** — any Speaker label in your project
* **Timestamps** — the playhead, a specific time, or a time range
 ## How to improve your results
Your first prompt doesn’t need to be perfect. Start with a clear request, see what happens, then adjust.
* **If it’s close:** “Make it a little more casual” or “Brighten the lighting.”
* **If it missed the mark:** “Try again, but make it feel more polished.”
* **If it did too much:** “Keep the captions, remove the music.”
* **Break complex edits into steps:** “Summarize this into 60 seconds” *→* then “Now add captions.”
* **Give feedback**: Click 👍 or 👎 to help improve results.
If you’re using **Underlord**: You can [undo or roll back changes to previous versions](/ai-assistant/revert) and try again.
## How to improve your results
Your first prompt doesn’t need to be perfect. Start with a clear request, see what happens, then adjust.
* **If it’s close:** “Make it a little more casual” or “Brighten the lighting.”
* **If it missed the mark:** “Try again, but make it feel more polished.”
* **If it did too much:** “Keep the captions, remove the music.”
* **Break complex edits into steps:** “Summarize this into 60 seconds” *→* then “Now add captions.”
* **Give feedback**: Click 👍 or 👎 to help improve results.
If you’re using **Underlord**: You can [undo or roll back changes to previous versions](/ai-assistant/revert) and try again.