> ## Documentation Index
> Fetch the complete documentation index at: https://help.descript.com/llms.txt
> Use this file to discover all available pages before exploring further.
# Repair Audio Drift
> Fix echoing and/or audio that slowly drifts out of sync over time.
Some recordings—especially screen captures and variable-frame-rate video—have audio and video that never quite line up, so the sound drifts out of sync as the clip plays, or turns echoey once you add Studio Sound. Run Repair Audio Drift and Descript analyzes the file, then creates a fixed version with better-timed audio.
There is a known bug in the Chrome browser (on macOS and Windows) that causes these types of file encoding issues. Descript's Repair audio drift feature can help mitigate the effects of this encoding error, allowing your audio to play back normally.
### Repair audio drift on a file in the Project panel
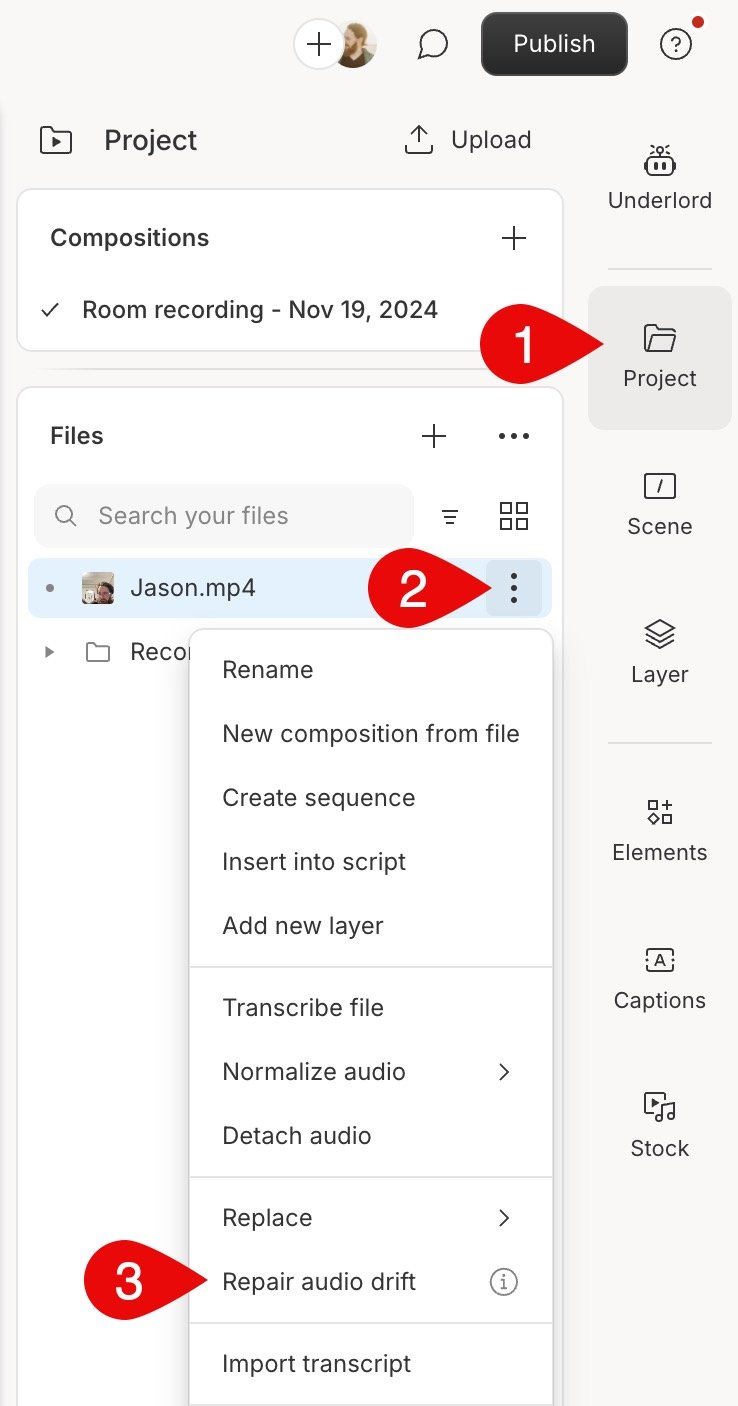
1. Open the **Project** panel on the right-hand side. Make sure you're looking at the **Files**section.
2. Click the  **Ellipsis**button next to the video file you're having trouble with.
3. Select **Repair audio drift**.\\
**Ellipsis**button next to the video file you're having trouble with.
3. Select **Repair audio drift**.\\
 4. Descript will begin downloading the source audio if it's not already available and then apply the repair.
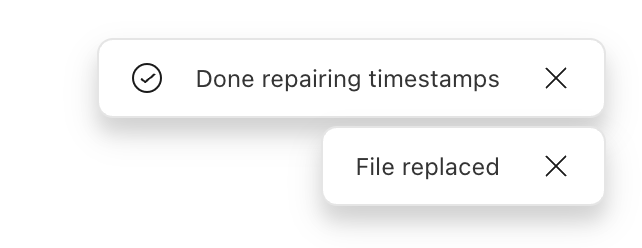
5. Once complete, you'll receive a notification that the source file has been replaced with the updated version.
4. Descript will begin downloading the source audio if it's not already available and then apply the repair.
5. Once complete, you'll receive a notification that the source file has been replaced with the updated version.
 ## Manually Repairing Videos
If Descript’s **Repair audio drift** does not resolve the issue or isn’t an available option, you can try manually re-encoding your files. This approach can address problems like unexpected echo effects, audio drifting out of sync, black frames, playback failures, or export errors caused by file encoding or codec incompatibilities. Re-encoding ensures your files are optimized for smooth playback, editing, and exporting in Descript.
### Manually Re-encode Videos Using VLC Media Player
1. **Download VLC Media Player**
* If you don’t already have VLC Media Player, download it from the [offical website.](https://www.videolan.org/vlc/index.html)
2. **Open VLC Media Player**
* Launch VLC after installing it.
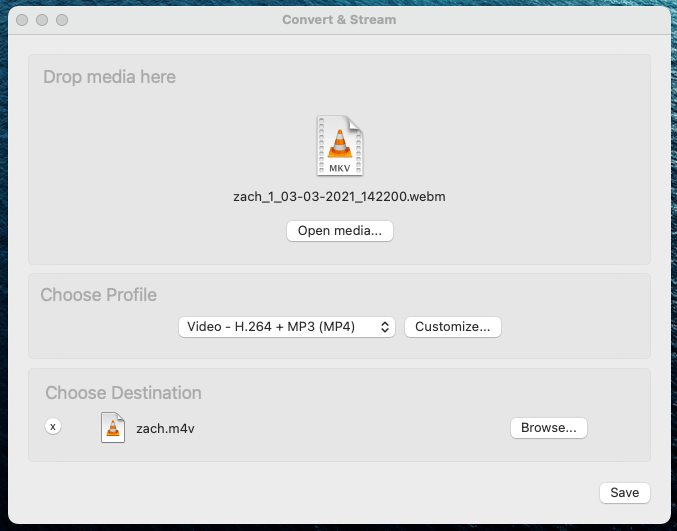
3. **Access the Convert/Save Menu**
* Go to the **File** menu at the top of VLC and select **Convert/Stream**.
4. **Add Your File**
* In the Open Media window, click **Open media...** and select the WebM file you want to convert.
5. **Set the Output Format**
* In the **Choose profile** window, choose the desired profile (e.g., `Video - H.264 + MP3 (MP4)`).
6. **Choose Destination File**
* Click the **Save as File** button.
* Click **Browse** to choose where to save the converted file and provide a name for the file to be created.
7. **Start the Conversion**
* Click **Save** to begin the conversion process. VLC will process the file and save it to the selected location.
## Manually Repairing Videos
If Descript’s **Repair audio drift** does not resolve the issue or isn’t an available option, you can try manually re-encoding your files. This approach can address problems like unexpected echo effects, audio drifting out of sync, black frames, playback failures, or export errors caused by file encoding or codec incompatibilities. Re-encoding ensures your files are optimized for smooth playback, editing, and exporting in Descript.
### Manually Re-encode Videos Using VLC Media Player
1. **Download VLC Media Player**
* If you don’t already have VLC Media Player, download it from the [offical website.](https://www.videolan.org/vlc/index.html)
2. **Open VLC Media Player**
* Launch VLC after installing it.
3. **Access the Convert/Save Menu**
* Go to the **File** menu at the top of VLC and select **Convert/Stream**.
4. **Add Your File**
* In the Open Media window, click **Open media...** and select the WebM file you want to convert.
5. **Set the Output Format**
* In the **Choose profile** window, choose the desired profile (e.g., `Video - H.264 + MP3 (MP4)`).
6. **Choose Destination File**
* Click the **Save as File** button.
* Click **Browse** to choose where to save the converted file and provide a name for the file to be created.
7. **Start the Conversion**
* Click **Save** to begin the conversion process. VLC will process the file and save it to the selected location.
 ### Manually Re-encode Videos Using HandBrake
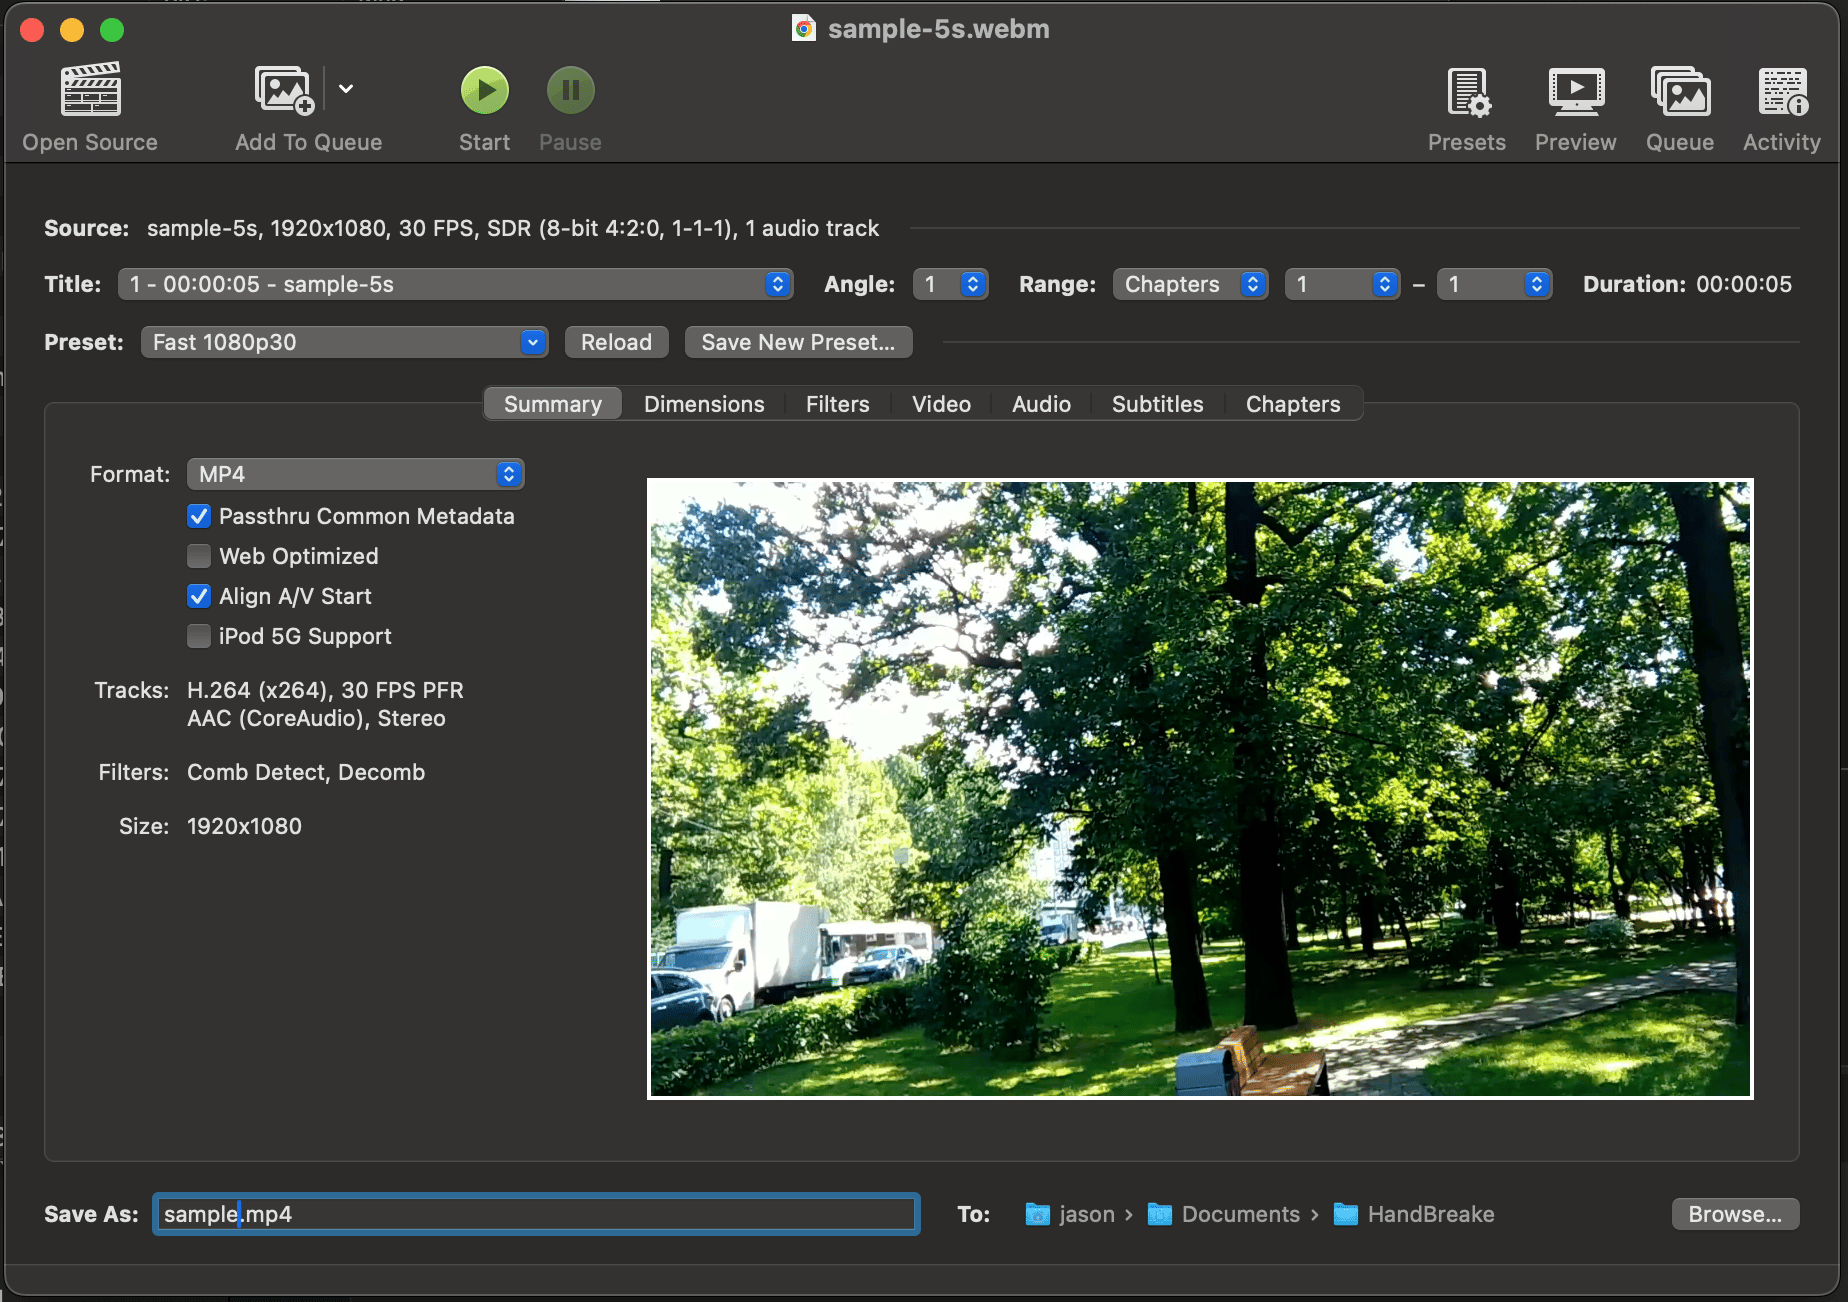
1. **Download HandBrake**
* If you don’t already have HandBrake, download it from the [official website](https://handbrake.fr/).
2. **Open HandBrake**
* Launch HandBrake after installing it.
3. **Add Your File**
* Click the **Open Source** button in HandBrake.
* Navigate to the location of your WebM file and select it.
4. **Set the Output Format**
* In the **Summary** tab, set the **Format** to `MP4`.
* Optional: Use the **Presets** menu on the right to select a configuration like "Fast 1080p30."
5. **Adjust Video Settings (Optional)**
* Switch to the **Video** tab and ensure the **Video Codec** is set to `H.264`.
6. **Choose Destination File**
* Provide a name for the file, ensuring it has the `.mp4` extension.
* Click **Browse** at the bottom to select where to save the converted file.
7. **Start the Conversion**
* Click **Start** to begin the conversion process.
* Wait for HandBrake to finish encoding your file.
### Manually Re-encode Videos Using HandBrake
1. **Download HandBrake**
* If you don’t already have HandBrake, download it from the [official website](https://handbrake.fr/).
2. **Open HandBrake**
* Launch HandBrake after installing it.
3. **Add Your File**
* Click the **Open Source** button in HandBrake.
* Navigate to the location of your WebM file and select it.
4. **Set the Output Format**
* In the **Summary** tab, set the **Format** to `MP4`.
* Optional: Use the **Presets** menu on the right to select a configuration like "Fast 1080p30."
5. **Adjust Video Settings (Optional)**
* Switch to the **Video** tab and ensure the **Video Codec** is set to `H.264`.
6. **Choose Destination File**
* Provide a name for the file, ensuring it has the `.mp4` extension.
* Click **Browse** at the bottom to select where to save the converted file.
7. **Start the Conversion**
* Click **Start** to begin the conversion process.
* Wait for HandBrake to finish encoding your file.